Encrypting an External Storage Device
Warning
DTS recommends using the encryption software provided by your external storage device rather than using BitLocker or FileVault as described below. For more information, refer to our guide, Using an external storage device.
Data security is important to our daily lives. We all have digital information we want to keep secure from hackers and security breaches. Encryption is the process of converting data into another form that cannot be easily decoded. Encrypting your internal hard drive and external storage devices is a good practice to add another layer of security to your sensitive information. Additionally, the University of Southern California (USC) security policy states that all devices and the corresponding hard drives (internal, external, flash/USB, mobile devices) must meet the USC security policy and be encrypted (this includes reimbursement scenarios). Complete the steps below to encrypt an external storage device that you have connected to your computer.
Encrypting an External Storage Device for Windows
Complete the following steps to encrypt your external storage device using the BitLocker encryption software that is included in the Windows operating system.
- Plug the external storage device into a USB port on your computer.
- Depending on the type of external storage device you purchased, you may need to complete an initial configuration process. Complete the initial setup processes before continuing.
-
Open File Explorer to view all of the drives on your computer.
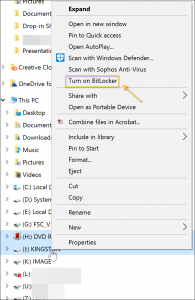
- With your mouse, right-click on the name of the external storage device. A pop-up menu displays.
-
Select Turn on BitLocker from the pop-up menu. The BitLocker encryption process begins.

-
Next, you will be prompted to select the desired encryption method. If you have a smart card reader in your computer, you may see an option to select a smart card as your encryption method. This is not the recommended encryption method. It is recommended that you select the password option.
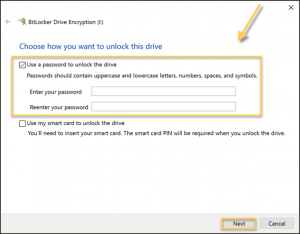
- Select the Use a password to unlock the drive checkbox. The password fields become active.
- Enter the password you want to use in the Enter your password field. The password should contain at least one (1) uppercase character, one (1) lowercase character, one (1) number, and one (1) symbol. It can also contain a blank space.
- Confirm the password by entering it in the Reenter your password field.
-
Select the Next button. The Encryption Mode screen displays.

- If you the storage device is in a fixed location, meaning you won't be detaching and reattaching the device frequently or at all, select New encryption mode. If the storage device is an mobile device (external hard drive, flash/USB drive, etc), select Compatibility mode.
-
Select the Next button. A confirmation screen displays.
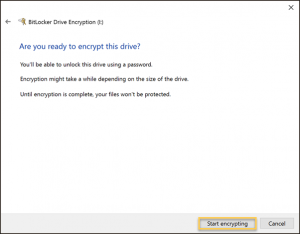
- Select the Start encrypting button. The encryption process begins.
- The encryption process can take a varying amount of time, depending on how much data is on the drive being encrypted. Do not disconnect the storage device while the encryption process is running. Do not restart or turn off the computer to which the storage device is connected.
-
When the encryption process is complete, BitLocker displays a completion message.
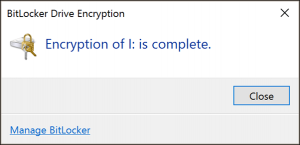
- Select the Close button. The encryption process is complete.
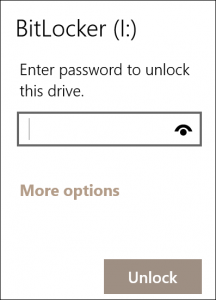
The encryption process is now complete. You will be prompted to enter the encryption password you created each time you disconnect. reconnect, and then attempt to access the encrypted storage device.
Encrypting an External Storage Device for Mac
Complete the following steps to encrypt your external storage device using the FileVault encryption software that is included in the Windows operating system.

Note:
Before you can encrypt the external storage device, you will need to erase it. Ensure that you have saved any data on the external storage device to another location before you proceed.
- Plug the external storage device into a USB port on your computer.
-
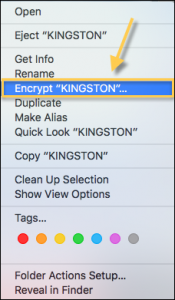
Right-click on the name of the external storage device. A pop-up menu displays.
-
Select the Encrypt option from the pop-up menu. You will be prompted to enter the password you want to use to access the device.
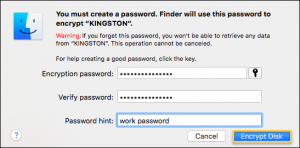
- Enter the password you want to use in the Encryption password field.
- Confirm the password you entered by reentering it in the Verify password field.
- Enter a Password hint, something that will help you remember the password for this device, in the corresponding field.
-
Select the Encrypt Disk button. For the majority of Mac users, a warning message displays. If no message about a GUID partition table is displayed, skip to step 21.
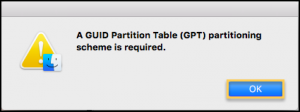
- The GUID Partition Table (GPT) message means that the external storage device must be formatted properly in order to encrypt the device. Select the OK button to continue.
-
Open Spotlight Search by selecting the magnifying glass icon in the top right corner of the desktop. Spotlight Search displays.
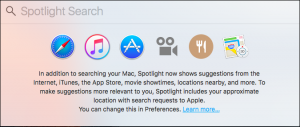
- Enter "disk utility" in the Spotlight Search and then press the Enter key on the keyboard. Disk Utility displays.
-
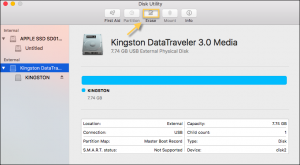
On the left side of the Disk Utility screen, the available drives are listed. Select the name of the external storage device you want to encrypt. Information about the device displays in the center of the screen.
-
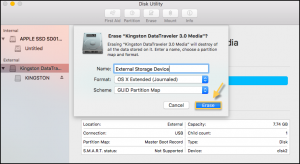
Select the Erase option. The Erase screen displays.
- Verify that you have stored all your data elsewhere before proceeding.
- Next, enter the name you want to use for this device in the Name field. This is a name of your choosing that will be used to identify the device by Mac OS.
- From the Format drop-down menu, select the Journaled option.
- From the Scheme drop-down menu, select the GUID Partition Map option.
- After naming the device and making the appropriate drop-down menu selections, select the Erase button. A progress meter is displayed as the external storage device is erased.
-
When the device has been erased, a confirmation message displays.
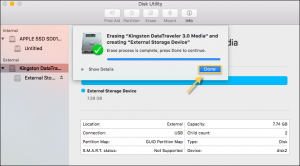
- Select the Done button.
- Close any open screens and return to the computer desktop.
-
Right-click on the name of the external storage device. A pop-up menu displays.
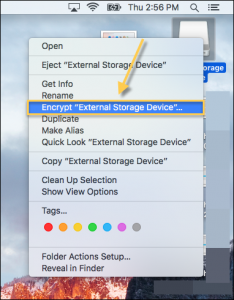
- Select the Encrypt External Storage Device option. The name of the device will vary. The encryption process begins.
While the external storage device is being encrypted, no progress meter or other information displays. There is no completion message either. Because the drive is empty, it should take no more than 5 minutes to encrypt the device. If the external storage device contains an indicator light, you will know the encryption process is finished when the indicator light stops flashing. Otherwise, there is no indicator.
To verify the encryption process was successful:
- Eject the external storage device from your computer (right-click on the device name and then select Eject).
- Disconnect the device from your computer.
- Reconnect the device to your computer.
-
After reconnecting the device to your computer, you will be prompted to enter the password you created for the device.
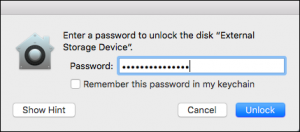
Receiving the password prompt means the encryption process completed successfully. You will receive the password prompt each time you you disconnect and reconnect the external storage device to your computer.
Repeat these steps to encrypt additional devices.