Overview
Zoom webinar is a feature that allows you to host a forum, training, or other type of online session where you need to disseminate information among a large group of participants and don't need to provide an extensive amount of interactivity among participants.
Requesting the Zoom webinar feature
Zoom webinar is not enabled on all USC Zoom accounts. To request the webinar feature on your account, contact ITS:
The webinar feature allows you to create webinars with up to 500 attendees.
Webinars with 500+ attendees
If you anticipate 500+ attendees or if you would prefer that DTS handle the technical details, you can place a request for remote event support. DTS can set up webinars with up to 3,000 attendees:
Creating your Zoom webinar
Quick guide
- Sign into your USC Zoom account at https://usc.zoom.us.
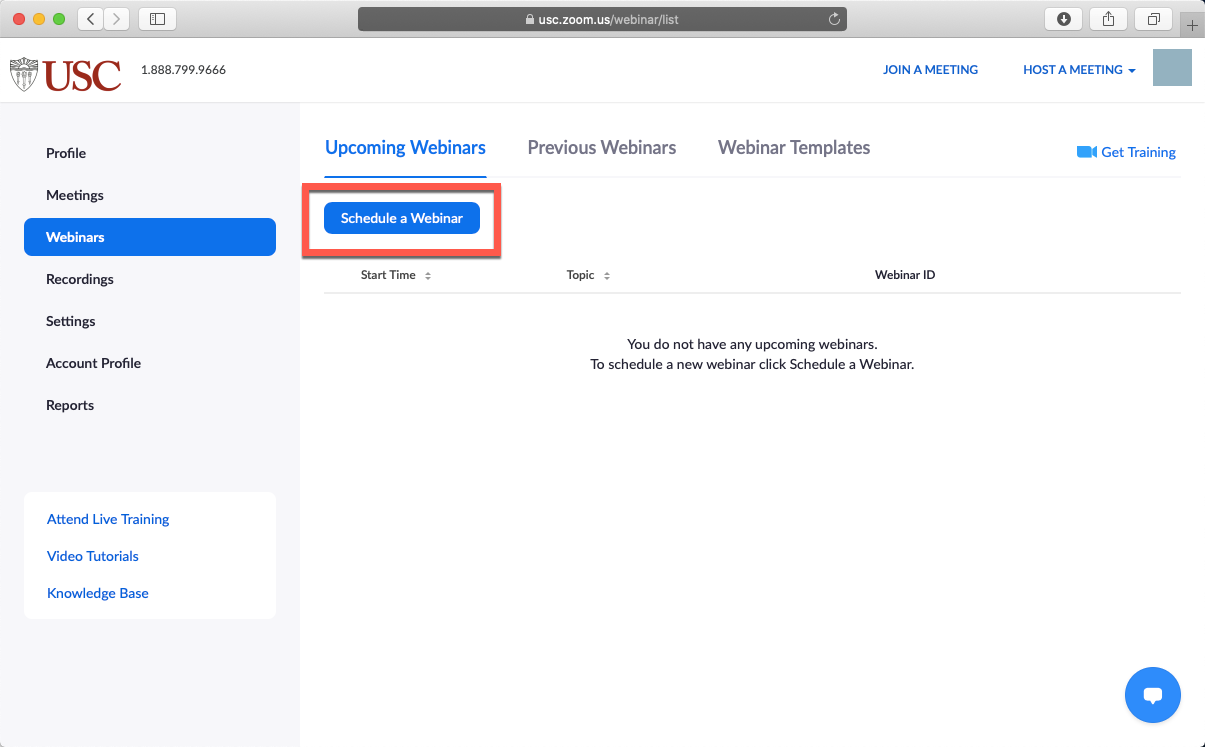
- In the left-hand menu, click on Webinars.
- Click on Schedule a Webinar.
- The webinar setup page displays. Input your webinar details.
- In "Registration," make sure the Required checkbox is selected. (Note: While we recommend having people register so you can know in advance who's attending, and to decrease the potential for uninvited disruptors, you can opt not to select the Required checkbox if you just want to let people join quickly with the webinar link.)
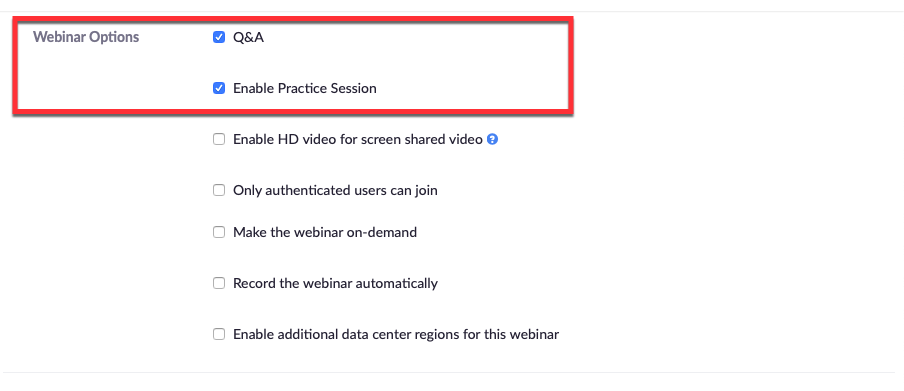
- In "Webinar Options," make sure the following checkboxes are selected:
- Q&A
- Enable Practice Session
- We recommend not selecting Record the webinar automatically and instead using the Record options during the actual webinar, but you can choose according to your preference.
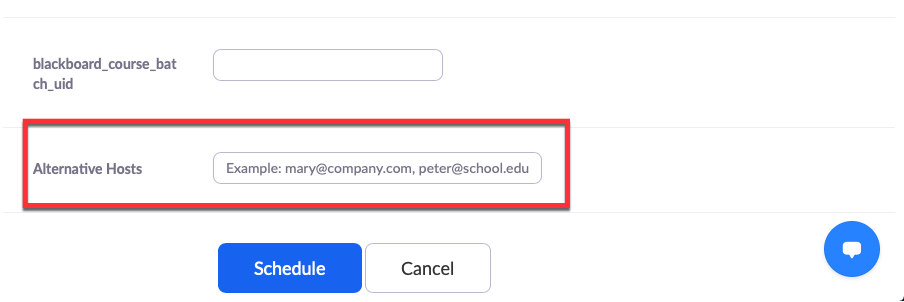
- In "Alternative Hosts," you can add additional people (USC Zoom accounts only) who will be helping host the session.
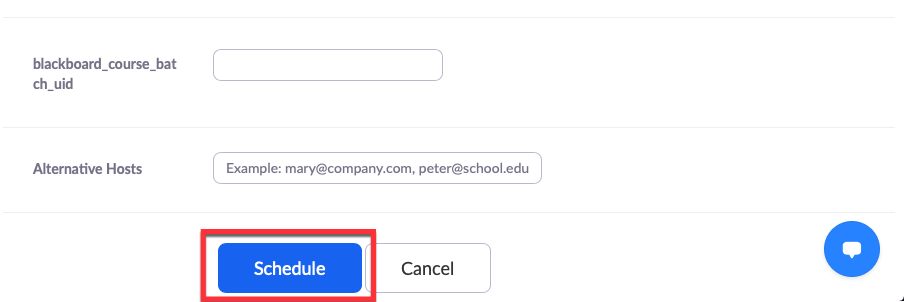
- Click on Schedule.
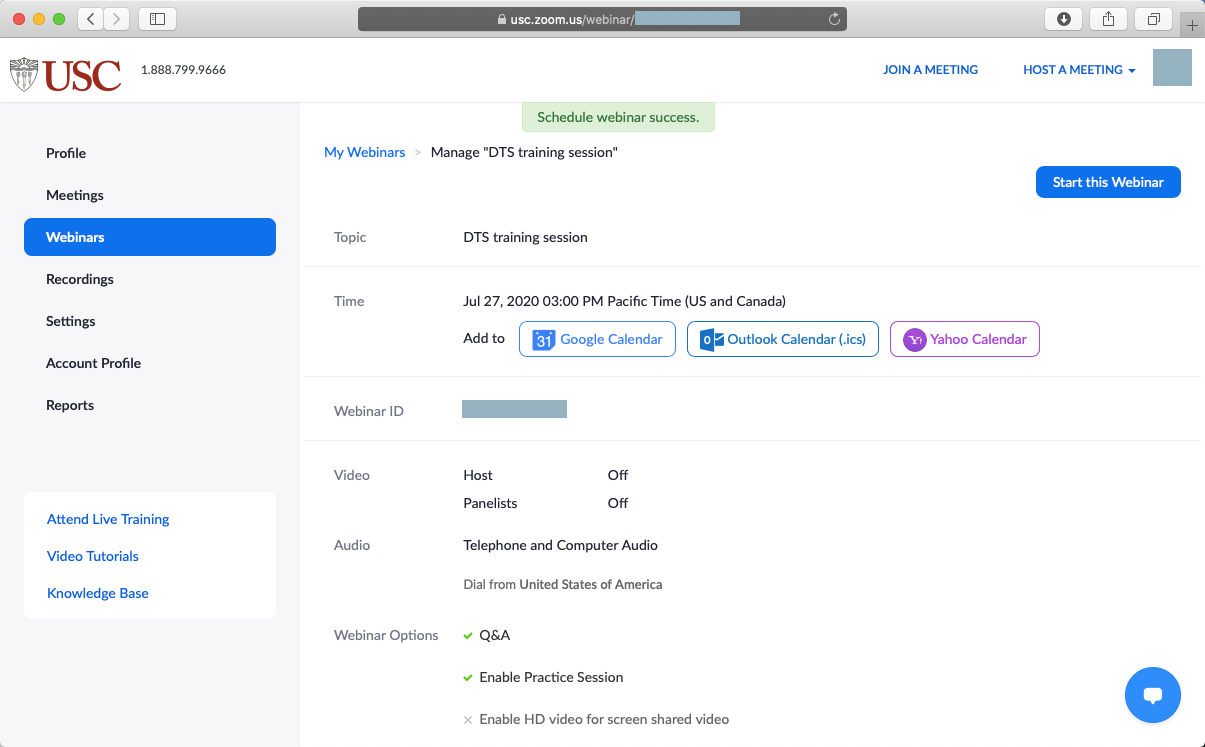
- Zoom schedules the webinar and updates the page.
Detailed guide (with screenshots)
- Go to https://usc.zoom.us and click on Sign in.
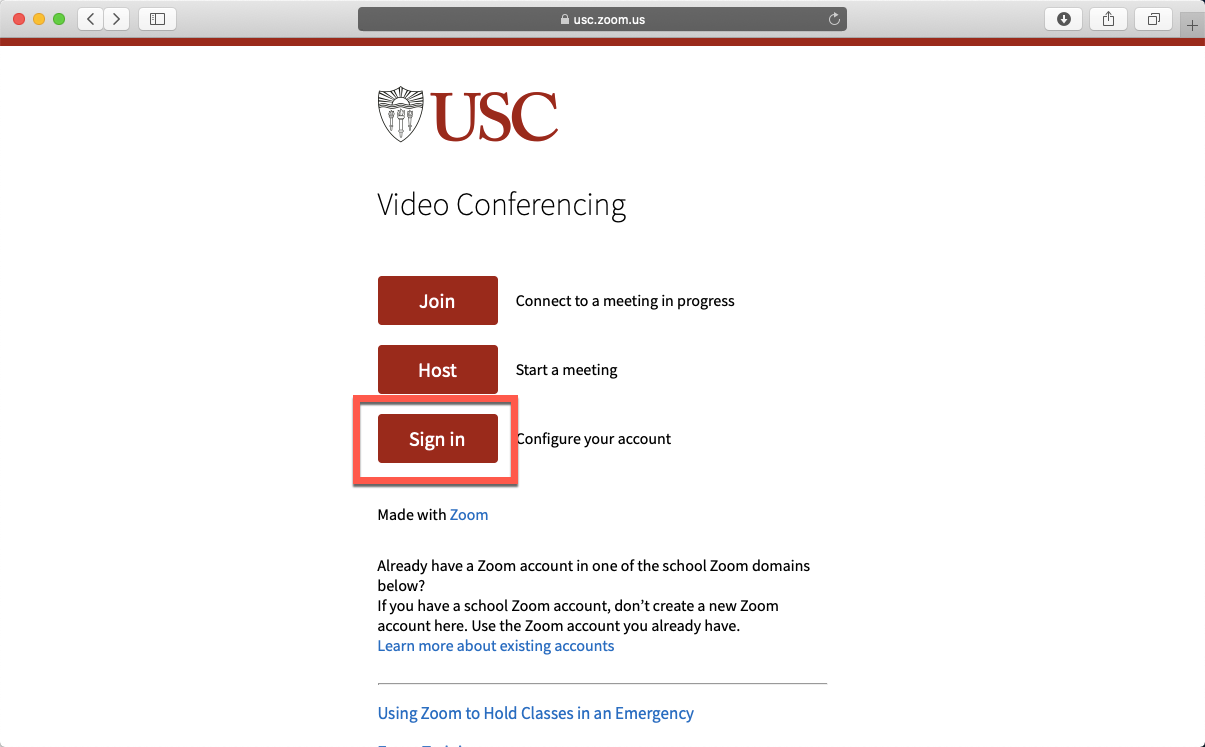
- You should be automatically logged in. If not:
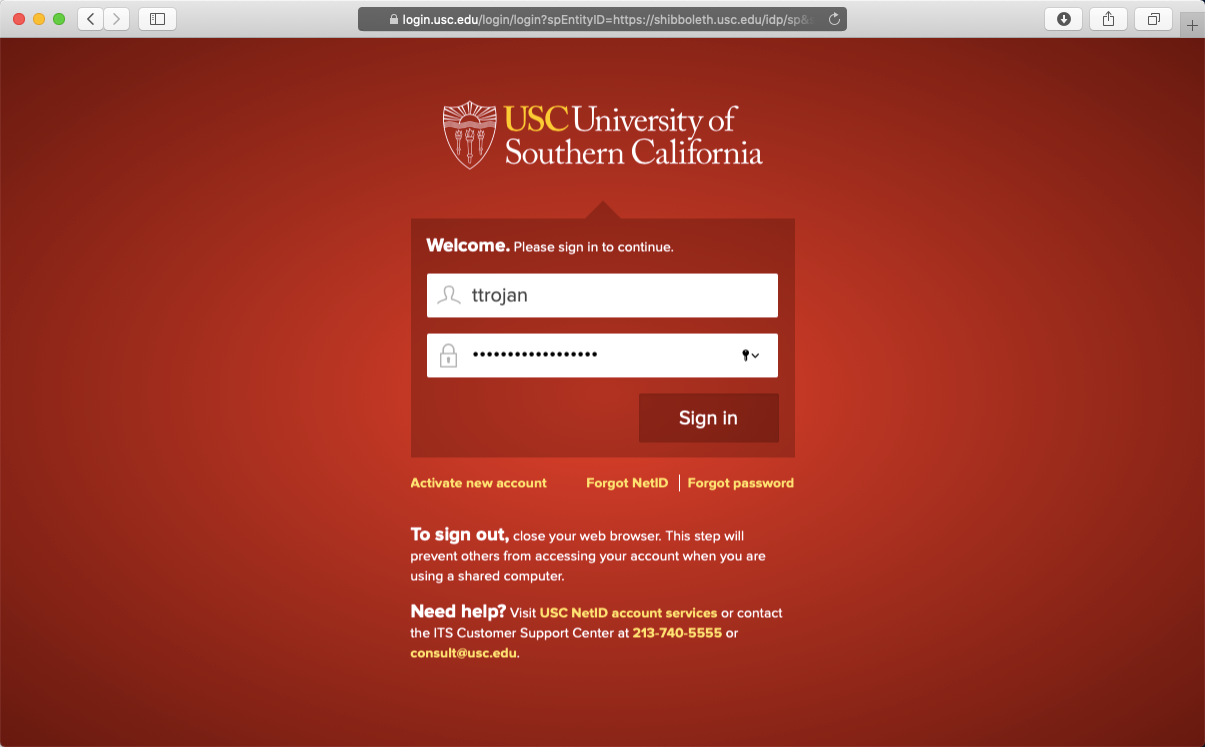
- The Shibboleth login page displays. Log in using your USC NetID and password.
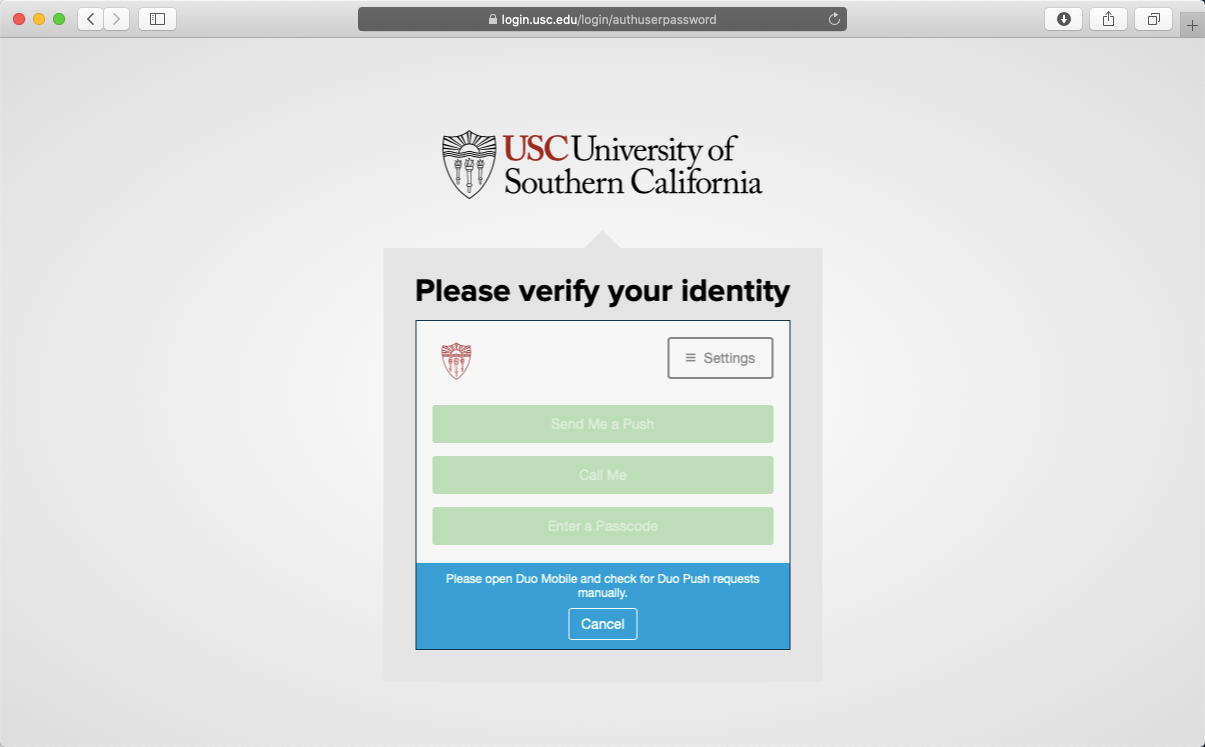
- The Duo screen displays. Follow the on-screen prompt to complete authentication.
- In the left-hand menu, click on Webinars.
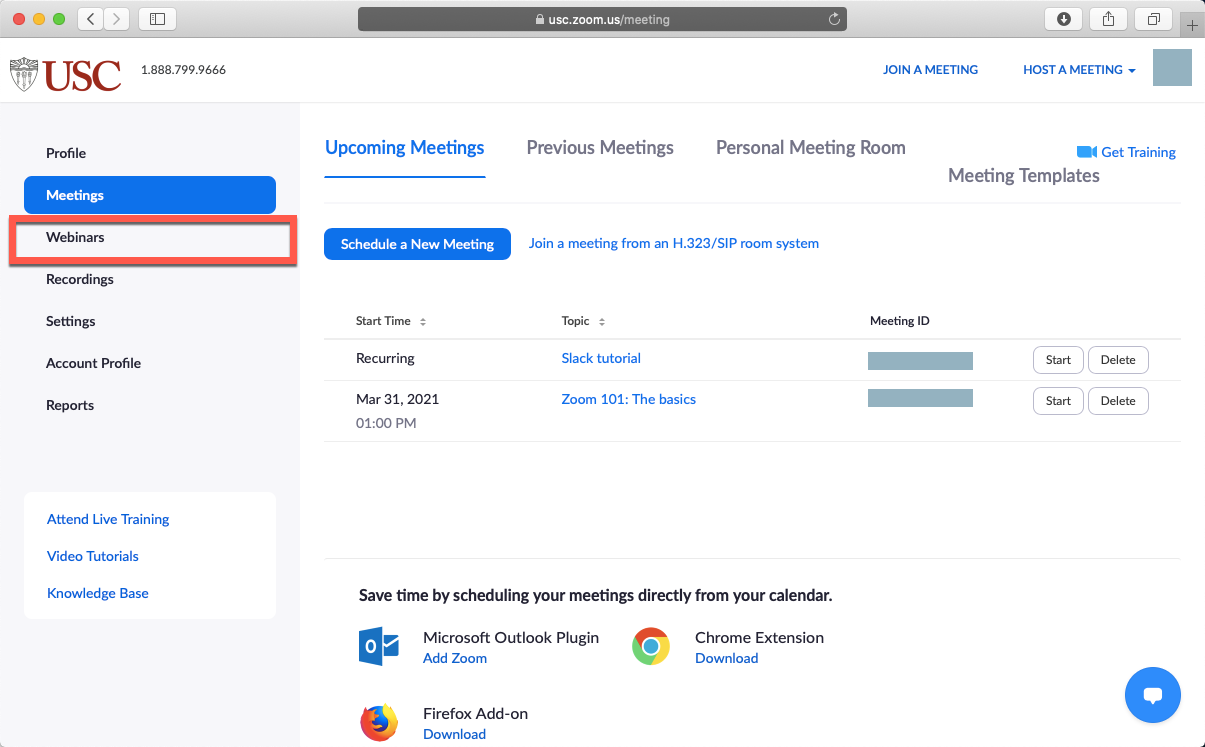
- Click on Schedule a Webinar.
- The webinar setup page displays. Fill out the form fields with your online session details.
- In "Registration," make sure the Required checkbox is selected. (Note: While we recommend having people register so you can know in advance who's attending, and to decrease the potential for uninvited disruptors, you can opt not to select the Required checkbox if you just want to let people join quickly with the webinar link.)

- In "Webinar Options," make sure the following checkboxes are selected:
- Q&A
- Enable Practice Session
- We recommend not selecting Record the webinar automatically and instead using the Record options during the actual webinar, but you can choose according to your preference.
- In "Alternative Hosts," you can add additional people (USC Zoom accounts only) who will be helping host the session.
- Click on Schedule.
- Zoom schedules the webinar and updates the page.
Configuring settings for your Zoom webinar
Finding your webinar's detailed settings
Quick guide
- Sign into your USC Zoom account at https://usc.zoom.us.
- In the left-hand menu, click on Webinars.
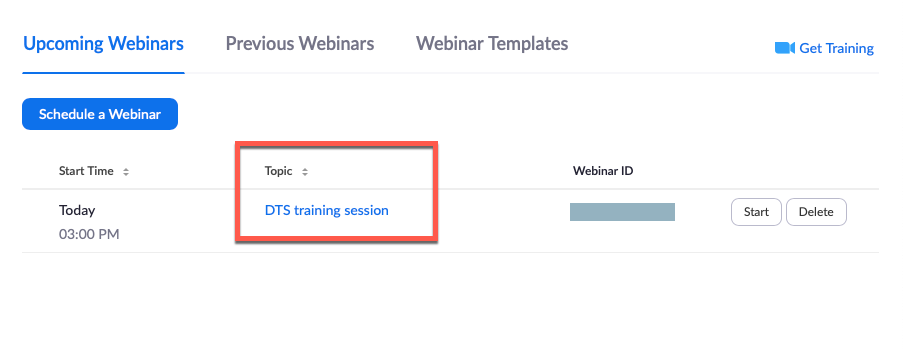
- Click on the Topic Name of your webinar.
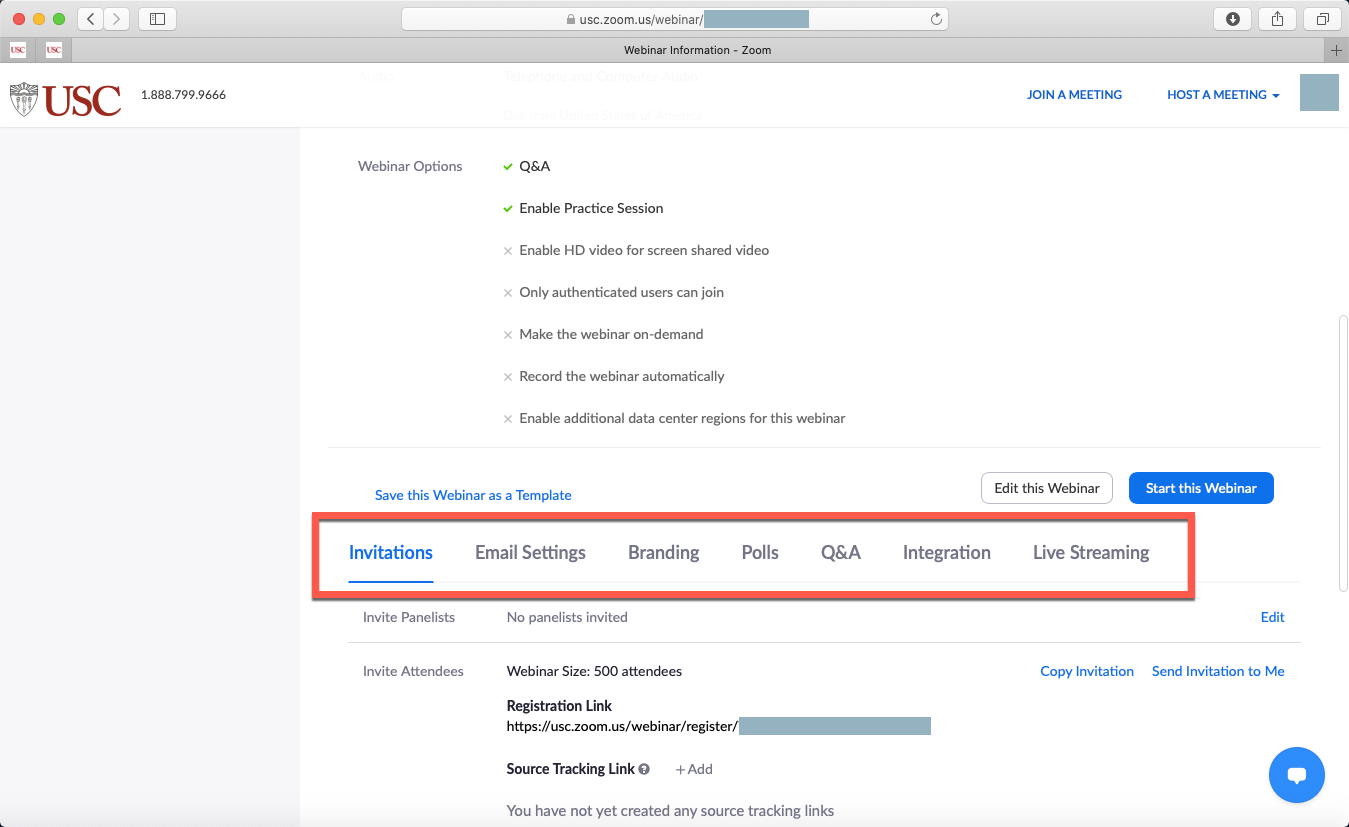
- On the bottom half of your webinar settings page, detailed settings are displayed as clickable tabs (Invitations, Email Settings, etc).
Detailed guide (with screenshots)
- Go to https://usc.zoom.us and click on Sign in.
- You should be automatically logged in. If not:
- The Shibboleth login page displays. Log in using your USC NetID and password.
- The Duo screen displays. Follow the on-screen prompt to complete authentication.
- In the left-hand menu, click on Webinars.
- Click on the Topic Name of your webinar.
- On the bottom half of your webinar settings page, detailed settings are displayed as clickable tabs (Invitations, Email Settings, etc).

Recommendations for detailed settings
Below, we direct your attention to our specific recommendations for webinar settings. You're welcome to implement as many or as few of these as you like. If you're interested in further exploring an option not listed below, you can search the Zoom Help Center for further instruction.
Note that there is not an option on the detailed settings page to configure your webinar's Chat feature. To configure the Chat feature, refer to "Adjusting Chat settings" under "During your Zoom webinar" below.
Invitations
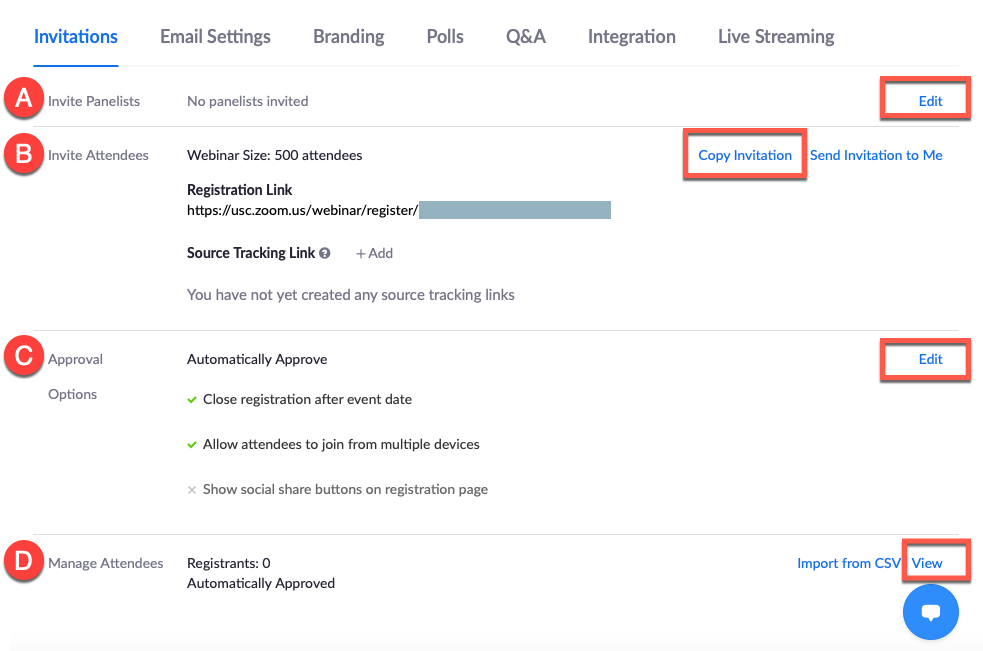
A. Invite Panelists
- Click on Edit to add/email your webinar presenter(s). USC and non-USC presenters are both permitted. You should also add any co-hosts as panelists, if you did not already list them as Alternative Hosts earlier when you scheduled the webinar.
- Leave the checkbox selected for Send invitation to all newly added panelists immediately.
- Once you've added your presenter(s), click on Save.
B. Invite Attendees
Click on Copy Invitation to display a full email template with your webinar registration link and details.
C. Approval Options
- Click on Edit.
- The Registration window opens. At the top of the Registration window, the "Registrations" tab displays.
- Approval: Keep Automatically Approve selected.
- Notification: Unselect the checkbox Send an email to host when someone registers.
- Other options: Unselect the checkbox Show social share buttons on registration page.
- Click on the "Questions" tab at the top of the Registration window.
- Select questions you want to add to your registration form. We recommend selecting none or as few as possible, to keep the registration process short and simple.
- To include a question, select the checkbox to its left. To make a question mandatory, select the checkbox to its right.
- Click on the "Custom Questions" tab at the top of the Registration window.
- Here you can create your own questions for the registration form. For instance, if you want to allow folks to make accessibility requests:
-
Type: Short Answer
-
Required: Unselect this checkbox
-
Question: Do you have any accessibility requests?
- Click on Create.
- When finished, click on Save All to exit the Registration window.
D. Manage Attendees
Click on View to see who has registered for your webinar so far. (To obtain a more detailed report, refer to "Running registration, poll, and attendance reports" below.)
Email Settings
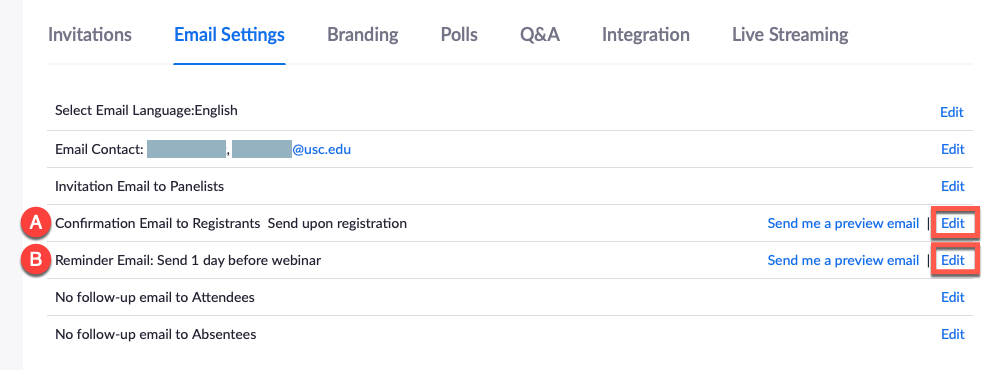
A. Confirmation Email to Registrants
We recommend keeping the Confirmation Email to Registrants set to "Send upon registration."
B. Reminder Email
- Click on Edit.
- Select the checkbox(es) corresponding to the reminder(s) you want to send. We recommend sending just one reminder email the day before, but Zoom gives you options to send up to three reminder emails.
- Click on Save.
Branding
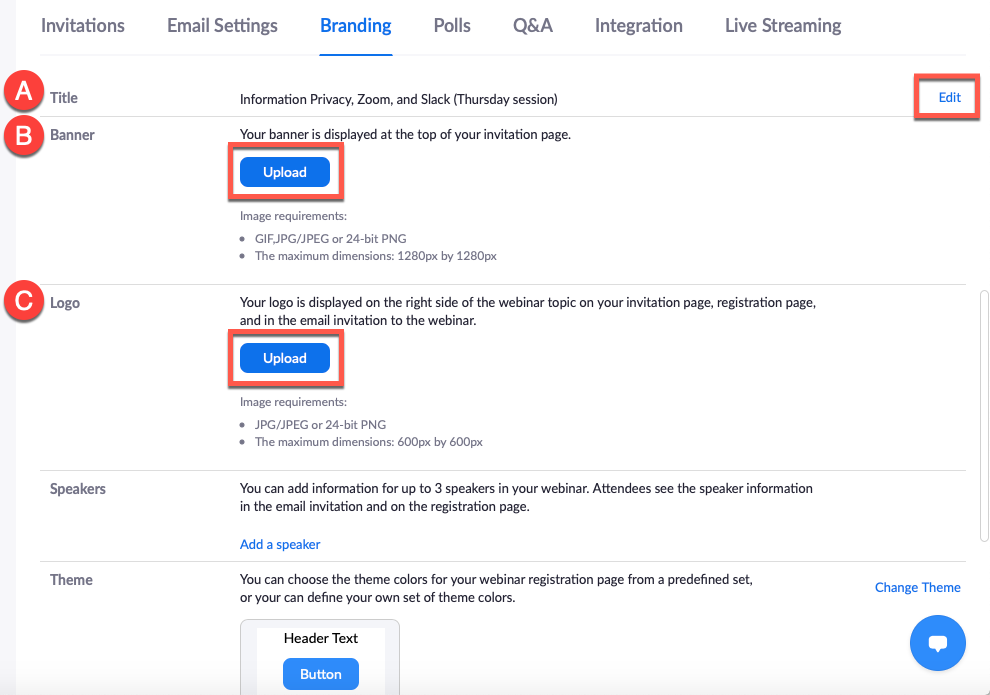
A. Title
Click on Edit to rename your registration page.
B. Banner and C. Logo
Click on Upload to add an image to your registration page.
-
Banner: Image will display at top center of your registration page.
-
Logo: Image will display at top right of your registration page and on email invitations.
Polls

Click on Add to create poll questions.
Try to keep polls on the briefer side: they're a great way to encourage attendee interactivity and can be activated at any point during the webinar, but they can get tedious if long.
A note about the Anonymous checkbox: During the webinar, poll results are shown anonymously. After the webinar, you can pull a separate report (refer to "Running registration, poll, and attendance reports" below) showing which attendee selected which response unless you selected the Anonymous checkbox.
Q&A
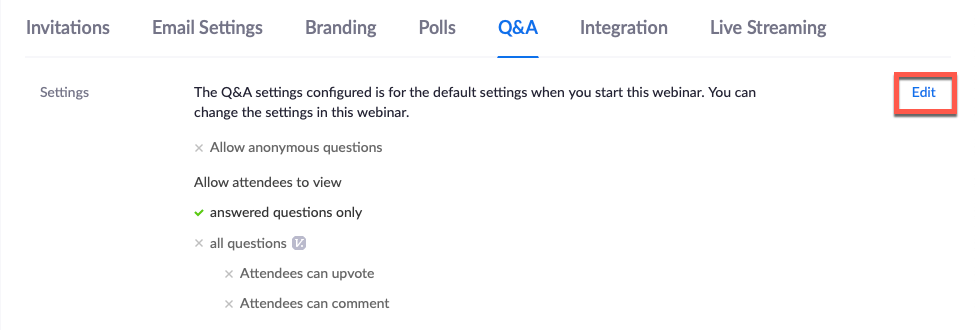
Click on Edit to adjust Q&A settings. Some settings you may want to consider:
- If your priority is to reduce opportunities for disruptive behavior, you can:
- Unselect the checkbox for Allow anonymous questions
- Keep Allow attendees to view set to "answered questions only"
- If your priority is to encourage Q&A interactions, you can:
- Keep the checkbox selected for Allow anonymous questions
- Set Allow attendees to view to "all questions," and select the checkboxes for Attendees can upvote and Attendees can comment.
Integration
We don't use this feature, but you can email ITS at consult@usc.edu if you are interested in more information.
Live Streaming
You can reach out to us if you would like our Media Services team to assist you or offer recommendations for live streaming your Zoom webinar on Facebook, Youtube, or another platform.
Leading up to your Zoom webinar
Checking who has registered to attend
You can run a registration report on your webinar at any point to see who has signed up and what their responses were to your registration questions: refer to "Running registration, poll, and attendance reports" below.
Preparing your alternative hosts and presenters/panelists
In advance of your webinar, we recommend reading "During your Zoom webinar" below so you can get familiar with the Zoom webinar buttons and decide who will be responsible for different functions (for instance, who will monitor the Q&A or Chat, who will be in charge of sharing screen content, who will make sure it's recording, and so forth). You can also share information from this guide with your co-hosts and presenters as you collectively plan and coordinate the webinar.
Having a backup plan
We recommend reviewing backup options with your co-hosts and presenters, just in case. Some situations for which you may need a backup plan, and possible solutions:
What if your Internet connection goes down? What if it goes down for one of your co-hosts or presenters?
- Agree on a backup method of communication (for instance, using Slack/Outlook on a smartphone, or if entirely offline, sharing phone numbers)
- If you have a smartphone:
- Install the Zoom app so you can use your smartphone directly, or
- Know how to activate your mobile hotspot in case you need to connect your computer to it
- Have a plan for communicating to attendees if technical issues arise during the webinar
- Decide how much time you will allow for troubleshooting, and at what point you may just have to stop and reschedule the webinar
- Have a list of IT contacts handy (DTS: 213-740-2775; ITS: 213-740-5555)
What if the webinar needs to be canceled or rescheduled on short notice?
- Communicate with attendees via email
- Communicate with attendees through the webinar
- For example, you can create a Powerpoint slide announcing the cancellation/rescheduling, Screen share the announcement, turn off all mics/cameras, and broadcast the webinar at the time it was originally scheduled to begin. (Only one host needs to be present to do this—the other co-hosts and presenters can simply leave the webinar.)
What if an attendee starts posting rude comments to the Chat or Q&A during the webinar?
- Review the Zoom interface buttons for managing participants so you are prepared to remove the attendee swiftly
- Have a plan for locking or even ending the webinar if the disruption is severe, and following up with attendees afterward
During your Zoom webinar
Signing in early for setup and practice
How early you want to start setup and practice among your co-hosts and presenters before allowing attendees to join the webinar is completely up to you. We typically recommend having your co-hosts and presenters join 20 minutes to 1 hour in advance, depending on whether you want to just make sure everyone can join successfully or whether you want to do an entire dry run, respectively.
When you added your co-hosts/presenters as Alternative Hosts and Panelists previously, they received an email from Zoom. The link in the email allows them to bypass the attendee registration process and join the webinar directly.
When you and your co-hosts/presenters initially enter the webinar to do setup and practice, the top of the Zoom screen will alert you that you are in practice mode. At this point, the webinar has not been opened to attendees, and if attendees try to join early, they will be placed in the waiting room.
Some steps you may want to incorporate into your setup/practice:
Confirming that co-host and presenter privileges are correctly set up
- Test presenters' cameras and mics
- Test Screen sharing by clicking on the Screen share button; if applicable, test computer sound as well
- If you set up polls, test/view your poll questions by clicking on the Poll button
Confirming who is responsible for which task
Individuals can be in charge of multiple tasks, but at the minimum we recommend that you have at least one person monitoring Q&A and/or Chat who is not also presenting/Screen sharing at the same time. Some tasks you may want to designate:
- Moderating attendee posts in the Q&A
- Moderating attendee posts in the Chat
- Sharing screen content (and, if applicable, computer sound)
- Ensuring the recording was started
- Making announcements to attendees if there are delays or technical difficulties
Adjusting Chat settings
Click on the Chat button to display the Chat panel. In the Chat panel, click on the tiny […] button to set your attendee chat settings. You can allow attendees to chat with:
- "No one": Select if you want to disable Chat and will moderate/allow interaction solely via the Q&A feature.
- "All panelists": Select if you want to allow attendees to message you, the co-hosts, and the presenters.
- "All panelists and attendees": Select if you want to allow attendees to interact with each other or offer running commentary during the webinar.
During the webinar
Starting (or "broadcasting") the webinar
Do not click on Broadcast until you have completed your setup and are ready to admit attendees—typically at or 1–2 minutes prior to your announced webinar start time.
Recording the webinar
Once you're officially ready to record, click on the Record button and select Record to the cloud. Once you begin the recording, additional buttons will display for pausing and stopping the recording.
If you experience technical difficulties during the webinar and need time to address them, you may want to click on Pause recording—don't forget to hit Resume recording once the webinar presentation resumes.
Additional suggestions
- Including an introductory slide
- We recommend Screen sharing a "we will be starting soon" introductory slide with the webinar description, as a heads up to attendees. You can even play music during your Screen share so that attendees can test out their connection to the audio while they wait.
- Orienting attendees on webinar functions
- We recommend that at the beginning of your presentation, you have a slide and/or 1–2 minutes to explain to attendees whether and how to post in the Q&A and/or Chat, and to reassure them that their mics and cameras are not turned on.
- Let attendees know whether you will be answering questions as they get posted or allotting dedicated Q&A time after the main presentation.
- Let attendees know if you are recording the webinar, and when/how the recording will be disseminated.
After your Zoom webinar
Receiving and sharing your recording and transcript
If you recorded your webinar to the cloud, typically no more than 24 hours should elapse between when you hit Stop recording and when Zoom emails you, but this can vary depending on the recording length and other factors. The email from Zoom will include a link for your review only as well as a link that can be distributed to your attendees. To obtain your attendees' email addresses so you can distribute the recording link, refer to "Running registration, poll, and attendance reports" below.
Please note that USC Zoom webinar recordings can only be viewed by people signed into USC Zoom accounts. This setting is pre-configured by ITS: to provide feedback on this limitation or inquire about your options, you can email ITS at consult@usc.edu.
Running registration, poll, and attendance reports
You can run registration reports at any point once you have created your Zoom webinar. You can run poll and attendance reports after your webinar has ended.
Quick guide
- Sign into your USC Zoom account at https://usc.zoom.us.
- In the left-hand menu, click on Reports.
- Click on Webinar.
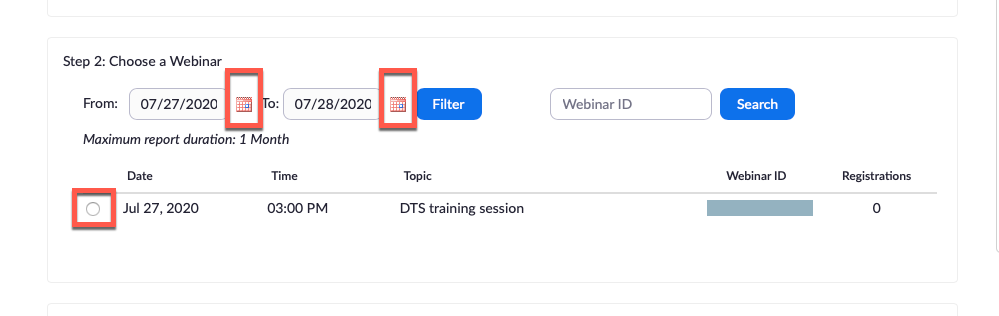
- Select your report type. In addition to Registration, Poll, and attendance (select either Attendee or Performance) reports, you can also select Q&A reports.
- Select your webinar. If your webinar is not showing up, make sure you use the calendar icons to select the date range in which your webinar falls.
- Click on Generate CSV report. This will download the Zoom report for your review.
Detailed guide (with screenshots)
- Go to https://usc.zoom.us and click on Sign in.
- You should be automatically logged in. If not:
- The Shibboleth login page displays. Log in using your USC NetID and password.
- The Duo screen displays. Follow the on-screen prompt to complete authentication.
- In the left-hand menu, click on Reports.
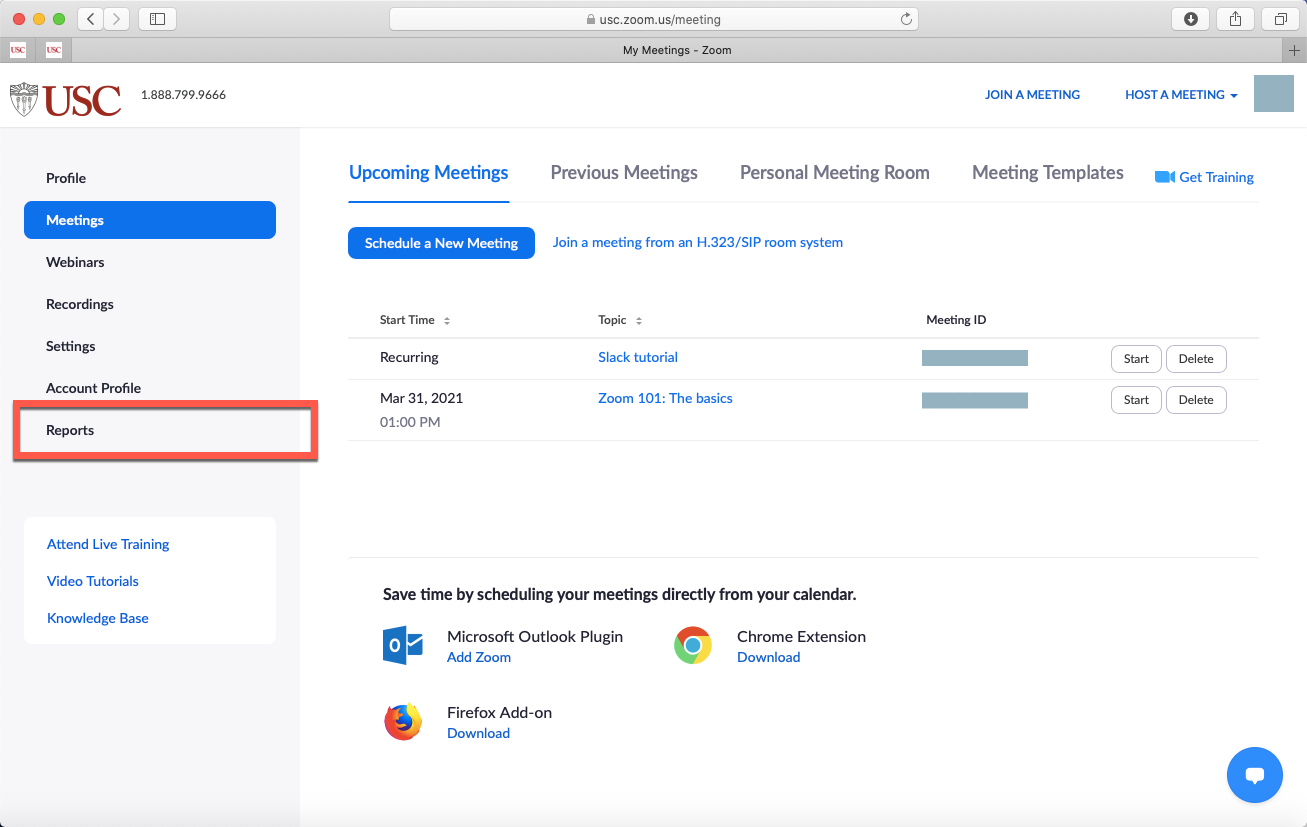
- Click on Webinar.

- Select your report type. In addition to Registration, Poll, and attendance (select either Attendee or Performance) reports, you can also select Q&A reports.

- Select your webinar. If your webinar is not showing up, use the calendar icons to select the date range within which your webinar falls.
- Click on Generate CSV report. This will download the report to your computer for your review.
