Overview
Microsoft Bookings is an appointment calendar system. Like Calendly, Bookings lets you set up online calendars with your availability—in addition, Bookings will automatically sync with your Outlook calendar so you don't get double-booked.
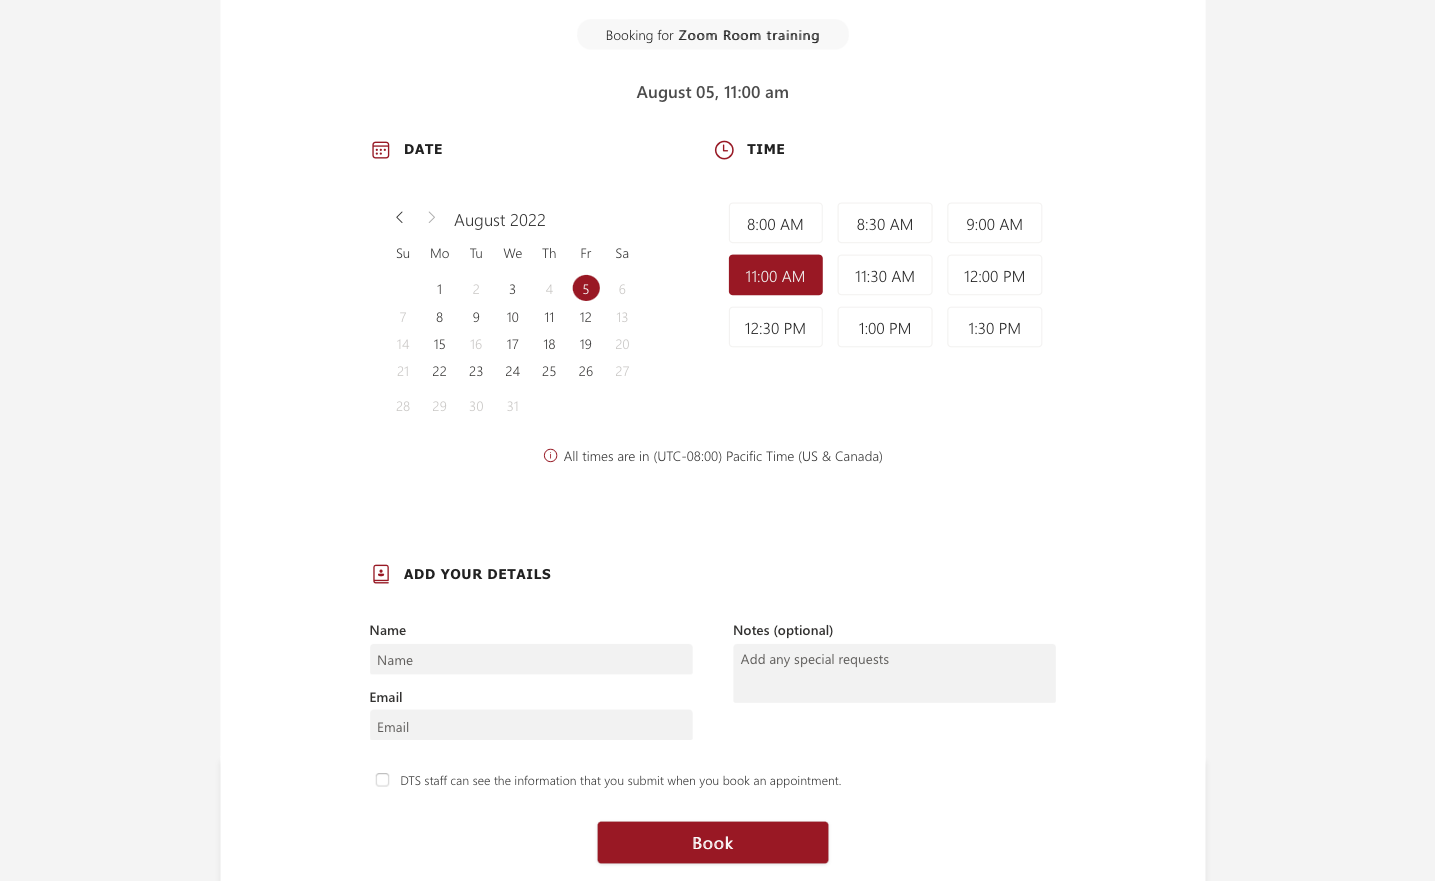
Here's how a Bookings page looks to someone wanting to book an appointment with you:
When to use Bookings
You might want to use Bookings if, for example:
- You are an instructor or adviser, and want students to book appointments during your office hours
- You conduct trainings across departments, and want faculty/staff to book appointments when you are available
In this guide, we'll review some useful features for optimal Bookings setup.
Creating a Bookings calendar
You can create a Bookings appointment calendar on your own @usc.edu account or on a shared org account such as a general departmental email. Just make sure you're already logged into the correct Outlook account before you begin.
To create a Bookings calendar (you can change any of these initial settings later):
- Go to https://outlook.office.com/bookings/homepage.
- Click + Create new calendar.
- Follow the prompts to set up your calendar (you can change any settings later). Bookings will make you the calendar administrator and will sync with your Outlook calendar to avoid scheduling conflicts.
- Note that on the "Set up a service" prompt, you may need to click Change and deselect Make this a Teams meeting if you do not plan to use Microsoft Teams for your appointments.
- Once you're done with the setup prompts, Microsoft Bookings emails you to confirm the calendar's creation.
Finding your Bookings calendar's settings
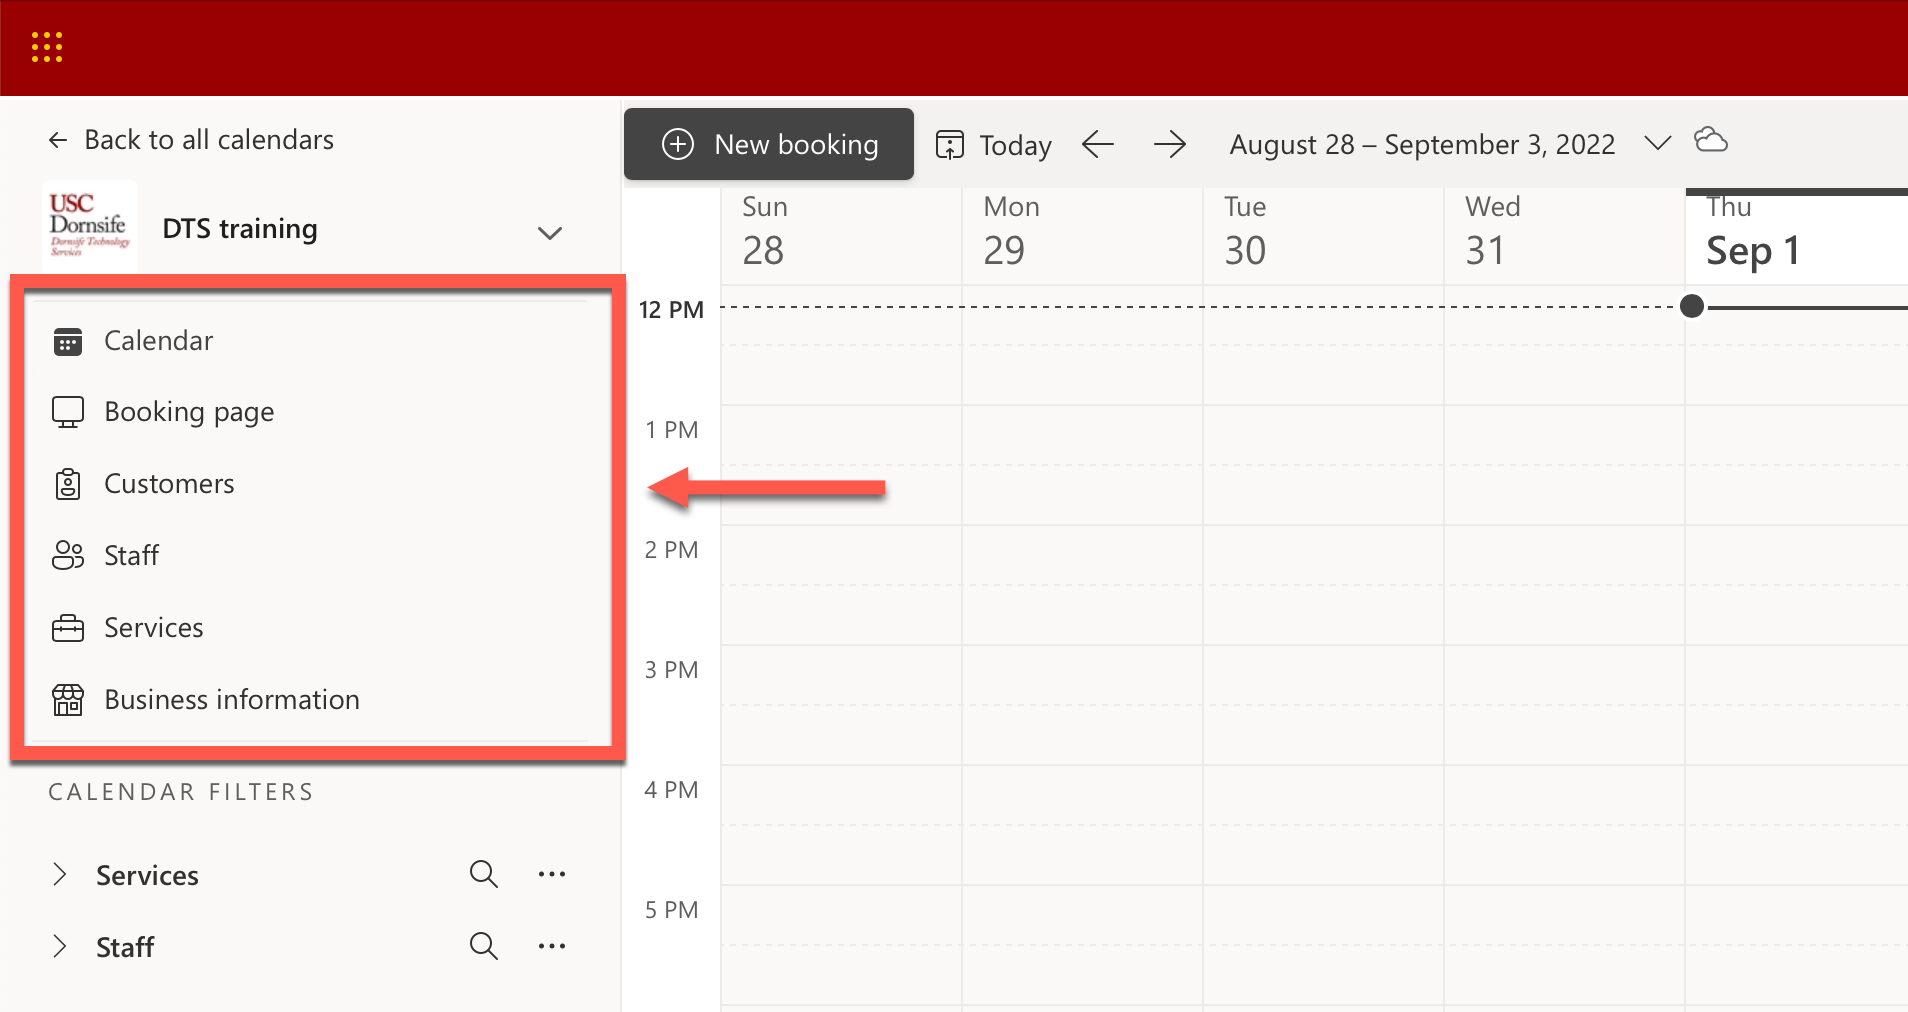
To find your calendar's settings, go to https://outlook.office.com/bookings/homepage, and click on the calendar you want to modify. Its settings, which we provide instructions for below, appear in the left-side menu:
Deleting a Bookings calendar (is not possible)
One note of caution: while you can rename a Bookings calendar, you cannot delete the calendar once it has been created. For this reason, avoid creating multiple Bookings calendars just for testing, as this will clutter up your Bookings homepage.
Configuring who can see your calendar
Setting up calendar availability
You can configure your availability in a number of ways. Below, we walk you through setting up an ongoing Bookings calendar where people can book appointments throughout the semester or year. For example, you may be an instructor or advisor who wants students to book with you in advance. You can set up regular, weekly office hours, and have the flexibility to block off time for holidays and vacations.
Step 1: Set up your general hours of availability
Quick guide
To change your business hours, time increments, and min/max lead time:
- Click Business information (left menu).
- Next to Business hours, click the down arrow. Edit your business hours as needed.
- Scroll to the top and click Save.
- Click Booking page (left menu).
- Next to Default scheduling policy, click the down arrow. Edit your options as needed.
- Under "Staff control" we recommend deselecting Allow customers to choose a specific person for the booking.
- Scroll to the top and click Save.
To change appointment length or add buffer time:
- Click Services (left menu).
- Click the service name, and click Edit service. (If adding a new appointment type, click + Add new service.)
- To change appointment length: Edit the Duration field.
- To add buffer time between appointments: Click the toggle Buffer time and make any adjustments.
- Make sure that Default scheduling policy is toggled on.
- Click Save changes.
To set your time zone:
- Click Booking page (left menu).
- Next to Region and time zone settings, click the down arrow.
- Make sure that the option displayed under "Current time zone" is correct, and select the checkbox Always show time slots in business time zone.
- Scroll to the top and click Save.
Step 2: Add time off as needed (holidays, vacation, etc)
Quick guide
- Click Booking page (left menu).
- Next to Default scheduling policy, click the down arrow.
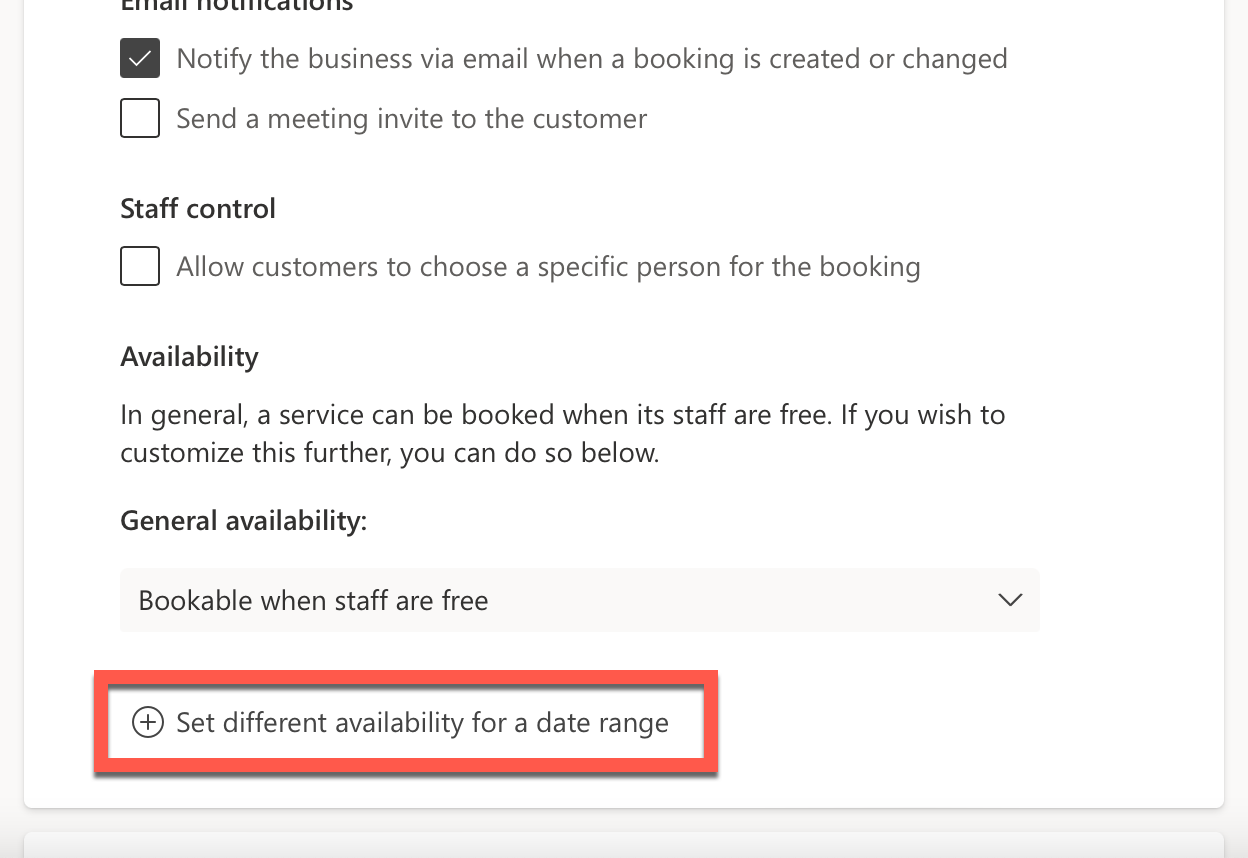
- Click +Set different availability for a time range.
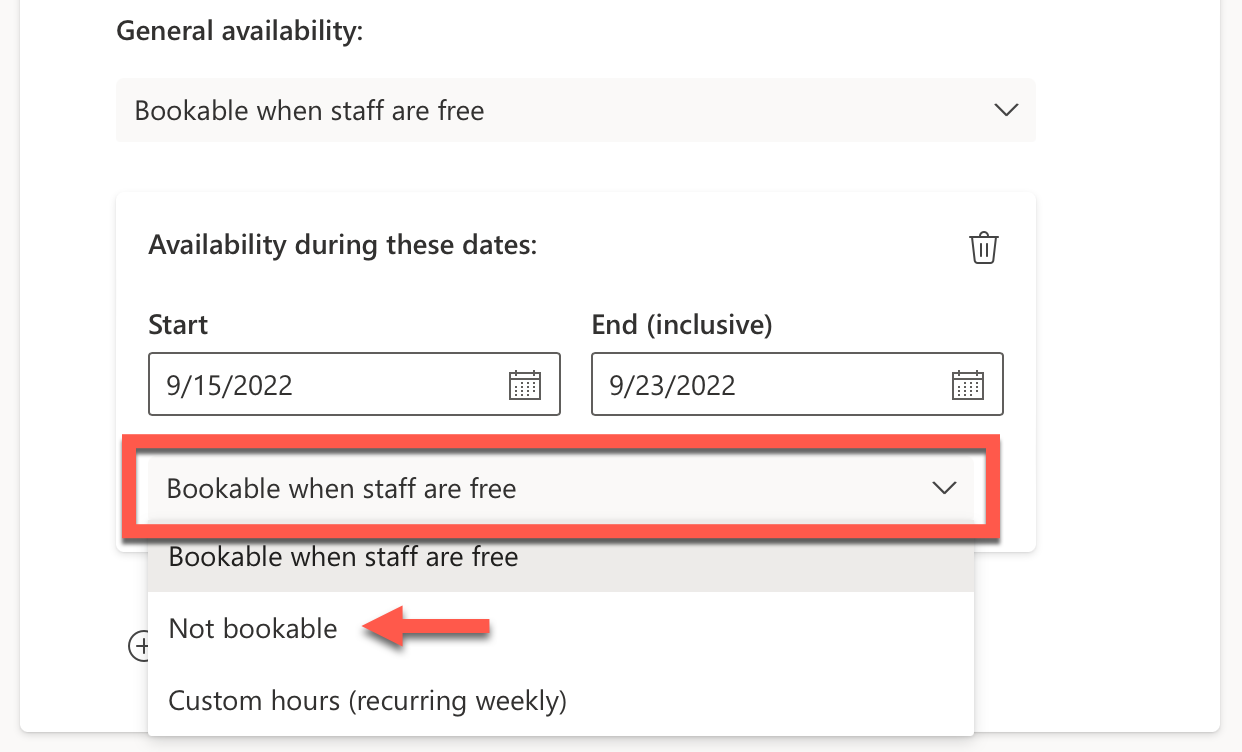
- Select the dates that you are unavailable. Then, click Bookable when staff are free and select Not bookable in the dropdown.
- Repeat steps 3–4 if you need to block off more dates.
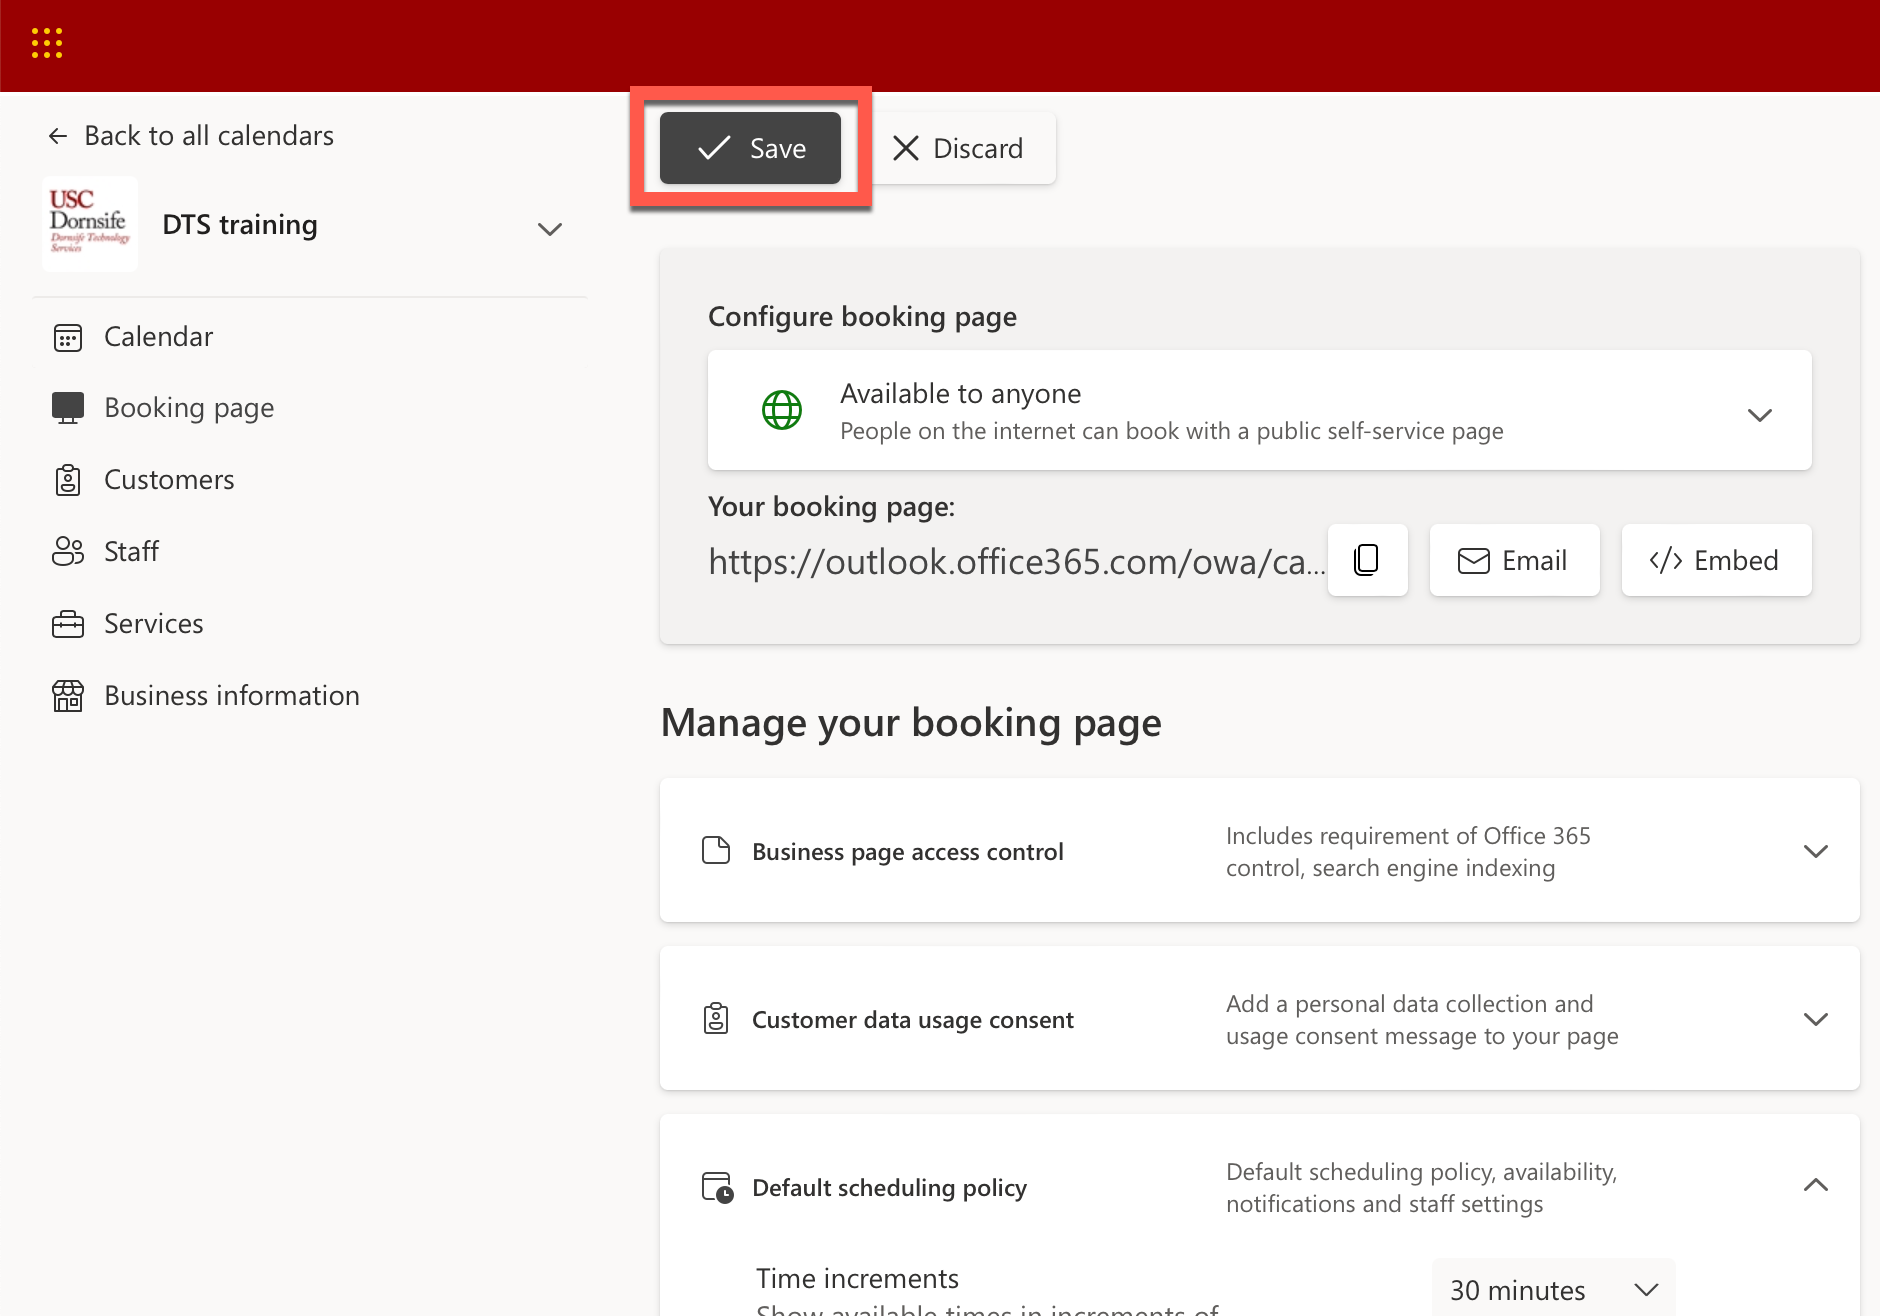
- Scroll to the top and click Save.
Detailed guide (with screenshots)
- Click Booking page (left menu).
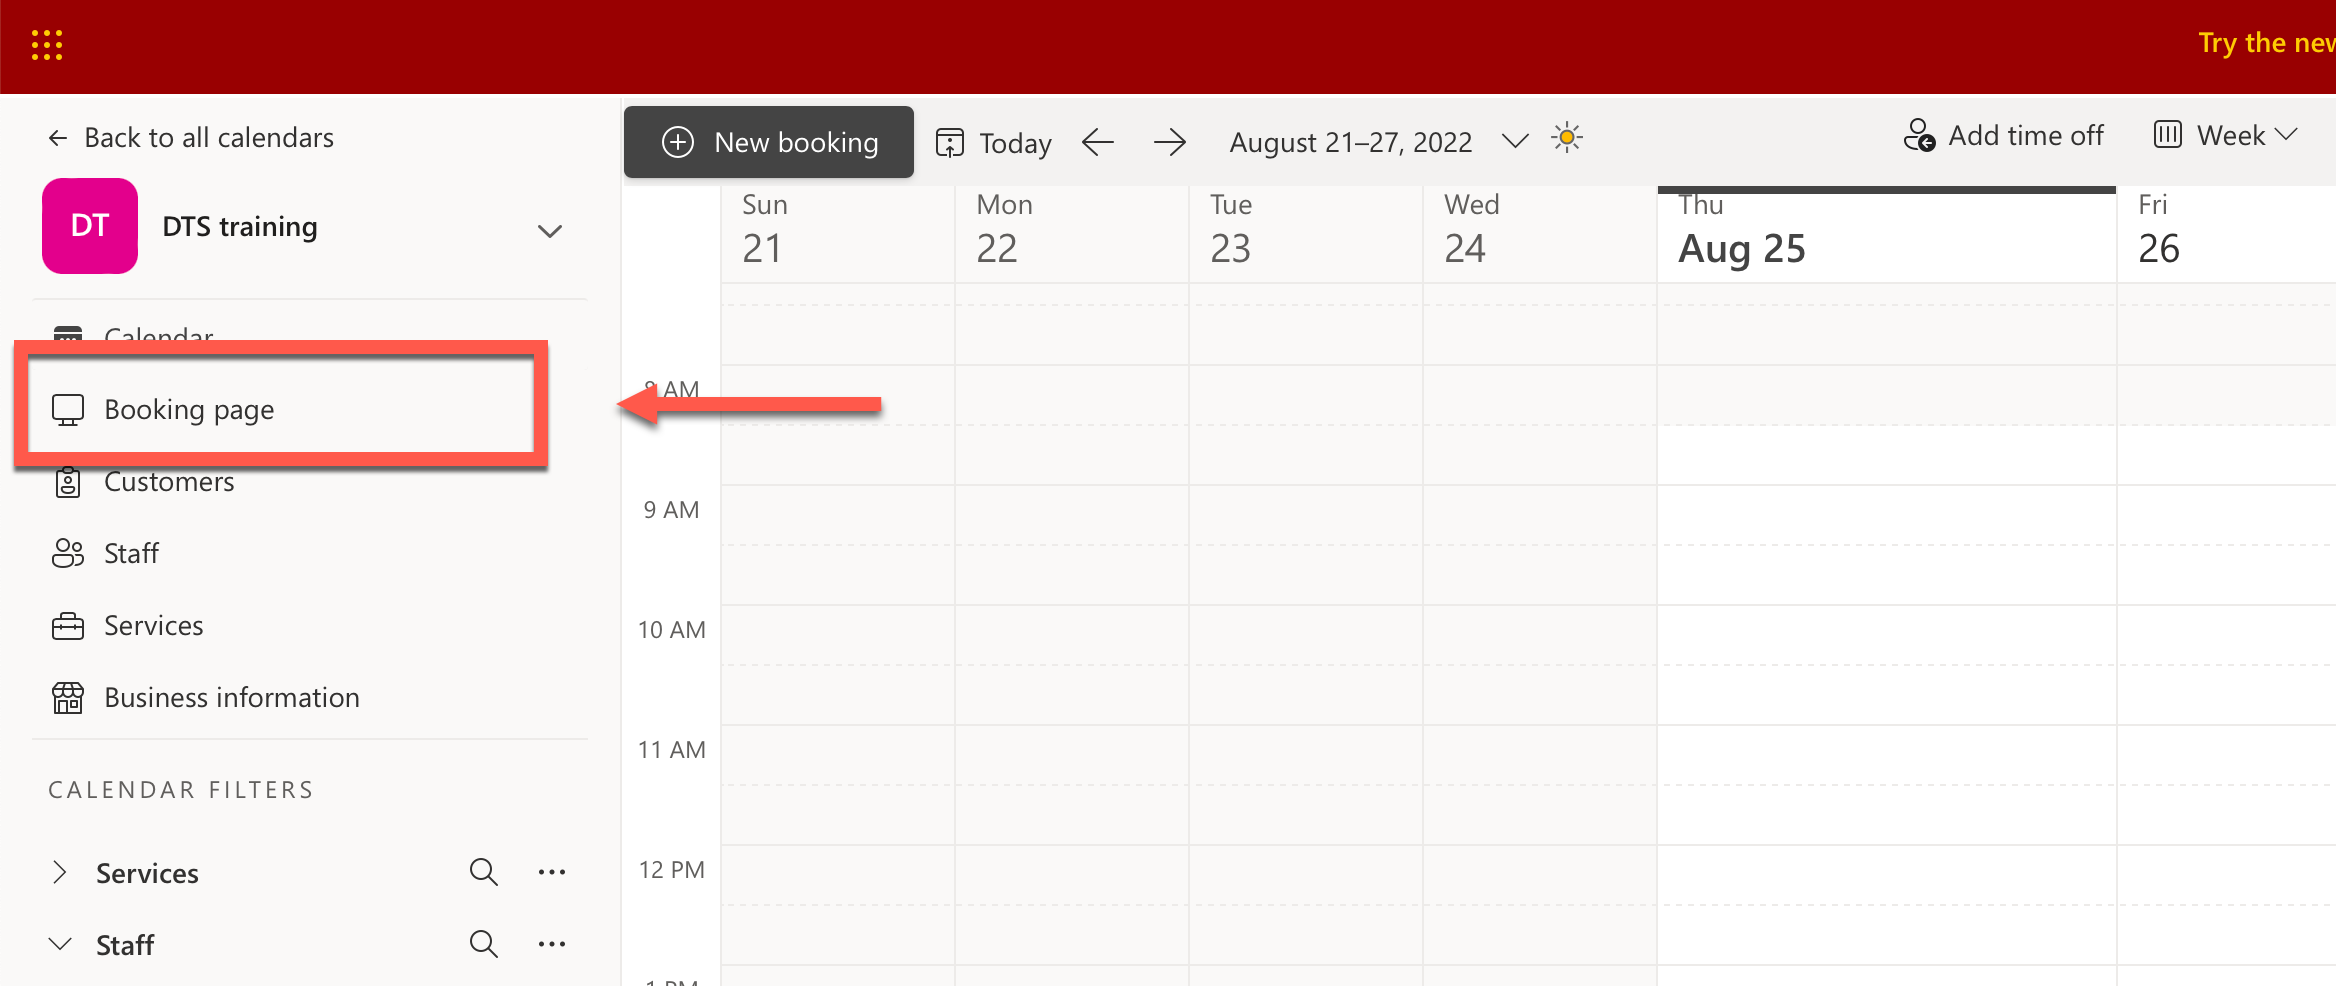
- Next to Default scheduling policy, click the down arrow.
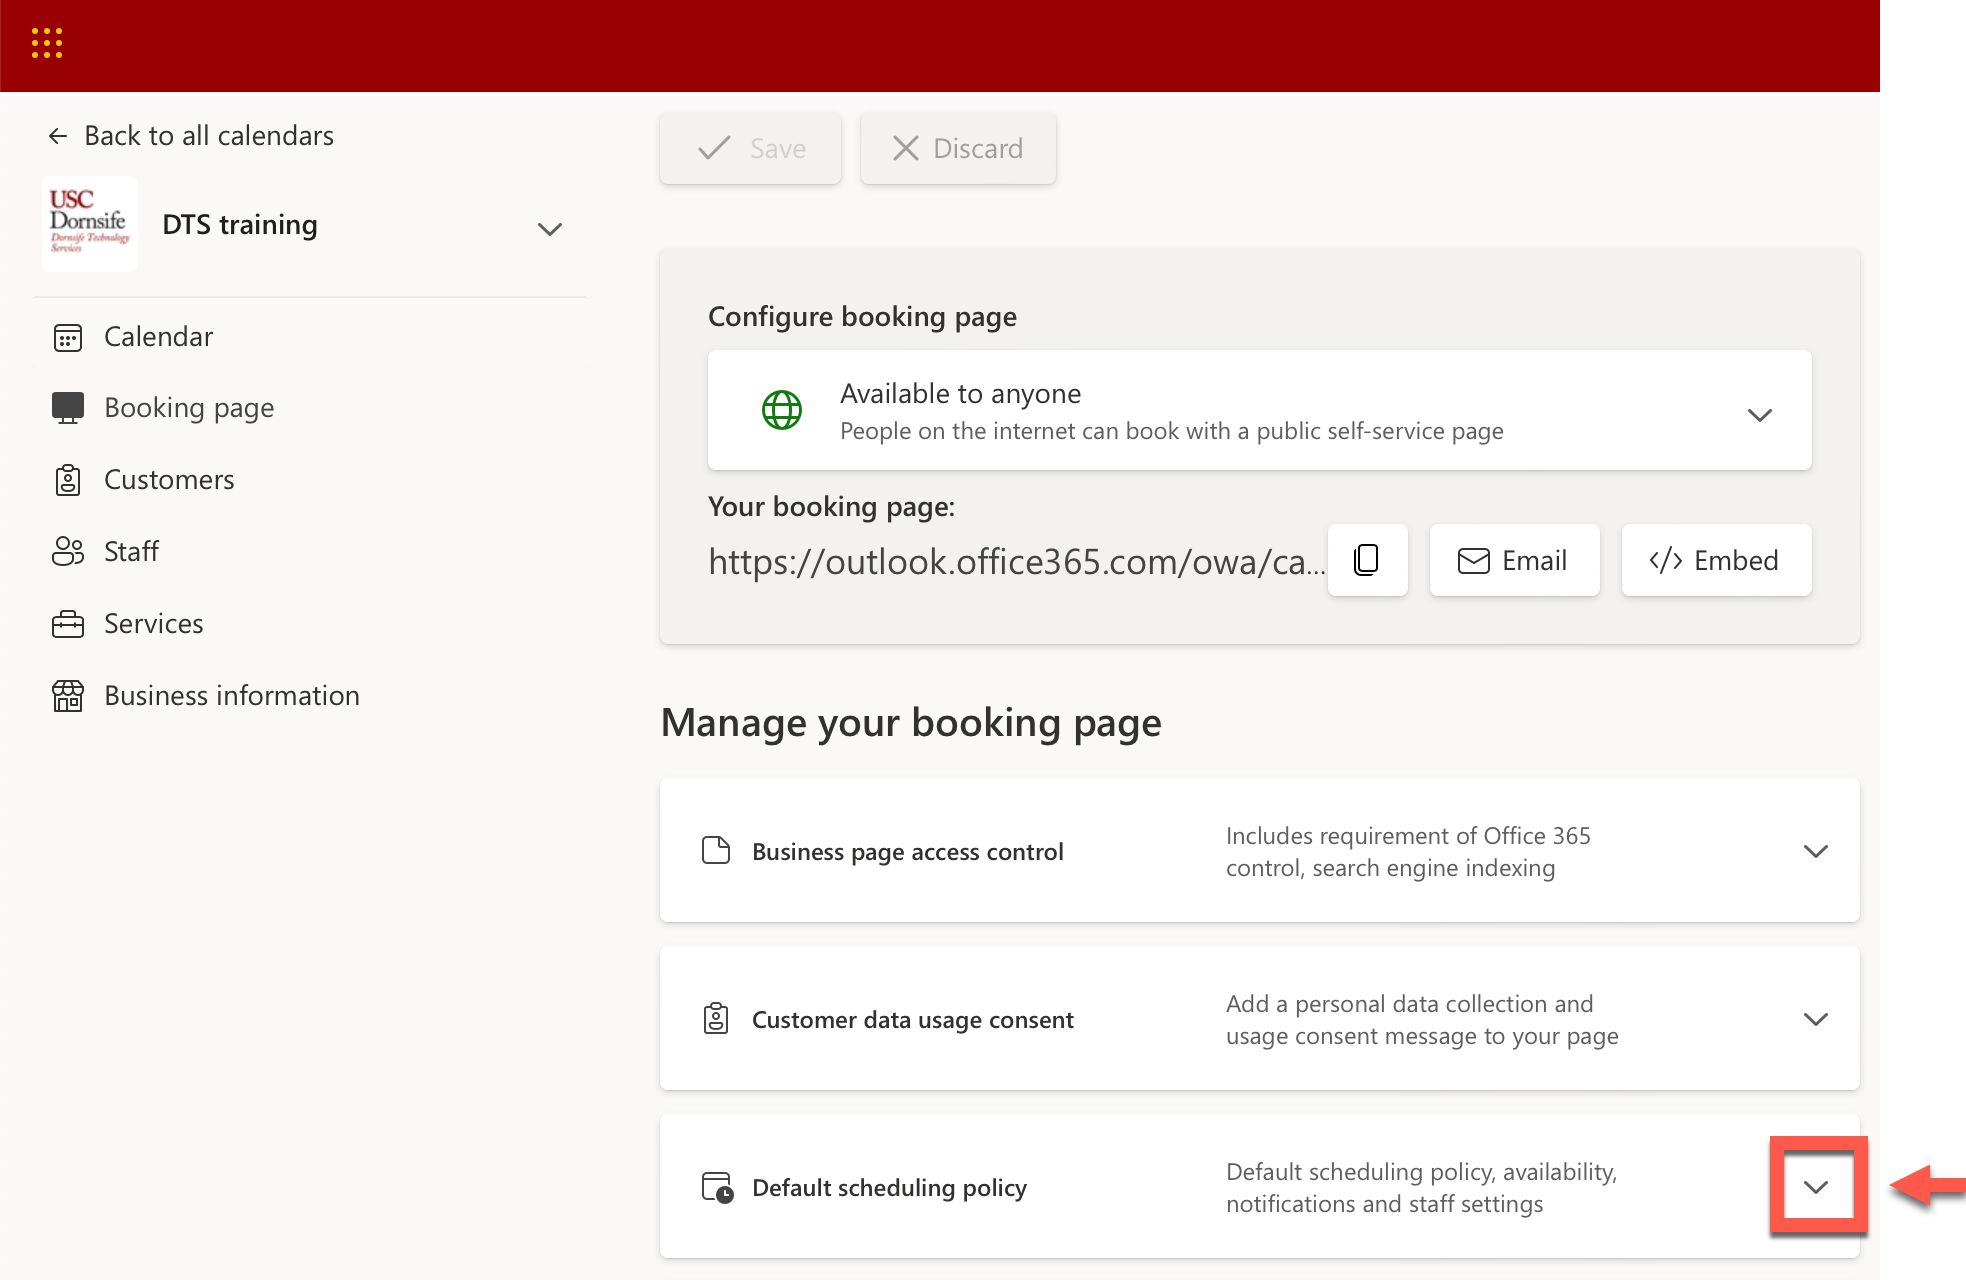
- Click + Set different availability for a time range.
- Select the dates that you are unavailable. Then, click the dropdown Bookable when staff are free and select Not bookable.
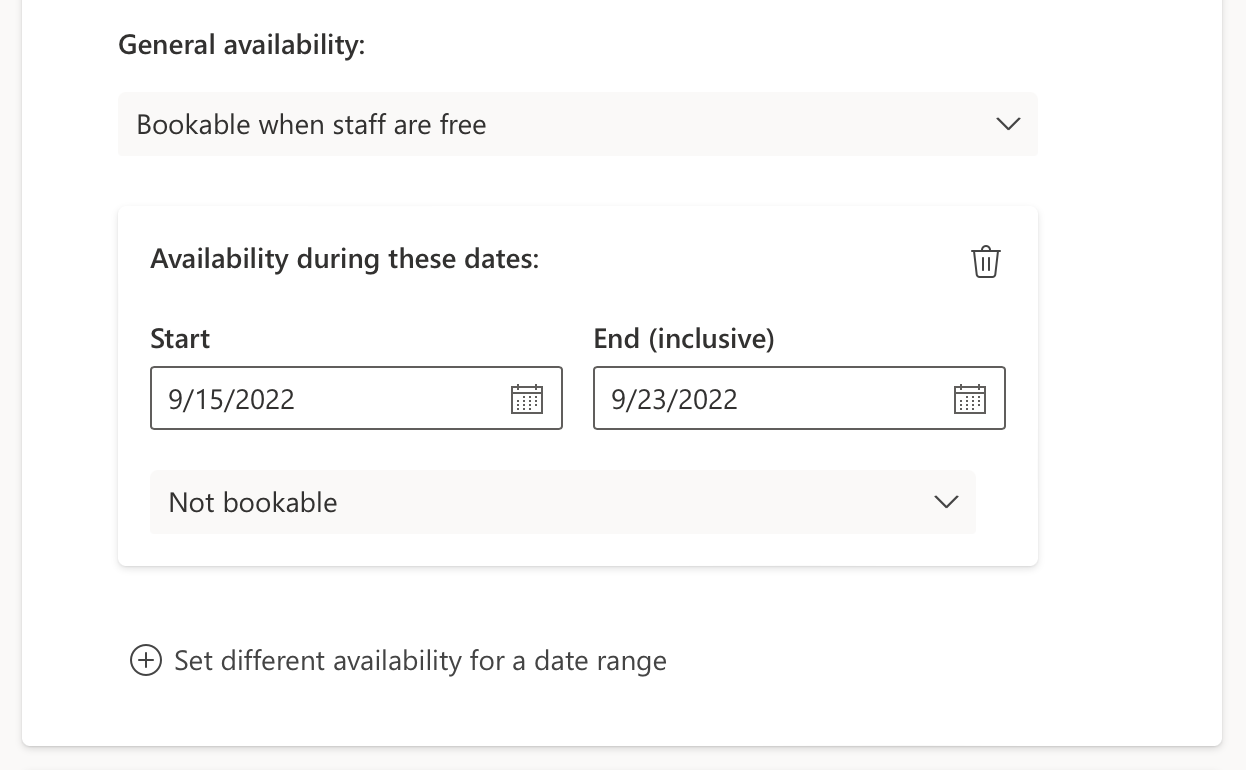
- Repeat steps 3–4 if you need to block off more dates.
- Scroll to the top and click Save.
Customizing your calendar's appearance
Adjusting additional settings
Remove Microsoft Teams default