Quick guide
Step 1: Create the survey and add the answer choices
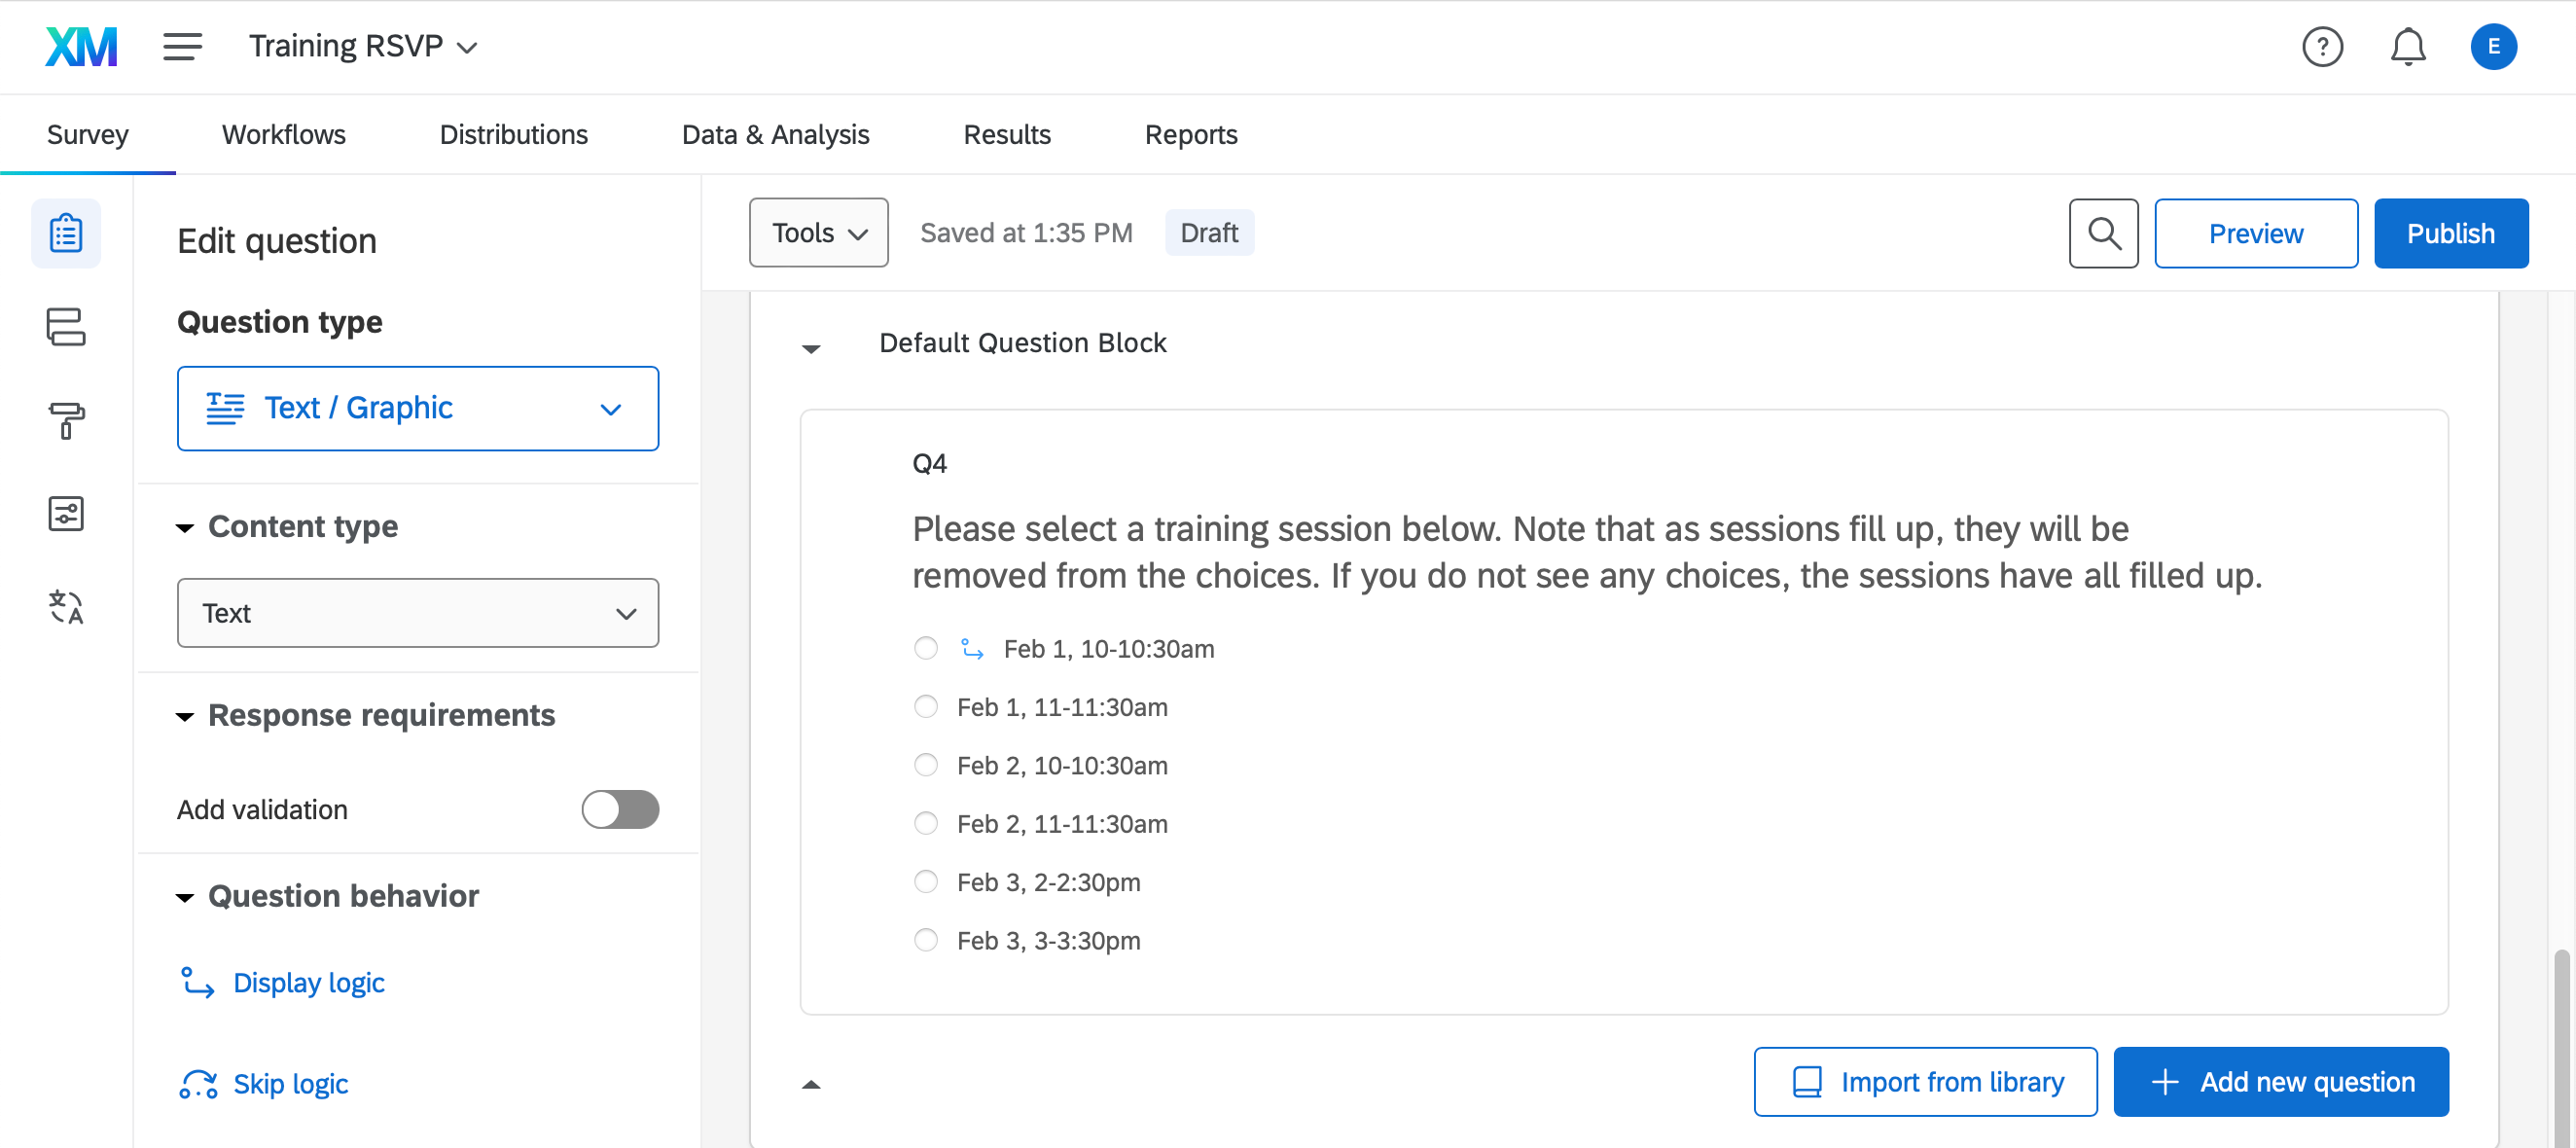
Follow the standard steps to create the Qualtrics survey. Make sure to completely fill out the answer choices that you want to set up quotas for. We also suggest adding a heads up to respondents about the quota. For example: "As sessions fill up, they will be removed from the choices below. If you do not see any choices, the sessions have all filled up."
Step 2: Set up a quota for each answer choice
- In the left menu, click the
 icon for Survey options.
- Click Quotas.
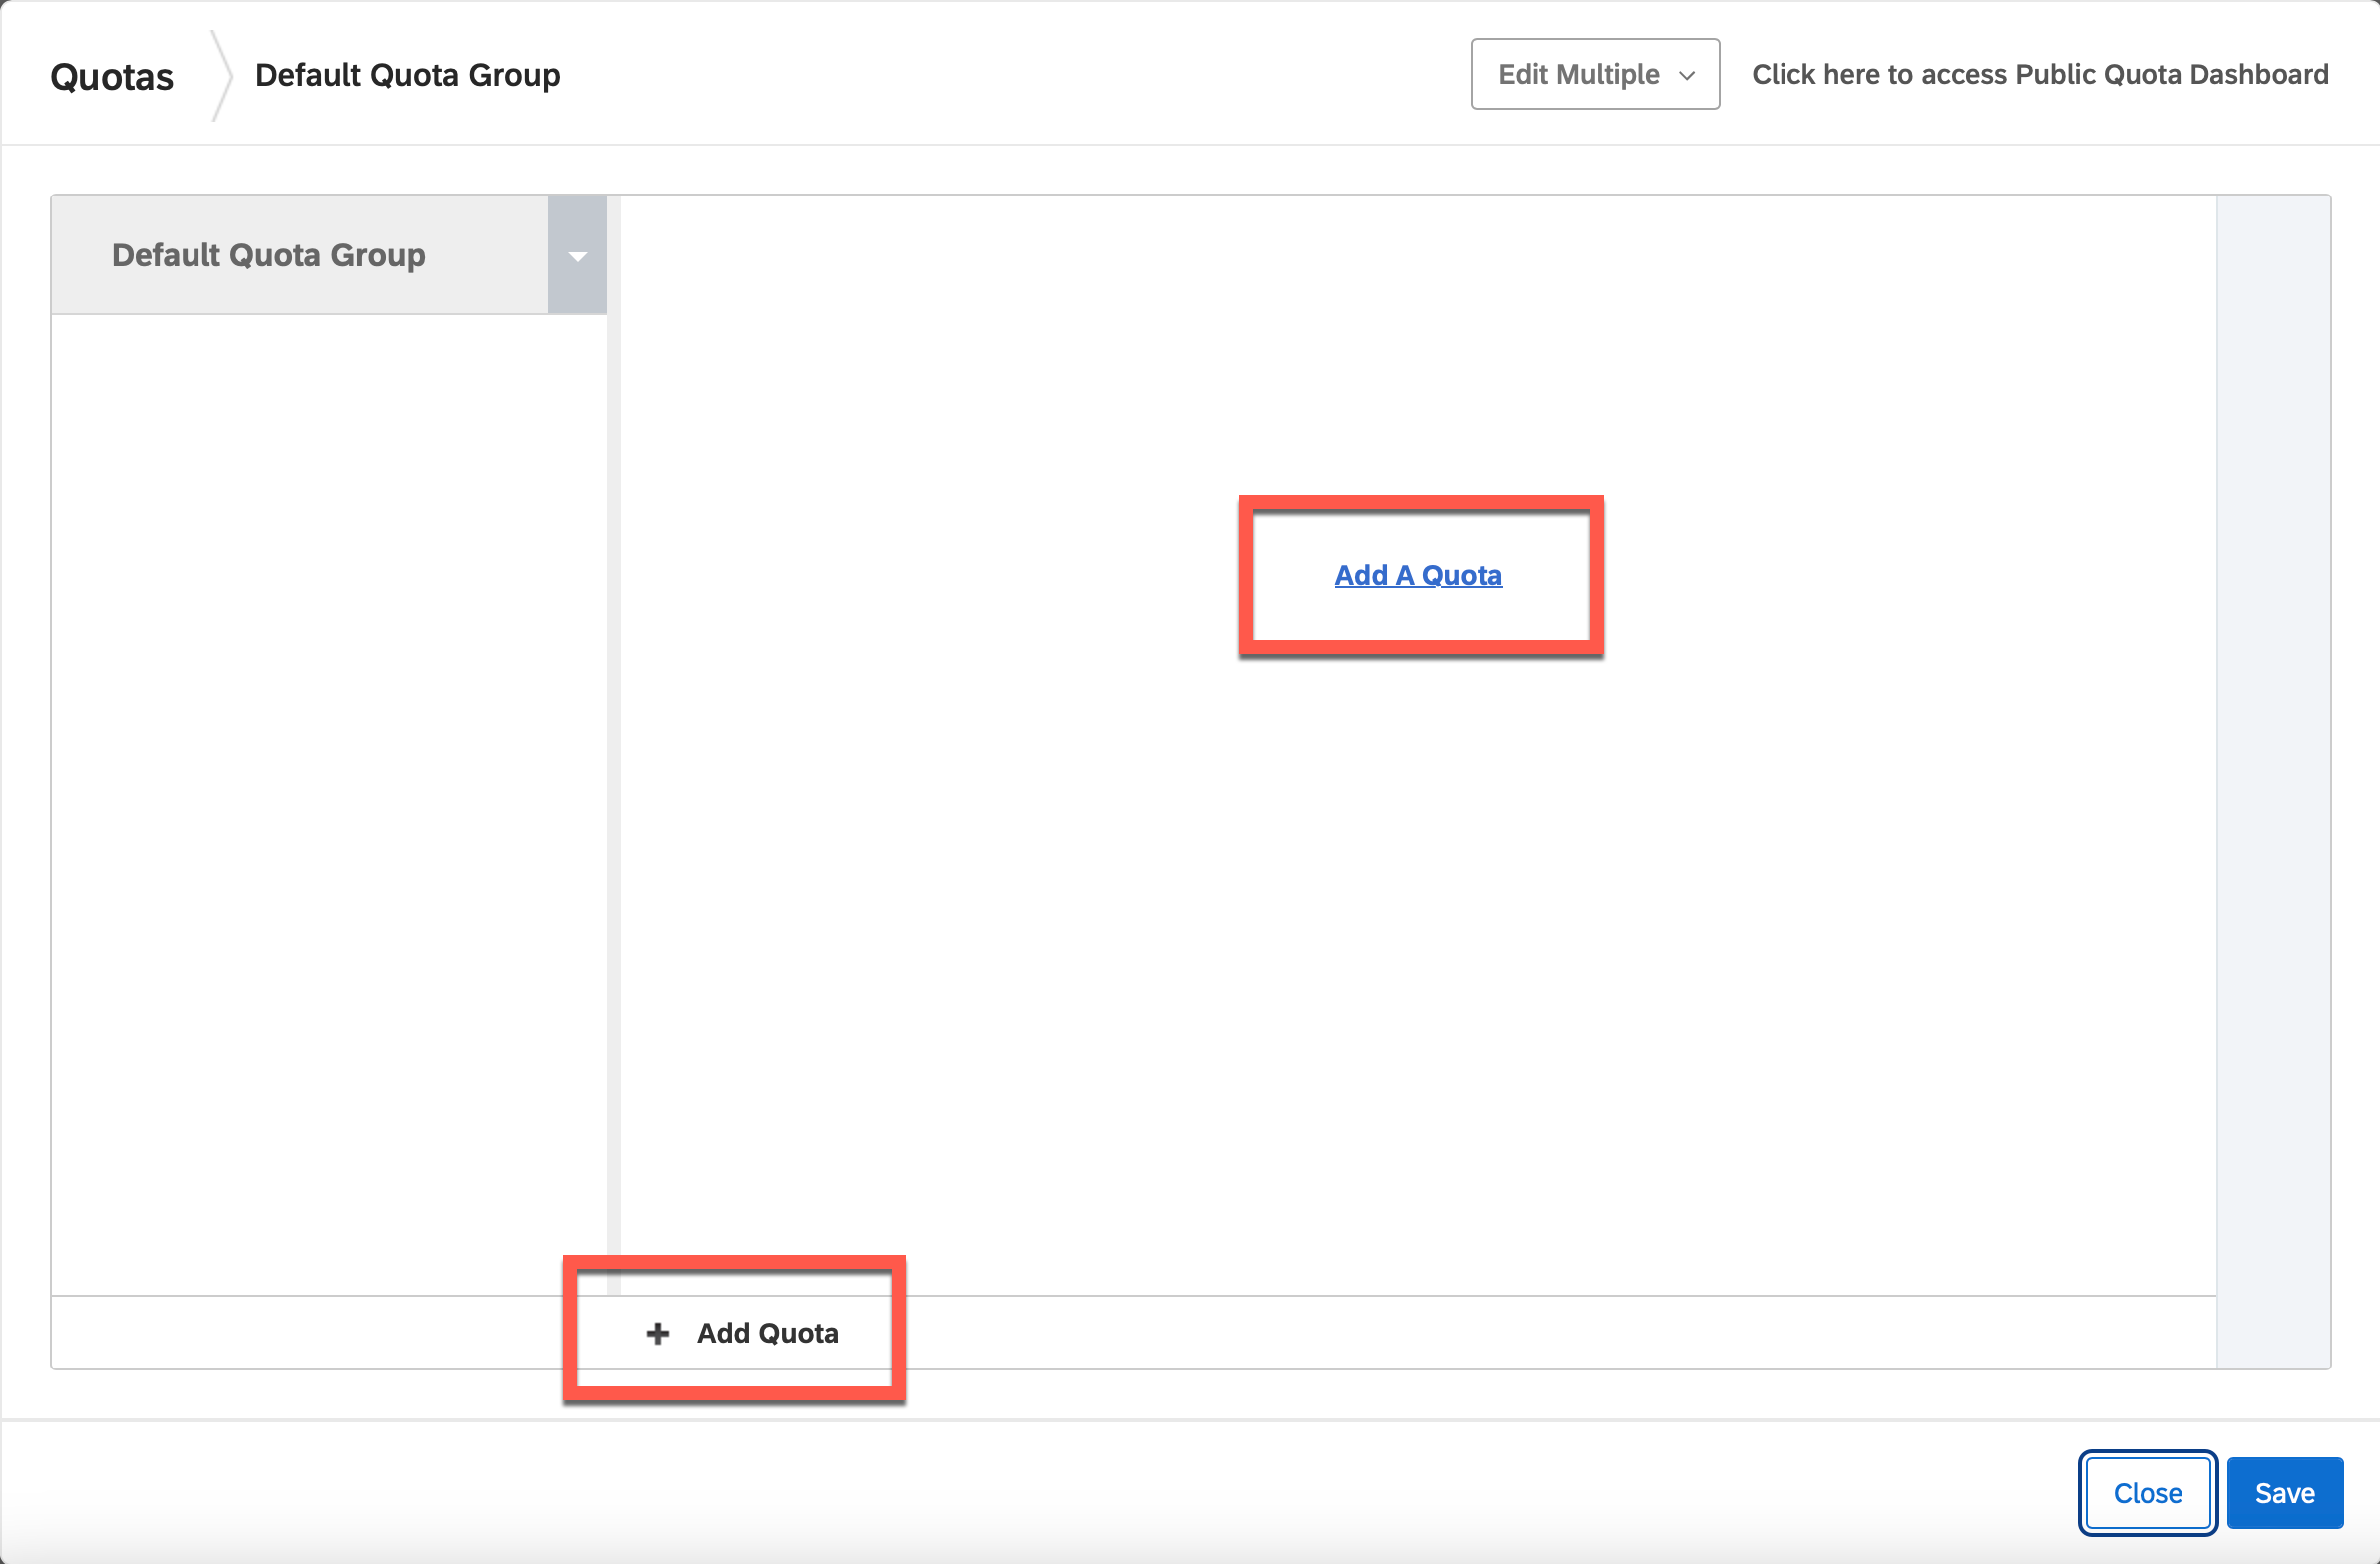
- Click Add a Quota or + Add Quota.
- In the right column:
- Click Select Question… and make a selection from the dropdown.
- Once the next field loads, click Select Choice… and make a selection from the dropdown. (It's normal for the quota fields to take a little while to load.)
- The next field correctly displays as Is Selected.
- Under "Quota options," click End Current Survey and select None (For Skip Logic or Survey Flow) from the dropdown.
- In the left column:
- Type your desired quota (the default is 100).
- Click New Quota to rename the quota (we suggest matching it to the name of the answer choice, so you can easily identify it).
- Continue to create a quota for each answer choice:
-
To add a quota from scratch: Click + Add Quota and follow the steps above.
-
To duplicate a quota: Click on the down arrow next to the quota name, and select Copy from the dropdown. Click on the new quota you just created. Make sure that you update all the necessary fields for your new quota (particularly the quota name and the answer choice).
-
To delete a quota: Click on the down-facing arrow next to the quota name, and select Delete from the dropdown.
- When finished, click Save.
Step 3: Add display logic to hide each answer choice once it has reached its respective quota
- Return to your survey (in the left menu, click the
 icon for Builder).
- Click on an answer choice that you created a quota for.
- Click the down arrow and select Add Display Logic… from the dropdown.
- Click Question and select Quota from the dropdown.
- Use the dropdown to select the quota matching the answer choice.
- Click Has Been Met and select Has Not Been Met from the dropdown. Now, the answer choice will only display if the quota has not been met, and will be hidden once the quota has been met.
- Click Save.
- A blue arrow icon appears next to the answer choice to indicate that display logic has been applied. Repeat these steps for each answer choice that you created a quota for.
Detailed guide (with screenshots)
Step 1: Create the survey and add the answer choices
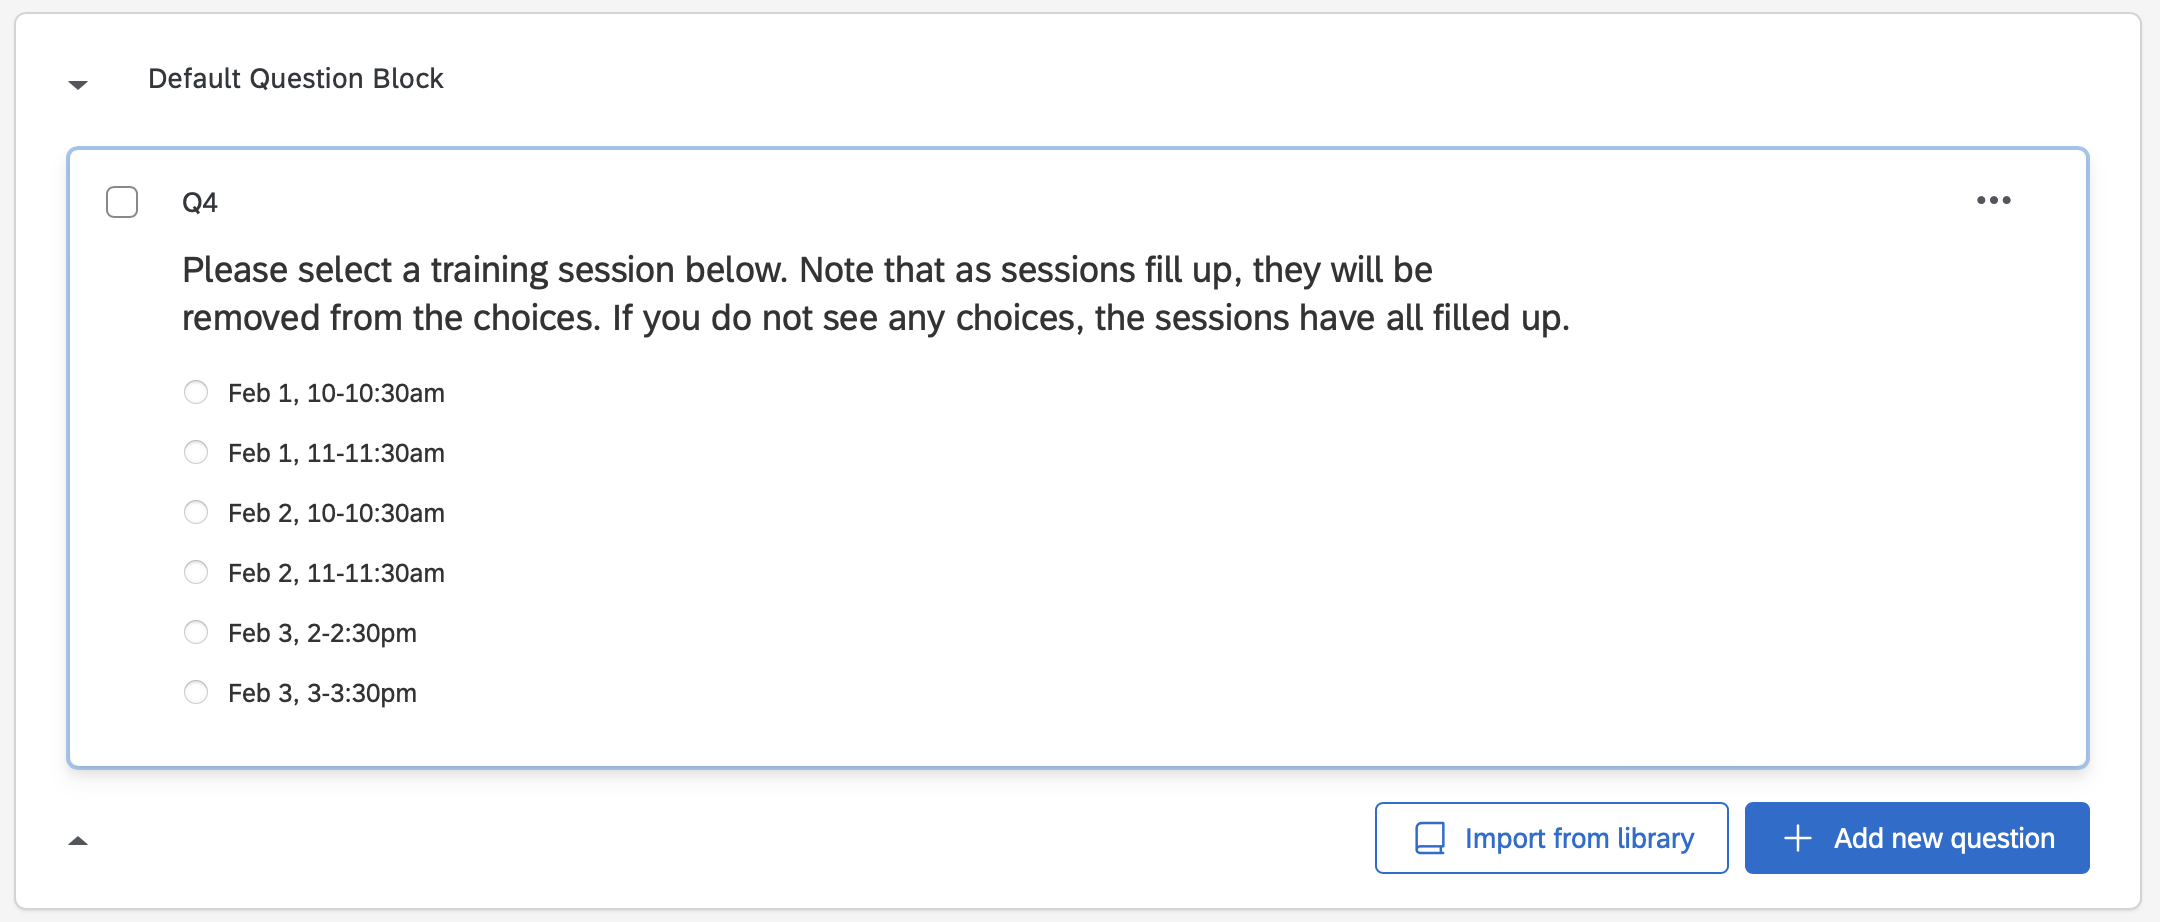
Follow the standard steps to create the Qualtrics survey. Make sure to completely fill out the answer choices that you want to set up quotas for. We also suggest adding a heads up to respondents about the quota. For example: "As sessions fill up, they will be removed from the choices below. If you do not see any choices, the sessions have all filled up."
Step 2: Set up a quota for each answer choice
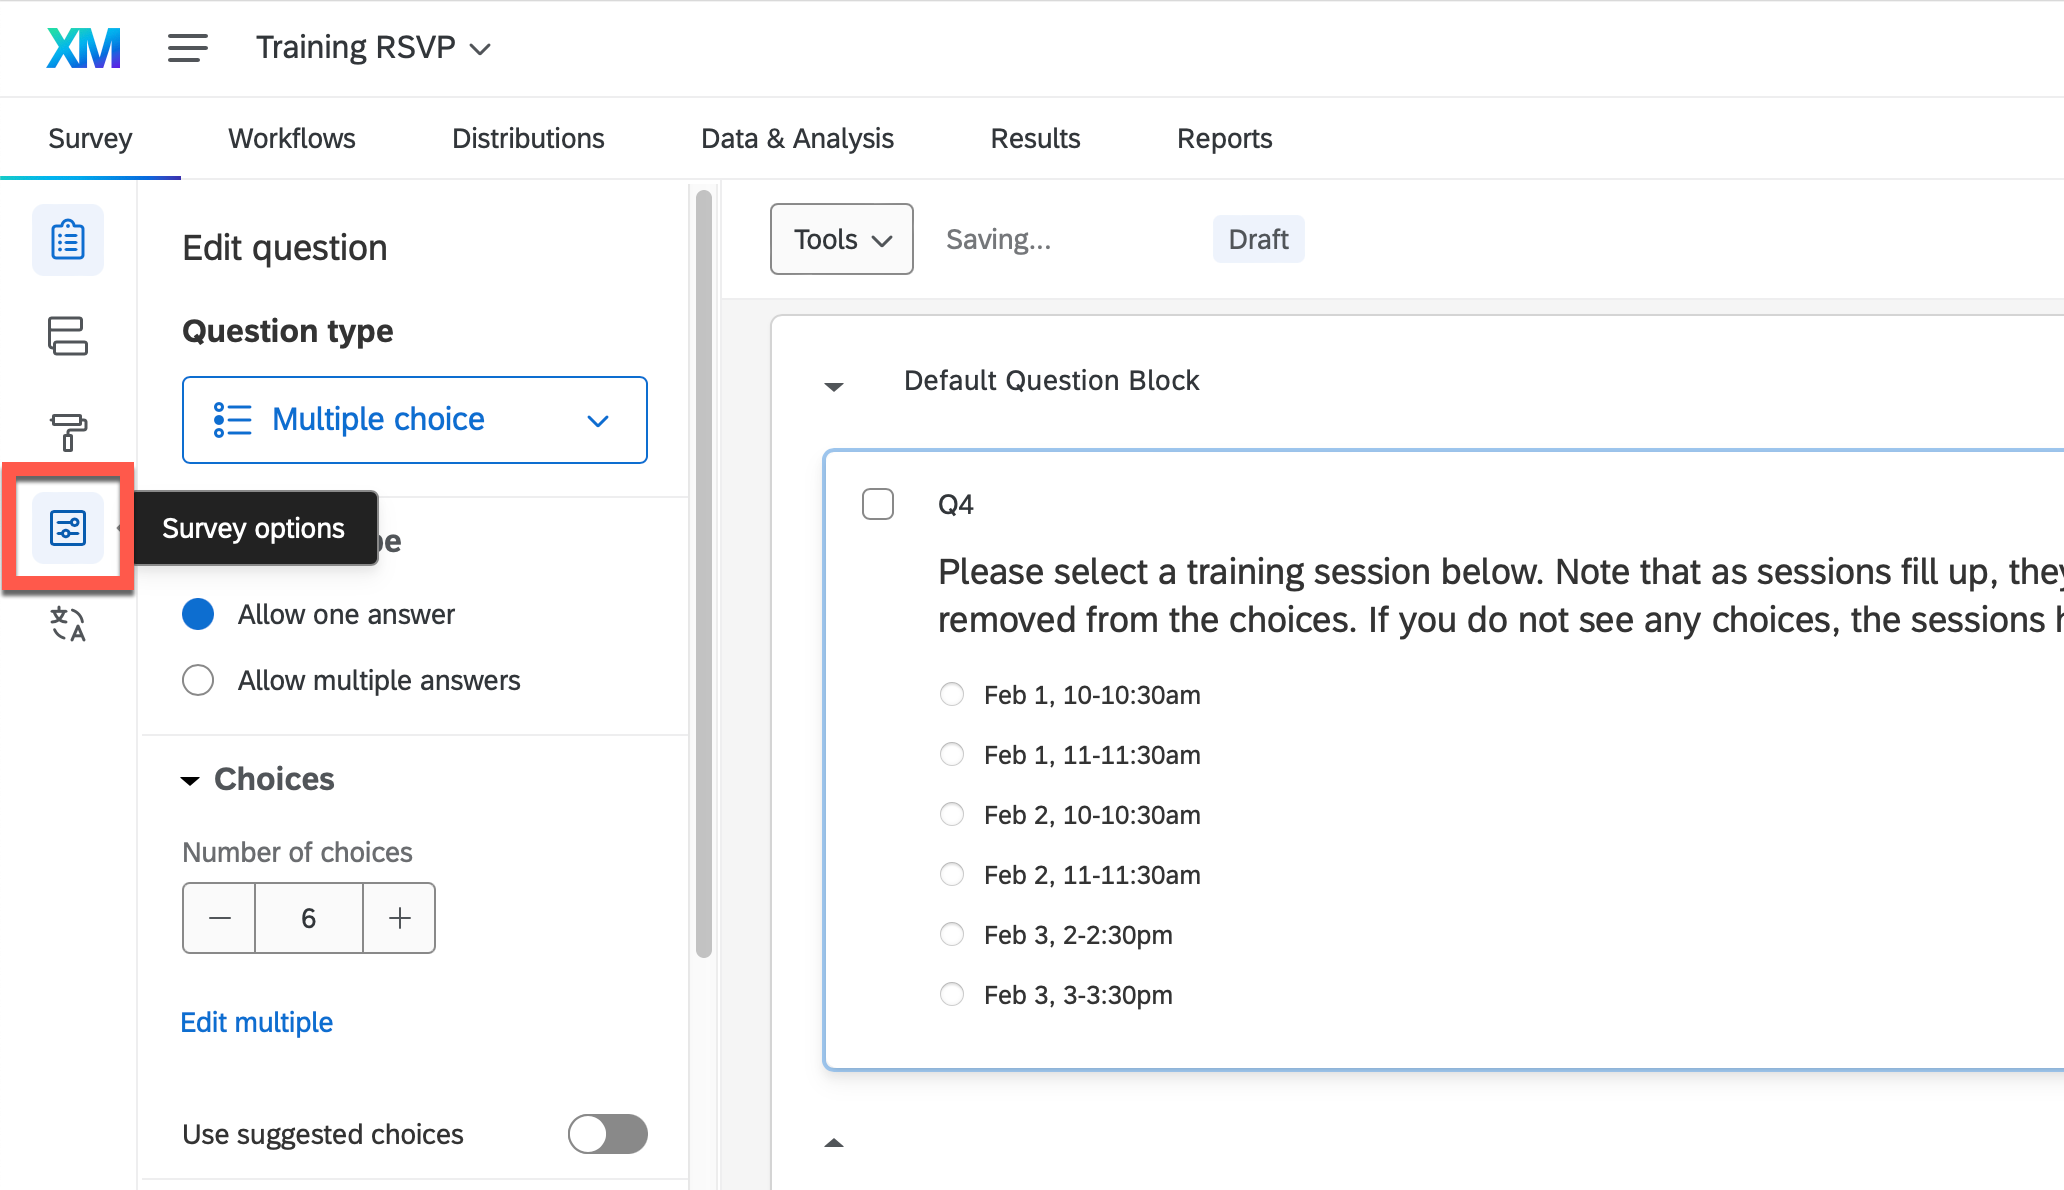
- In the left menu, click the
 icon for Survey options.
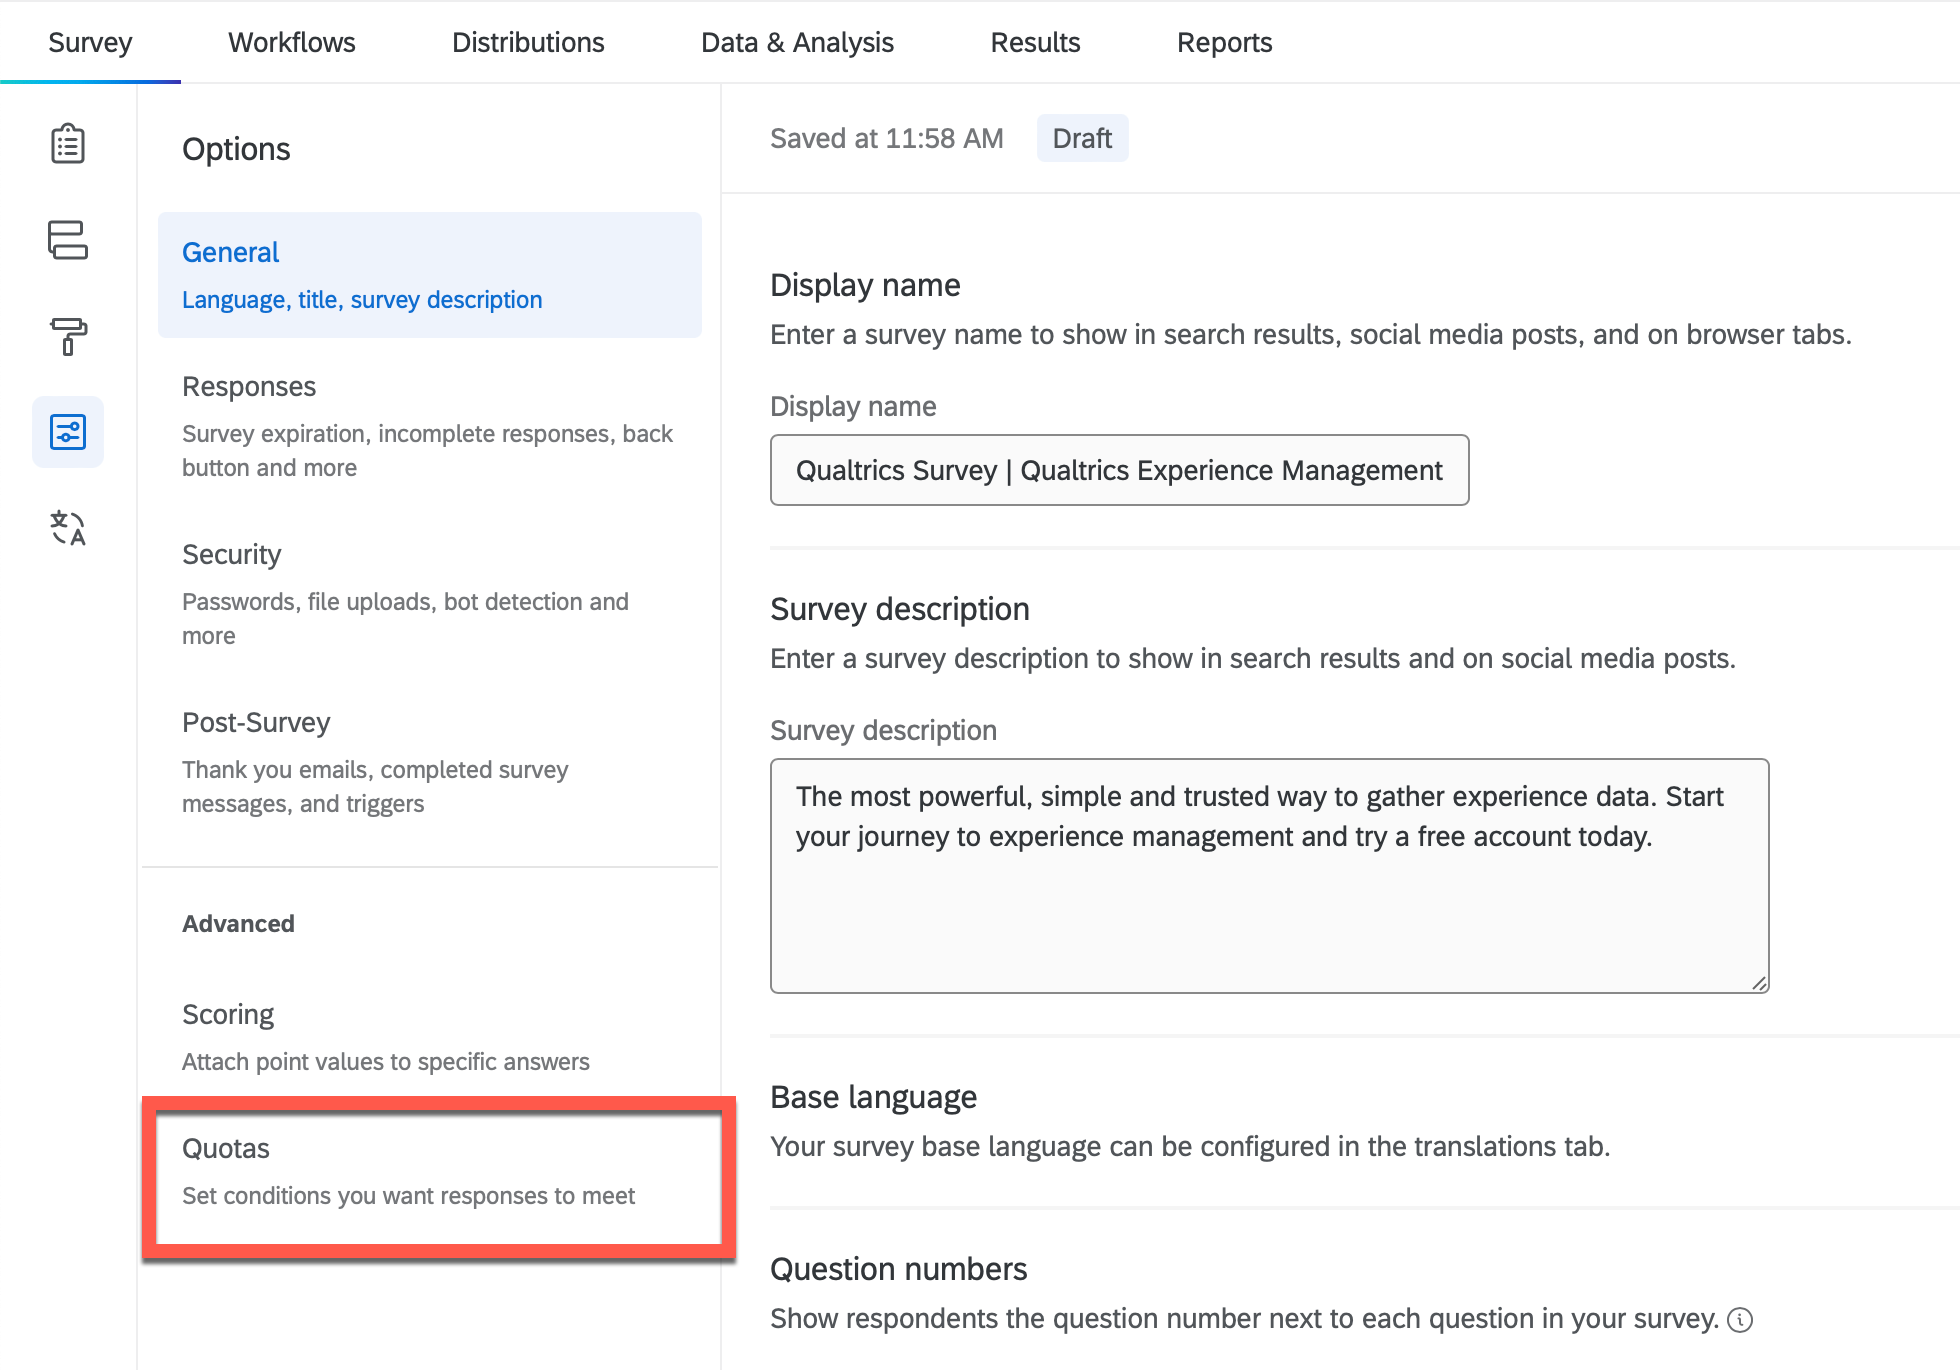
- Click Quotas.
- Click Add a Quota or + Add Quota.
- In the right column:
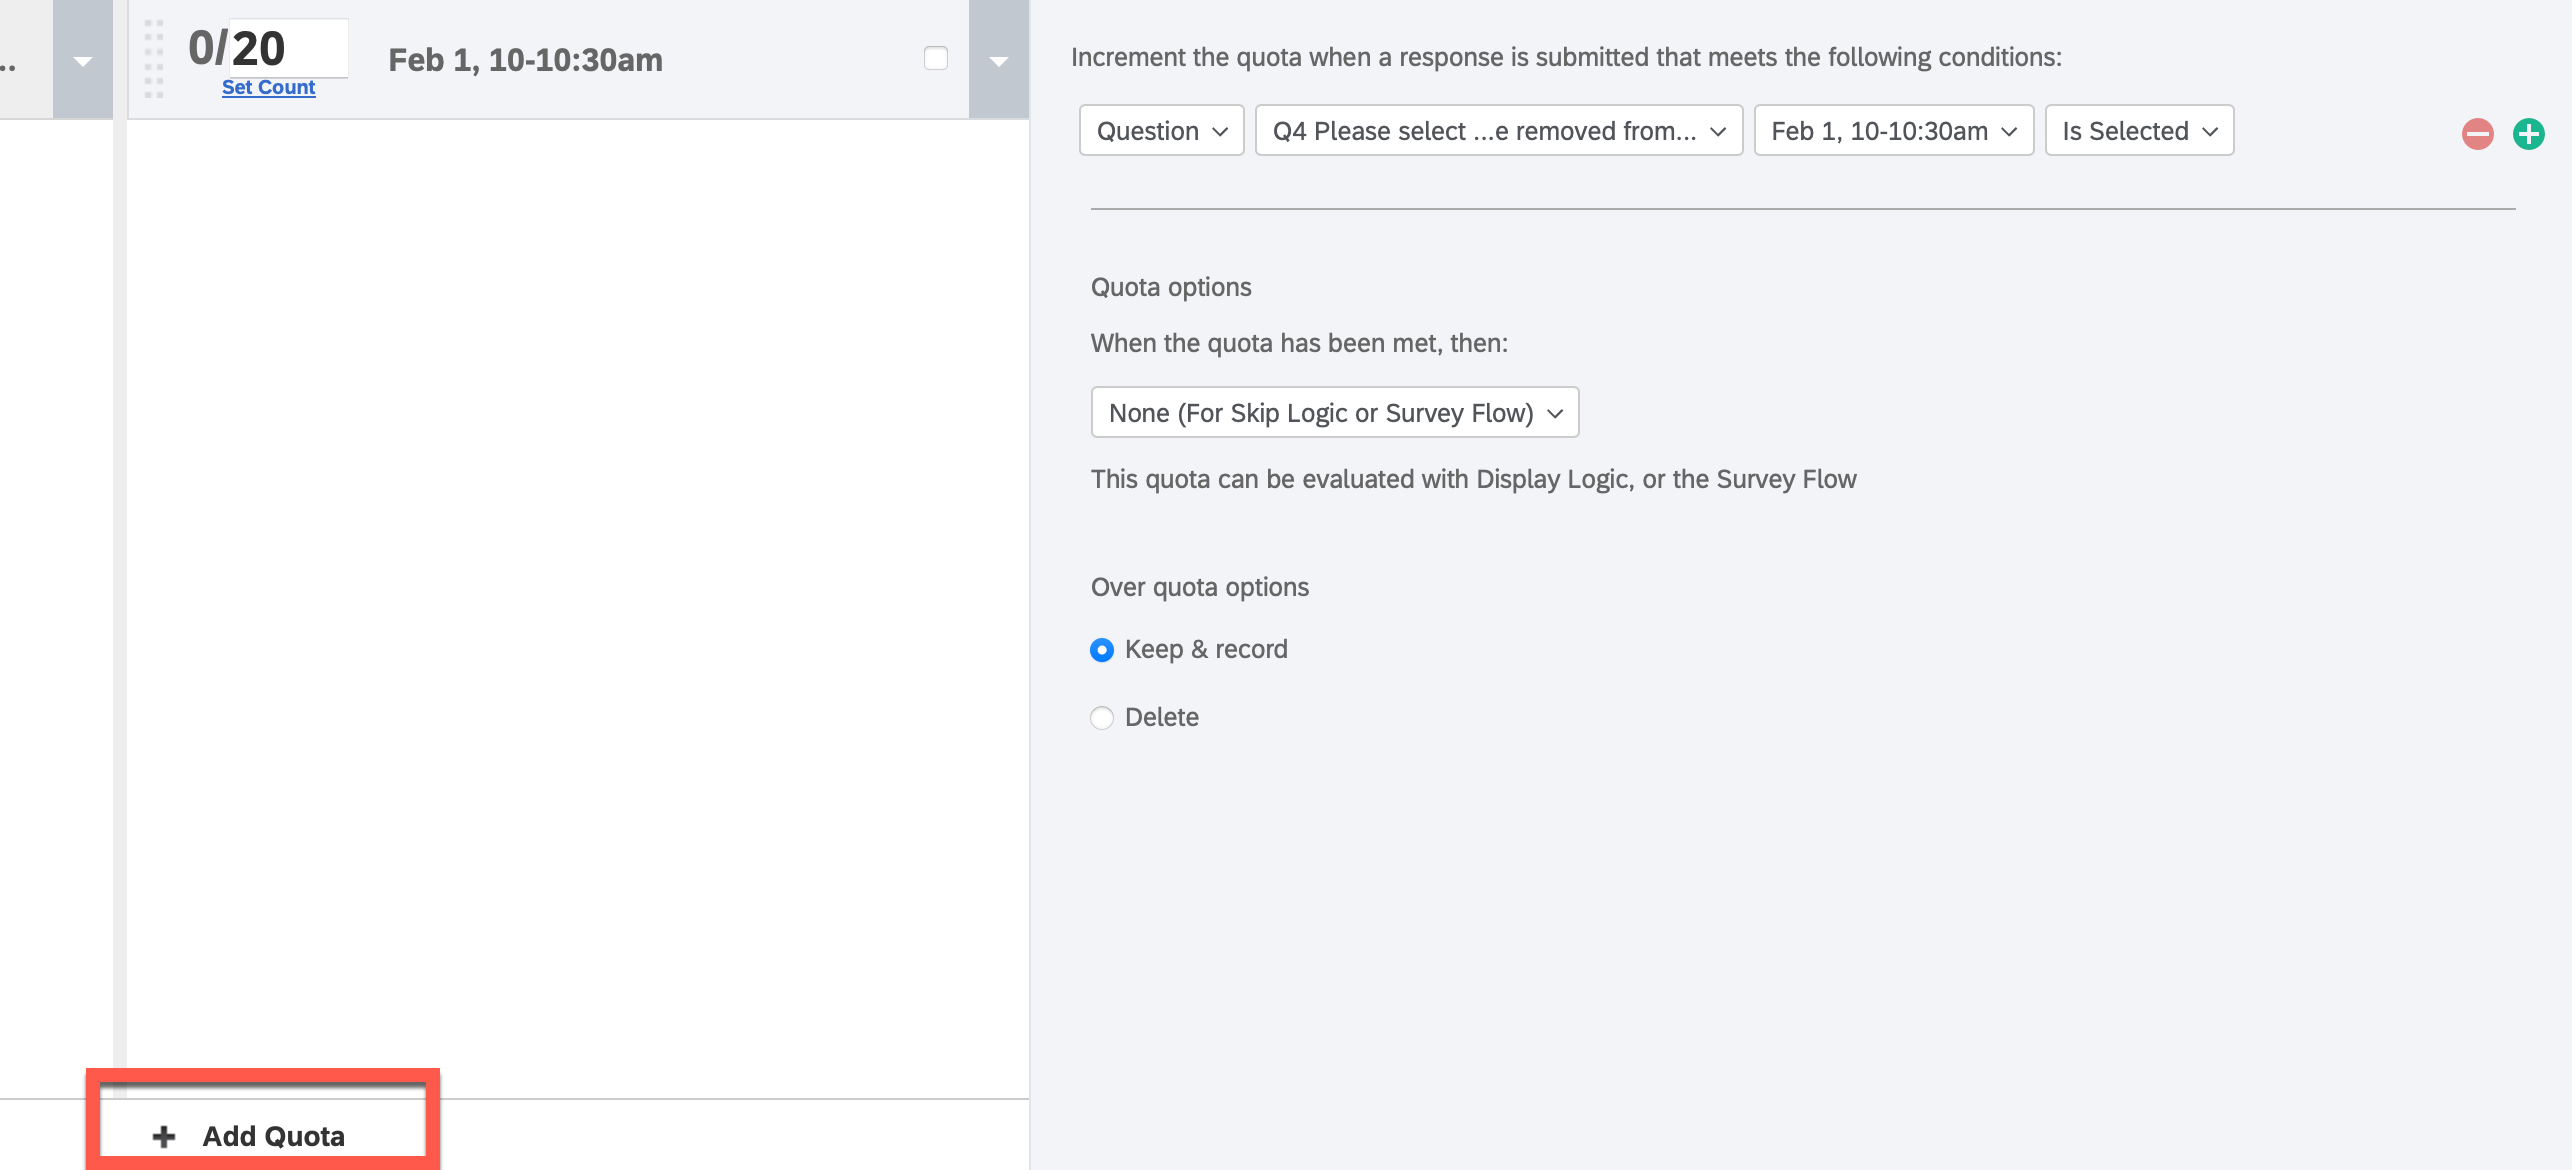
- Click Select Question… and make a selection from the dropdown.

- Once the next field loads, click Select Choice… and make a selection from the dropdown. (It's normal for the quota fields to take a little while to load.)

- The next field correctly displays as Is Selected.
- Under "Quota options," click End Current Survey and select None (For Skip Logic or Survey Flow) from the dropdown.

- In the left column:
- Type your desired quota (the default is 100).
- Click New Quota to rename the quota (we suggest matching it to the name of the answer choice, so you can easily identify it).


- Continue to create a quota for each answer choice:
-
To add a quota from scratch: Click + Add Quota and follow the steps above.
-
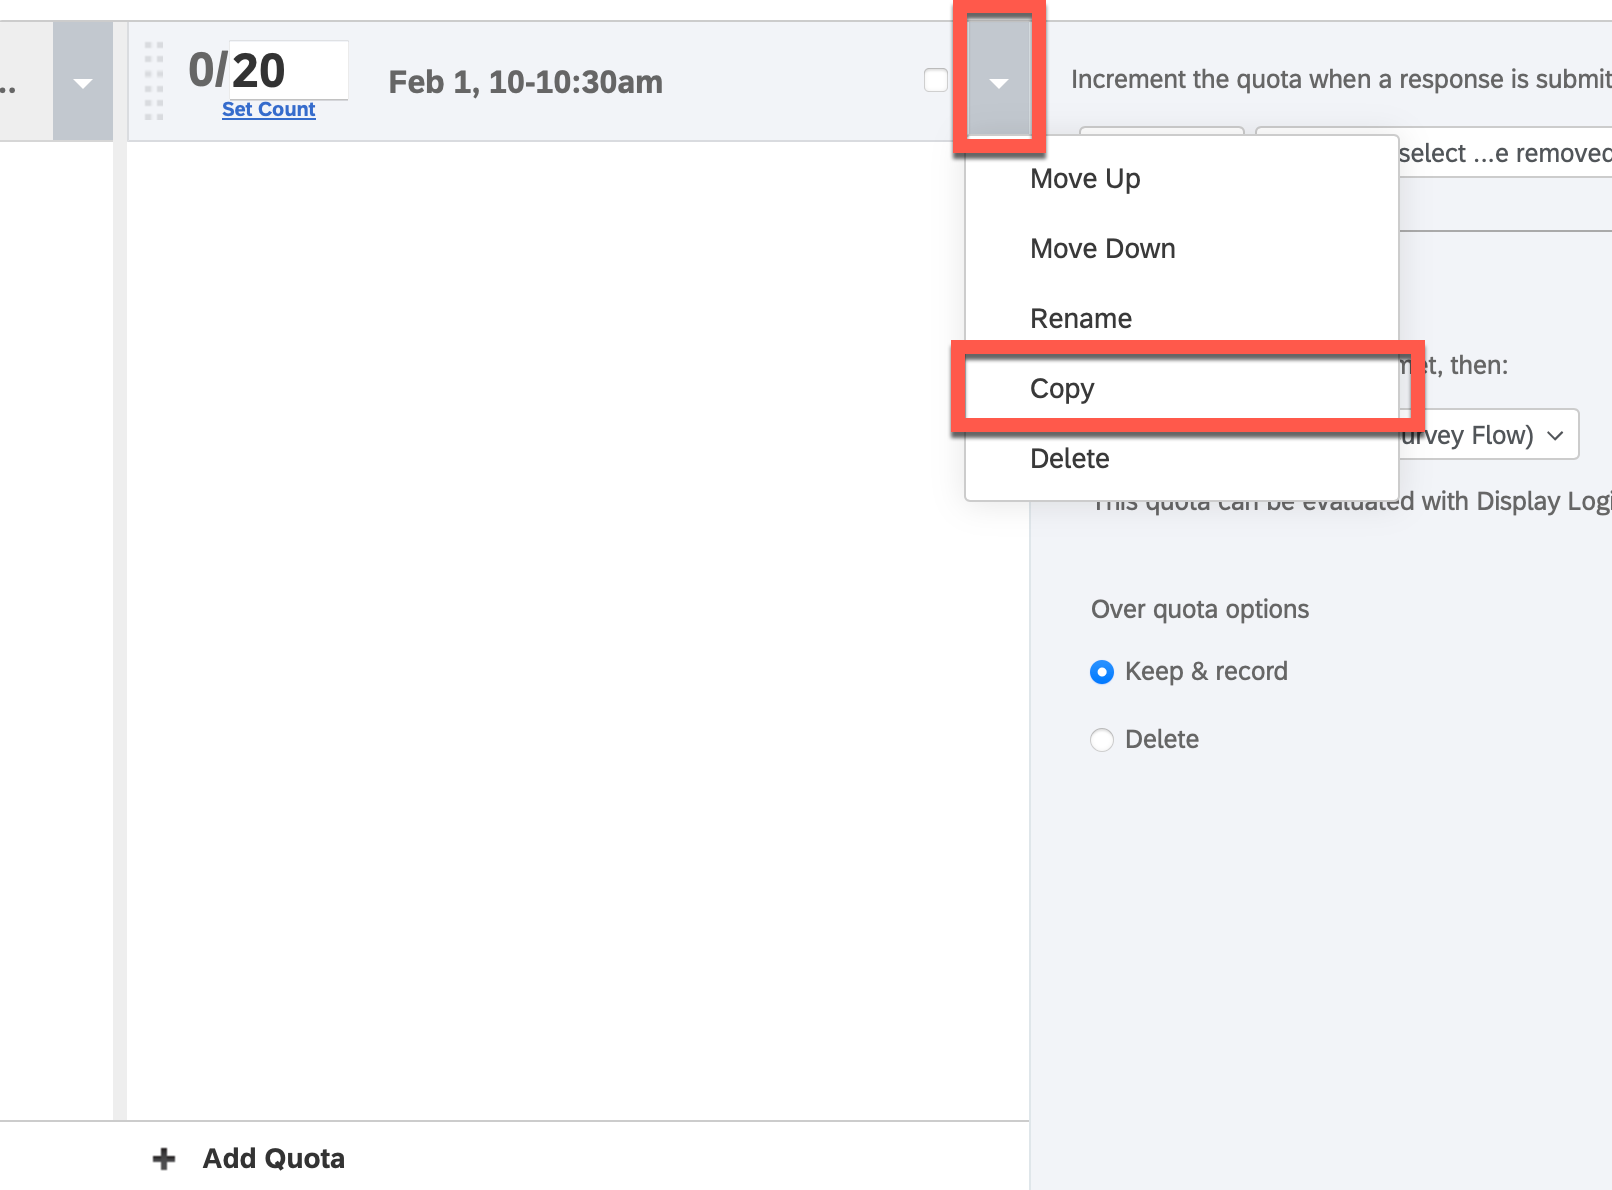
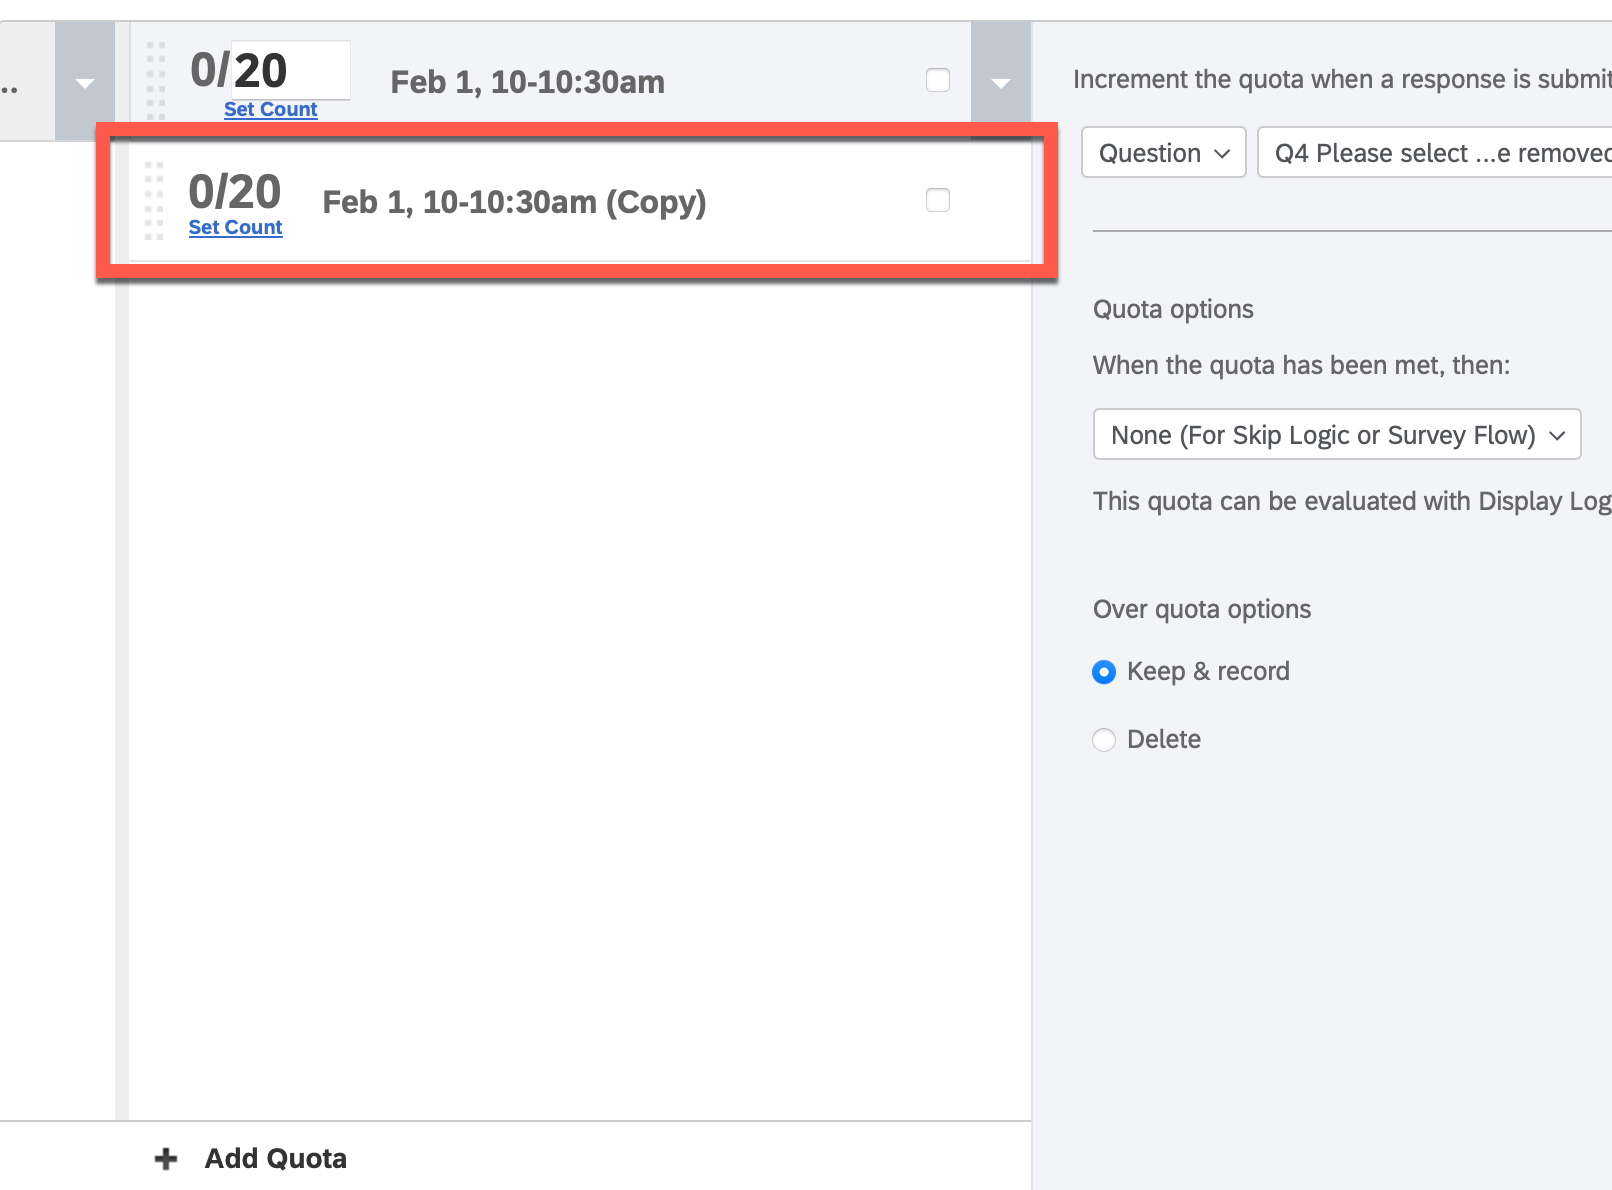
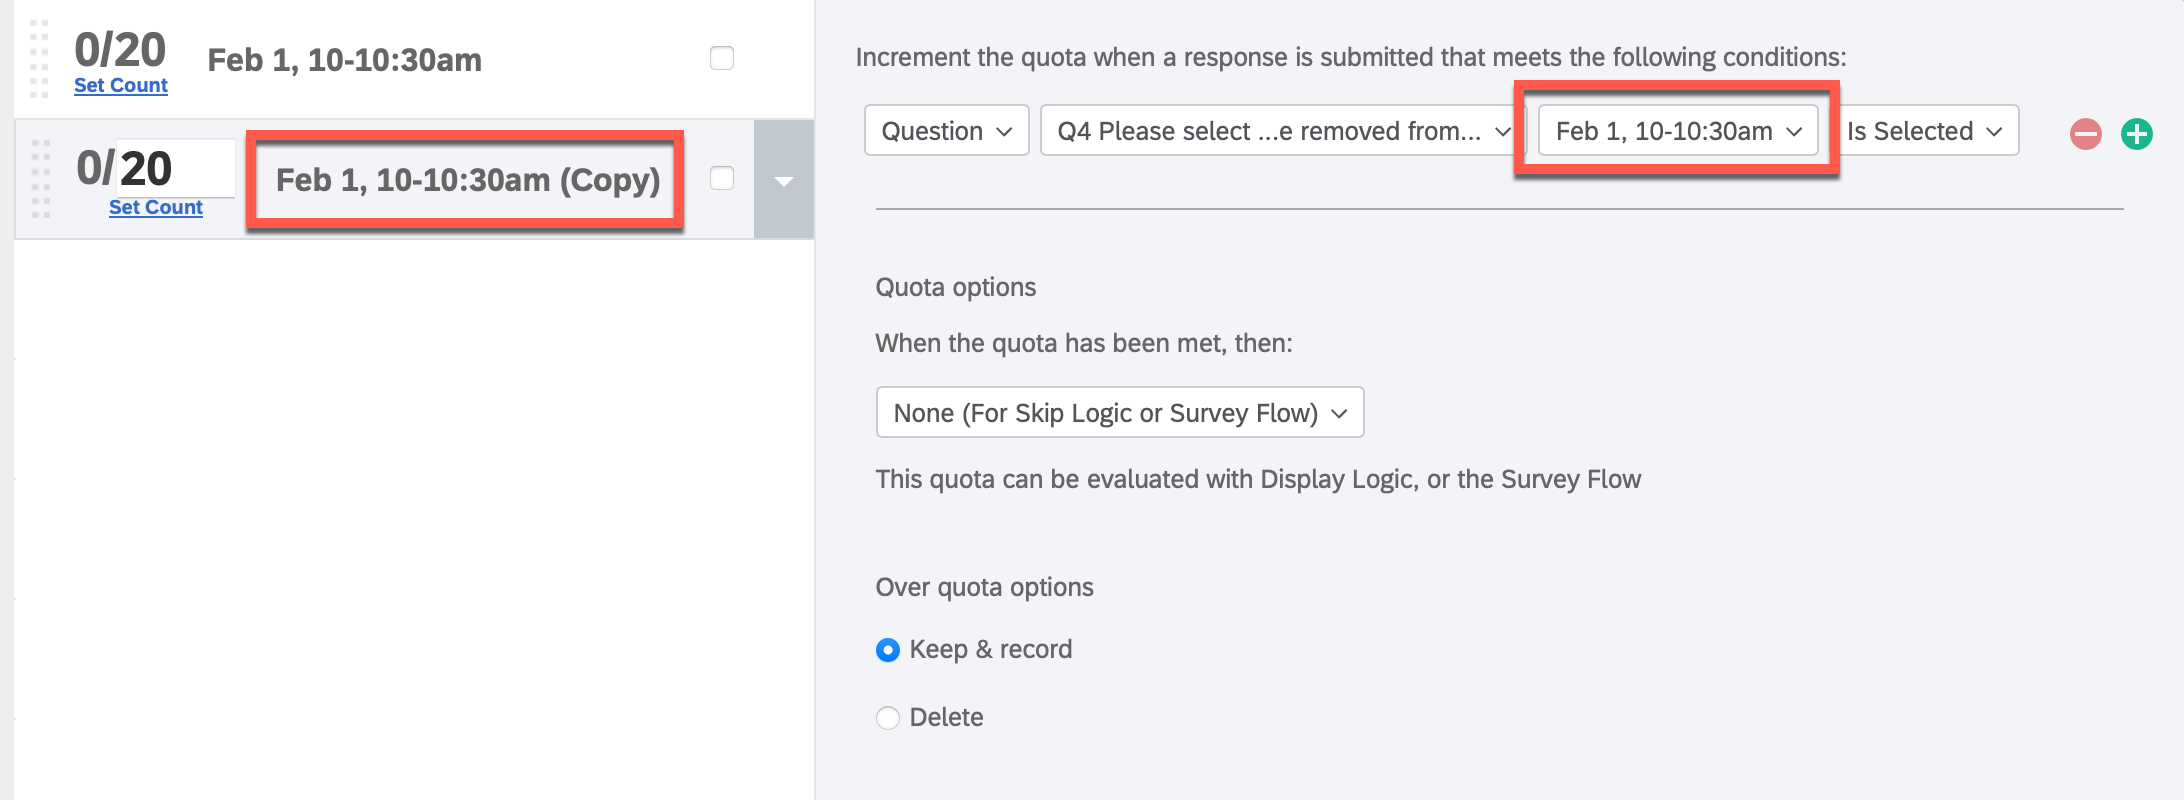
To duplicate a quota: Click on the down arrow next to the quota name, and select Copy from the dropdown. Click on the new quota you just created. Make sure that you update all the necessary fields for your new quota (particularly the quota name and the answer choice).

-
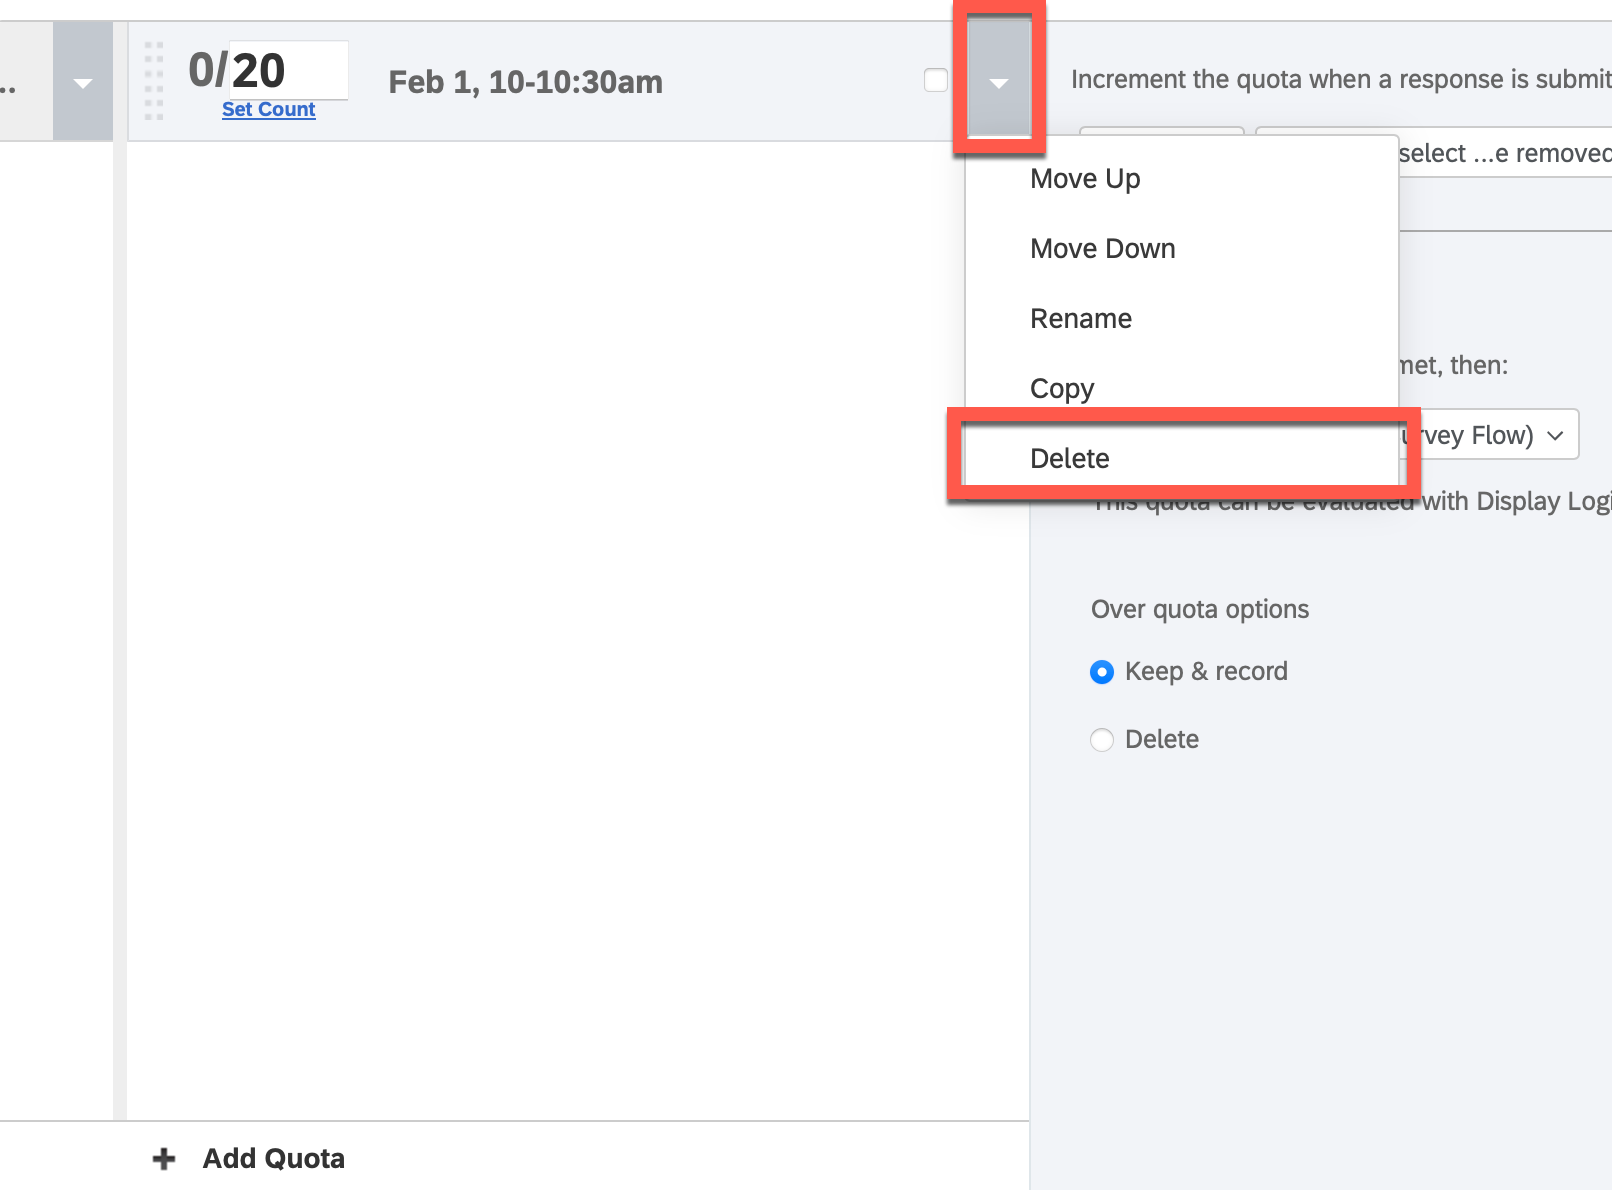
To delete a quota: Click on the down-facing arrow next to the quota name, and select Delete from the dropdown.
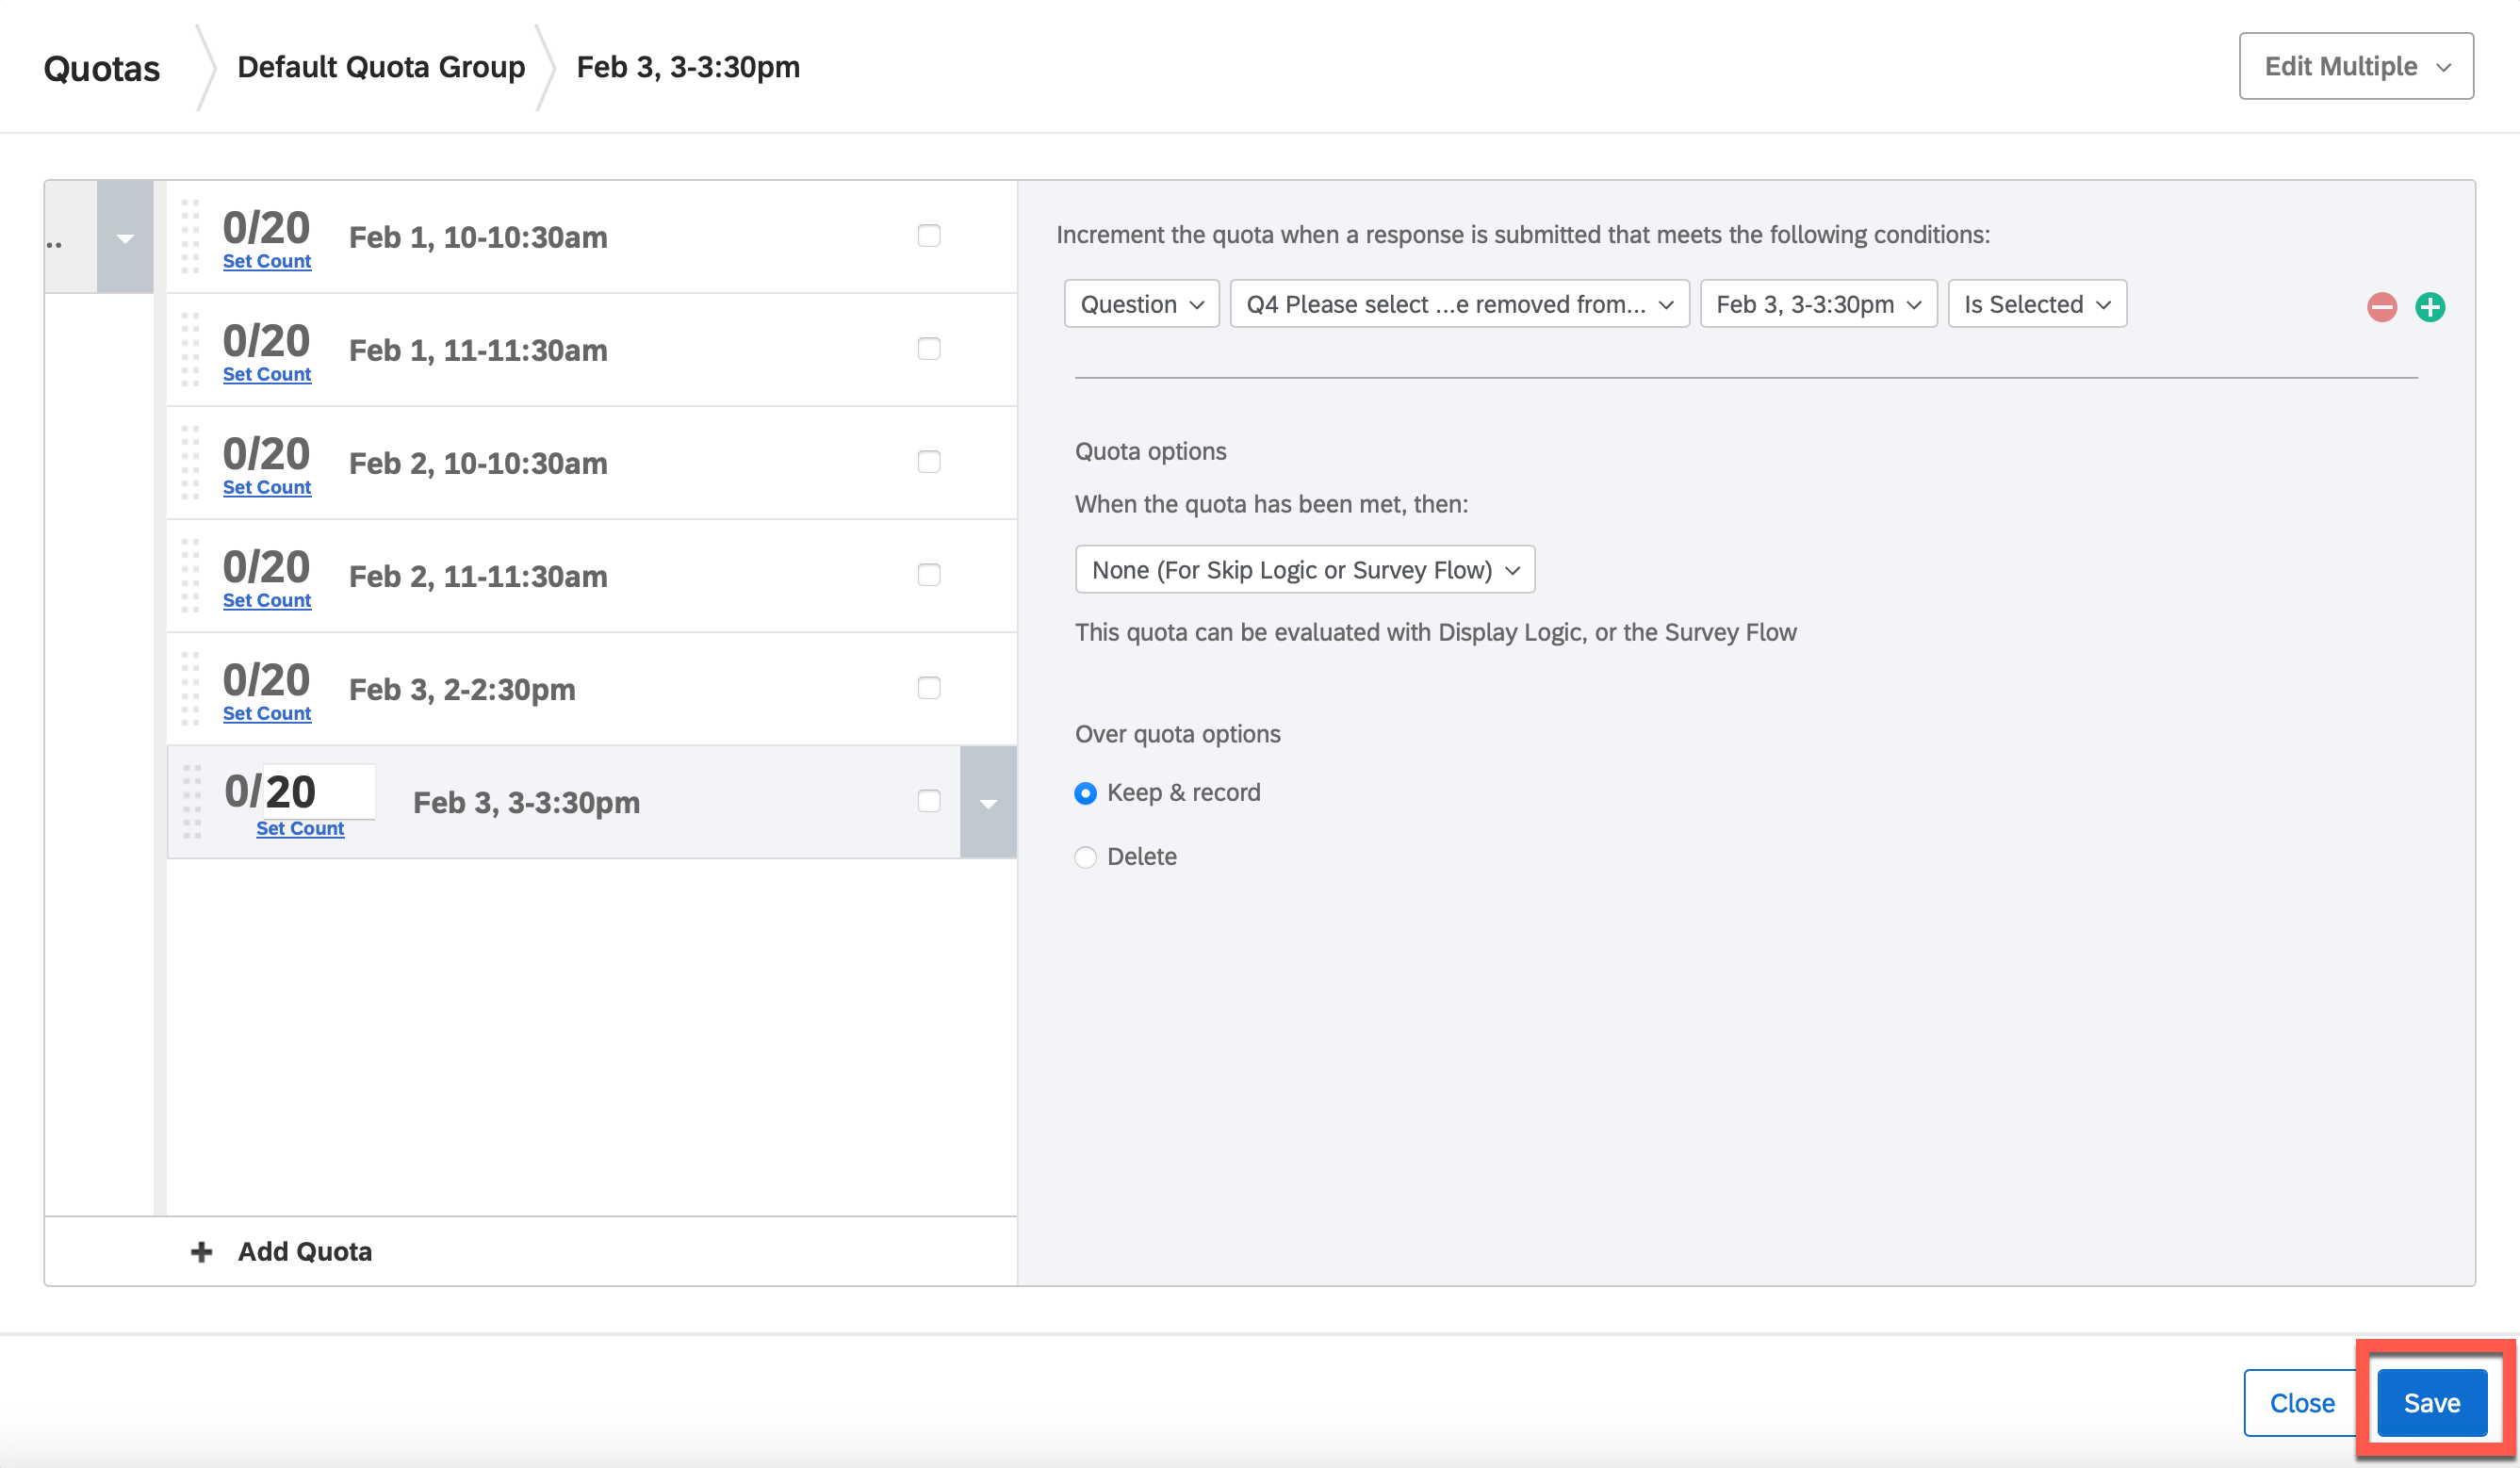
- When finished, click Save.
Step 3: Add display logic to hide each answer choice once it has reached its respective quota
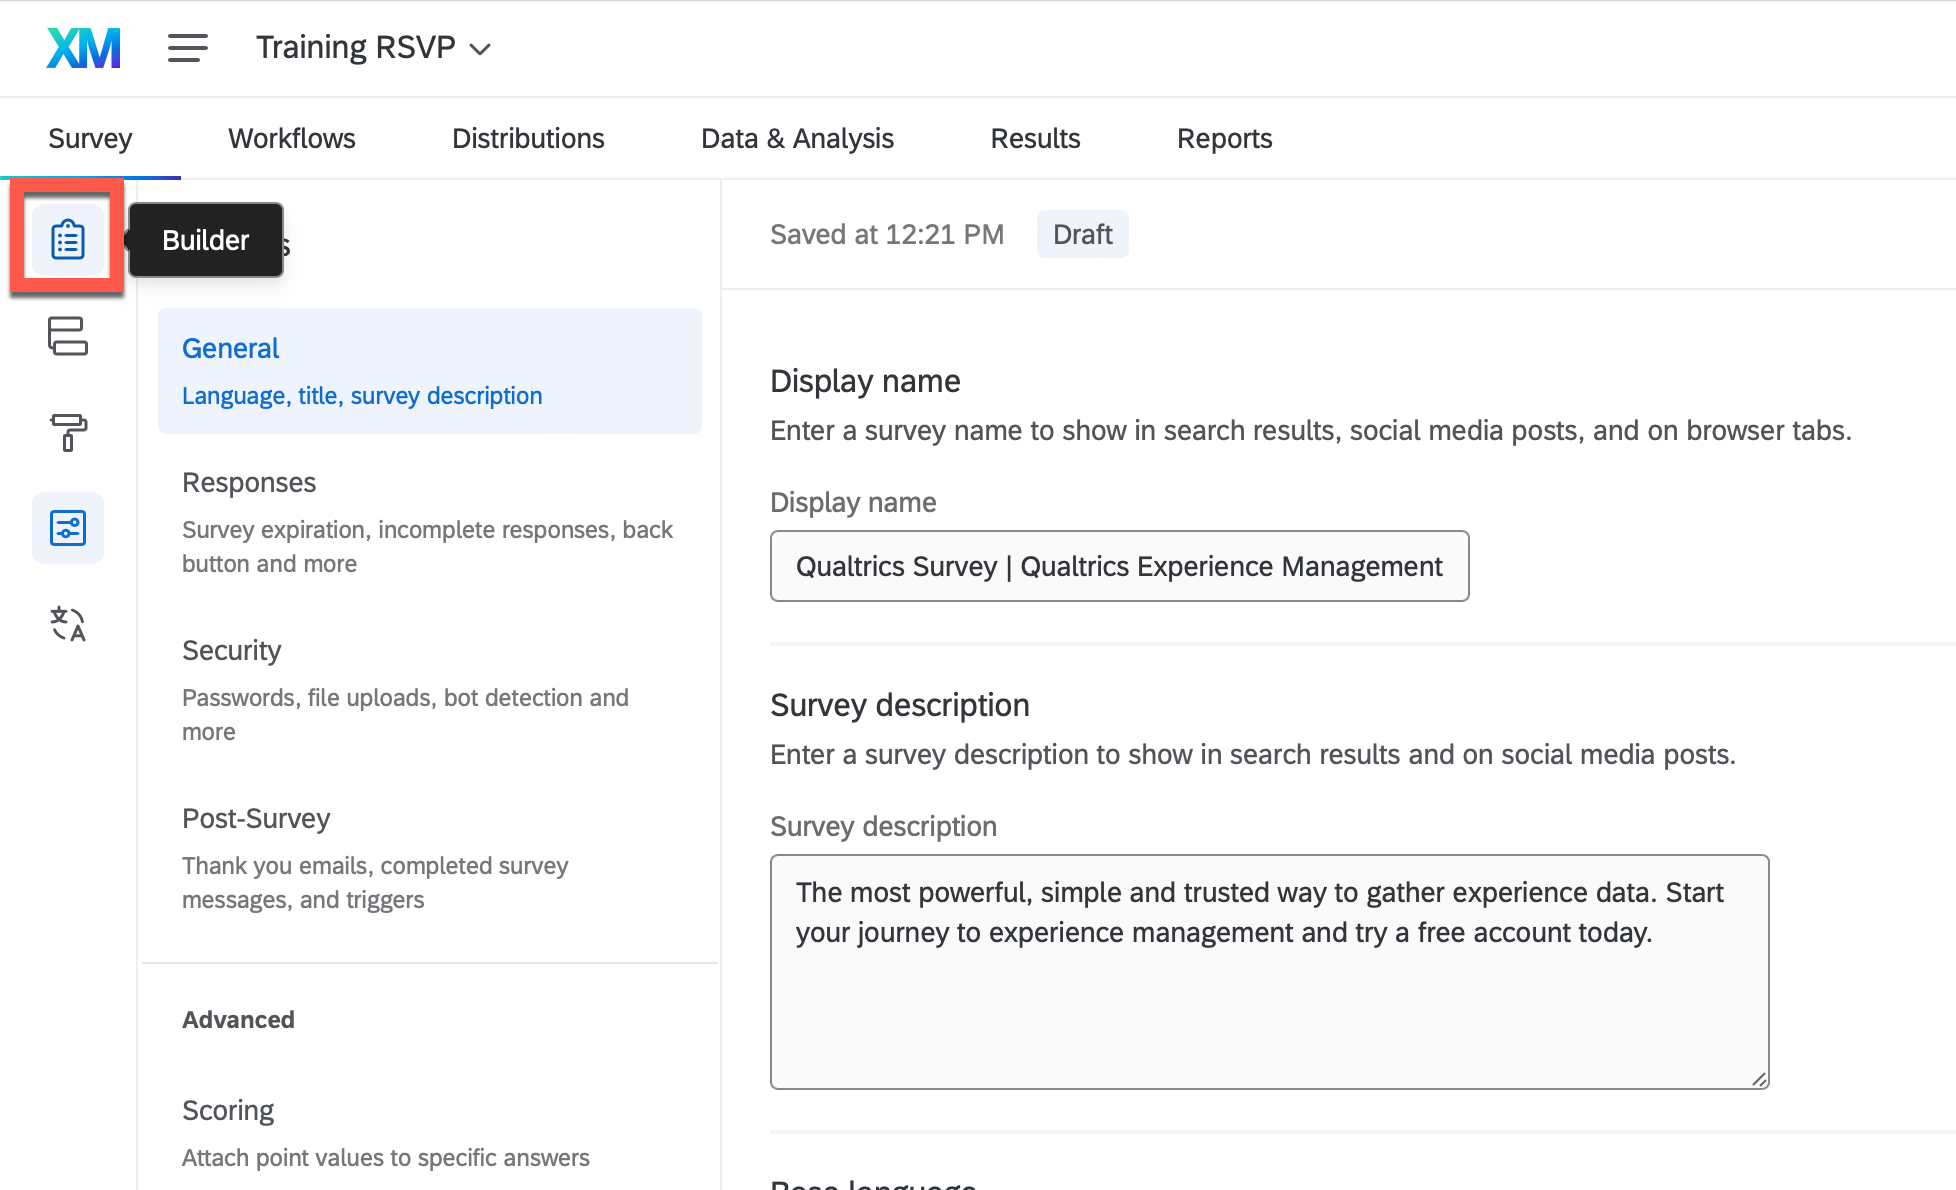
- Return to your survey (in the left menu, click the
 icon for Builder).
- Click on an answer choice that you created a quota for.
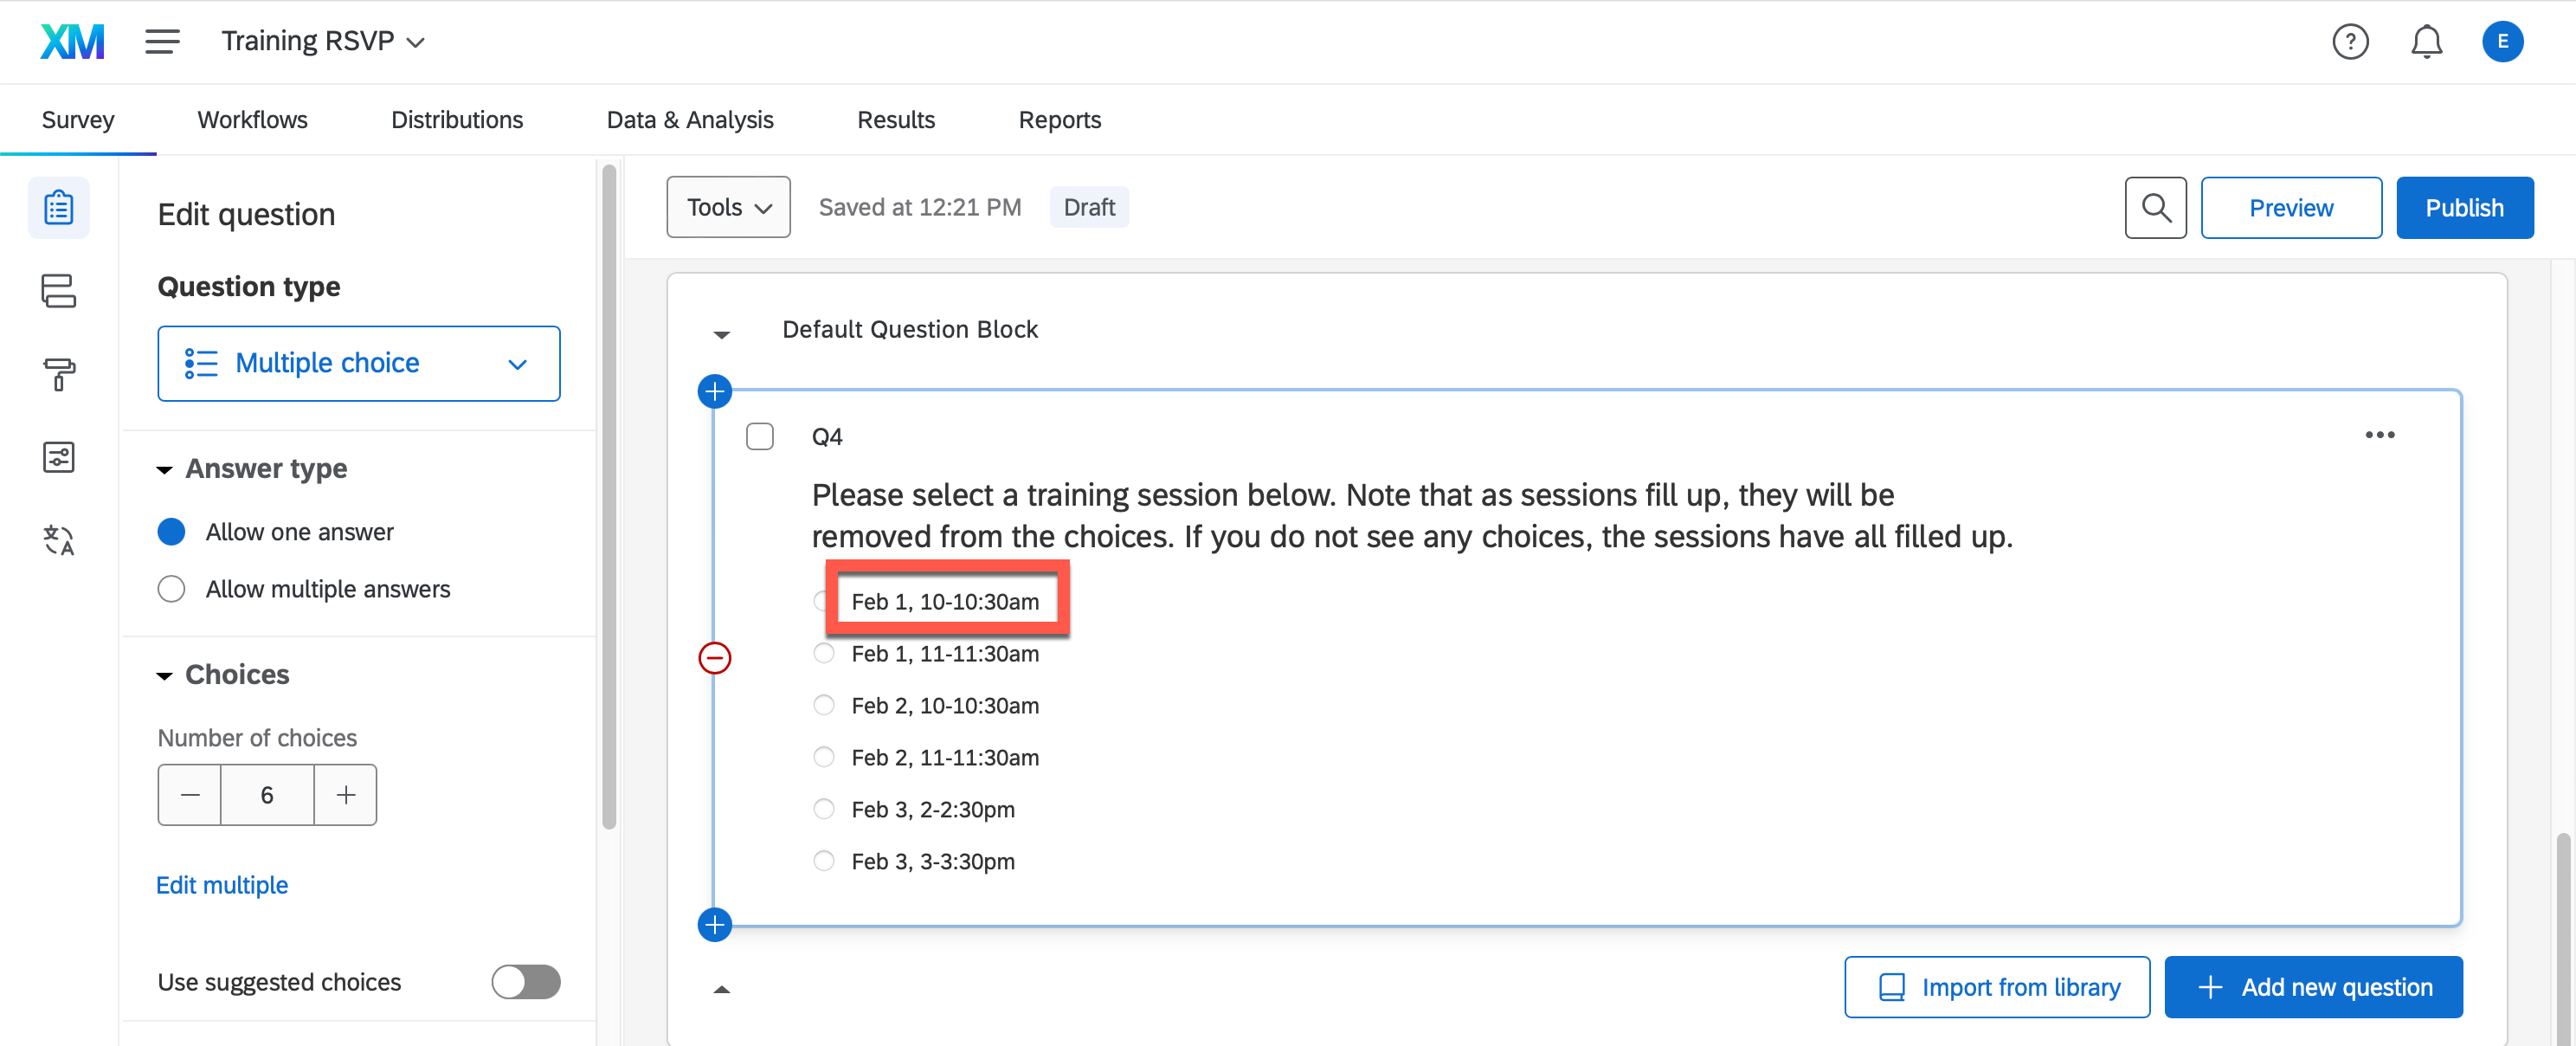
- Click the down arrow and select Add Display Logic… from the dropdown.
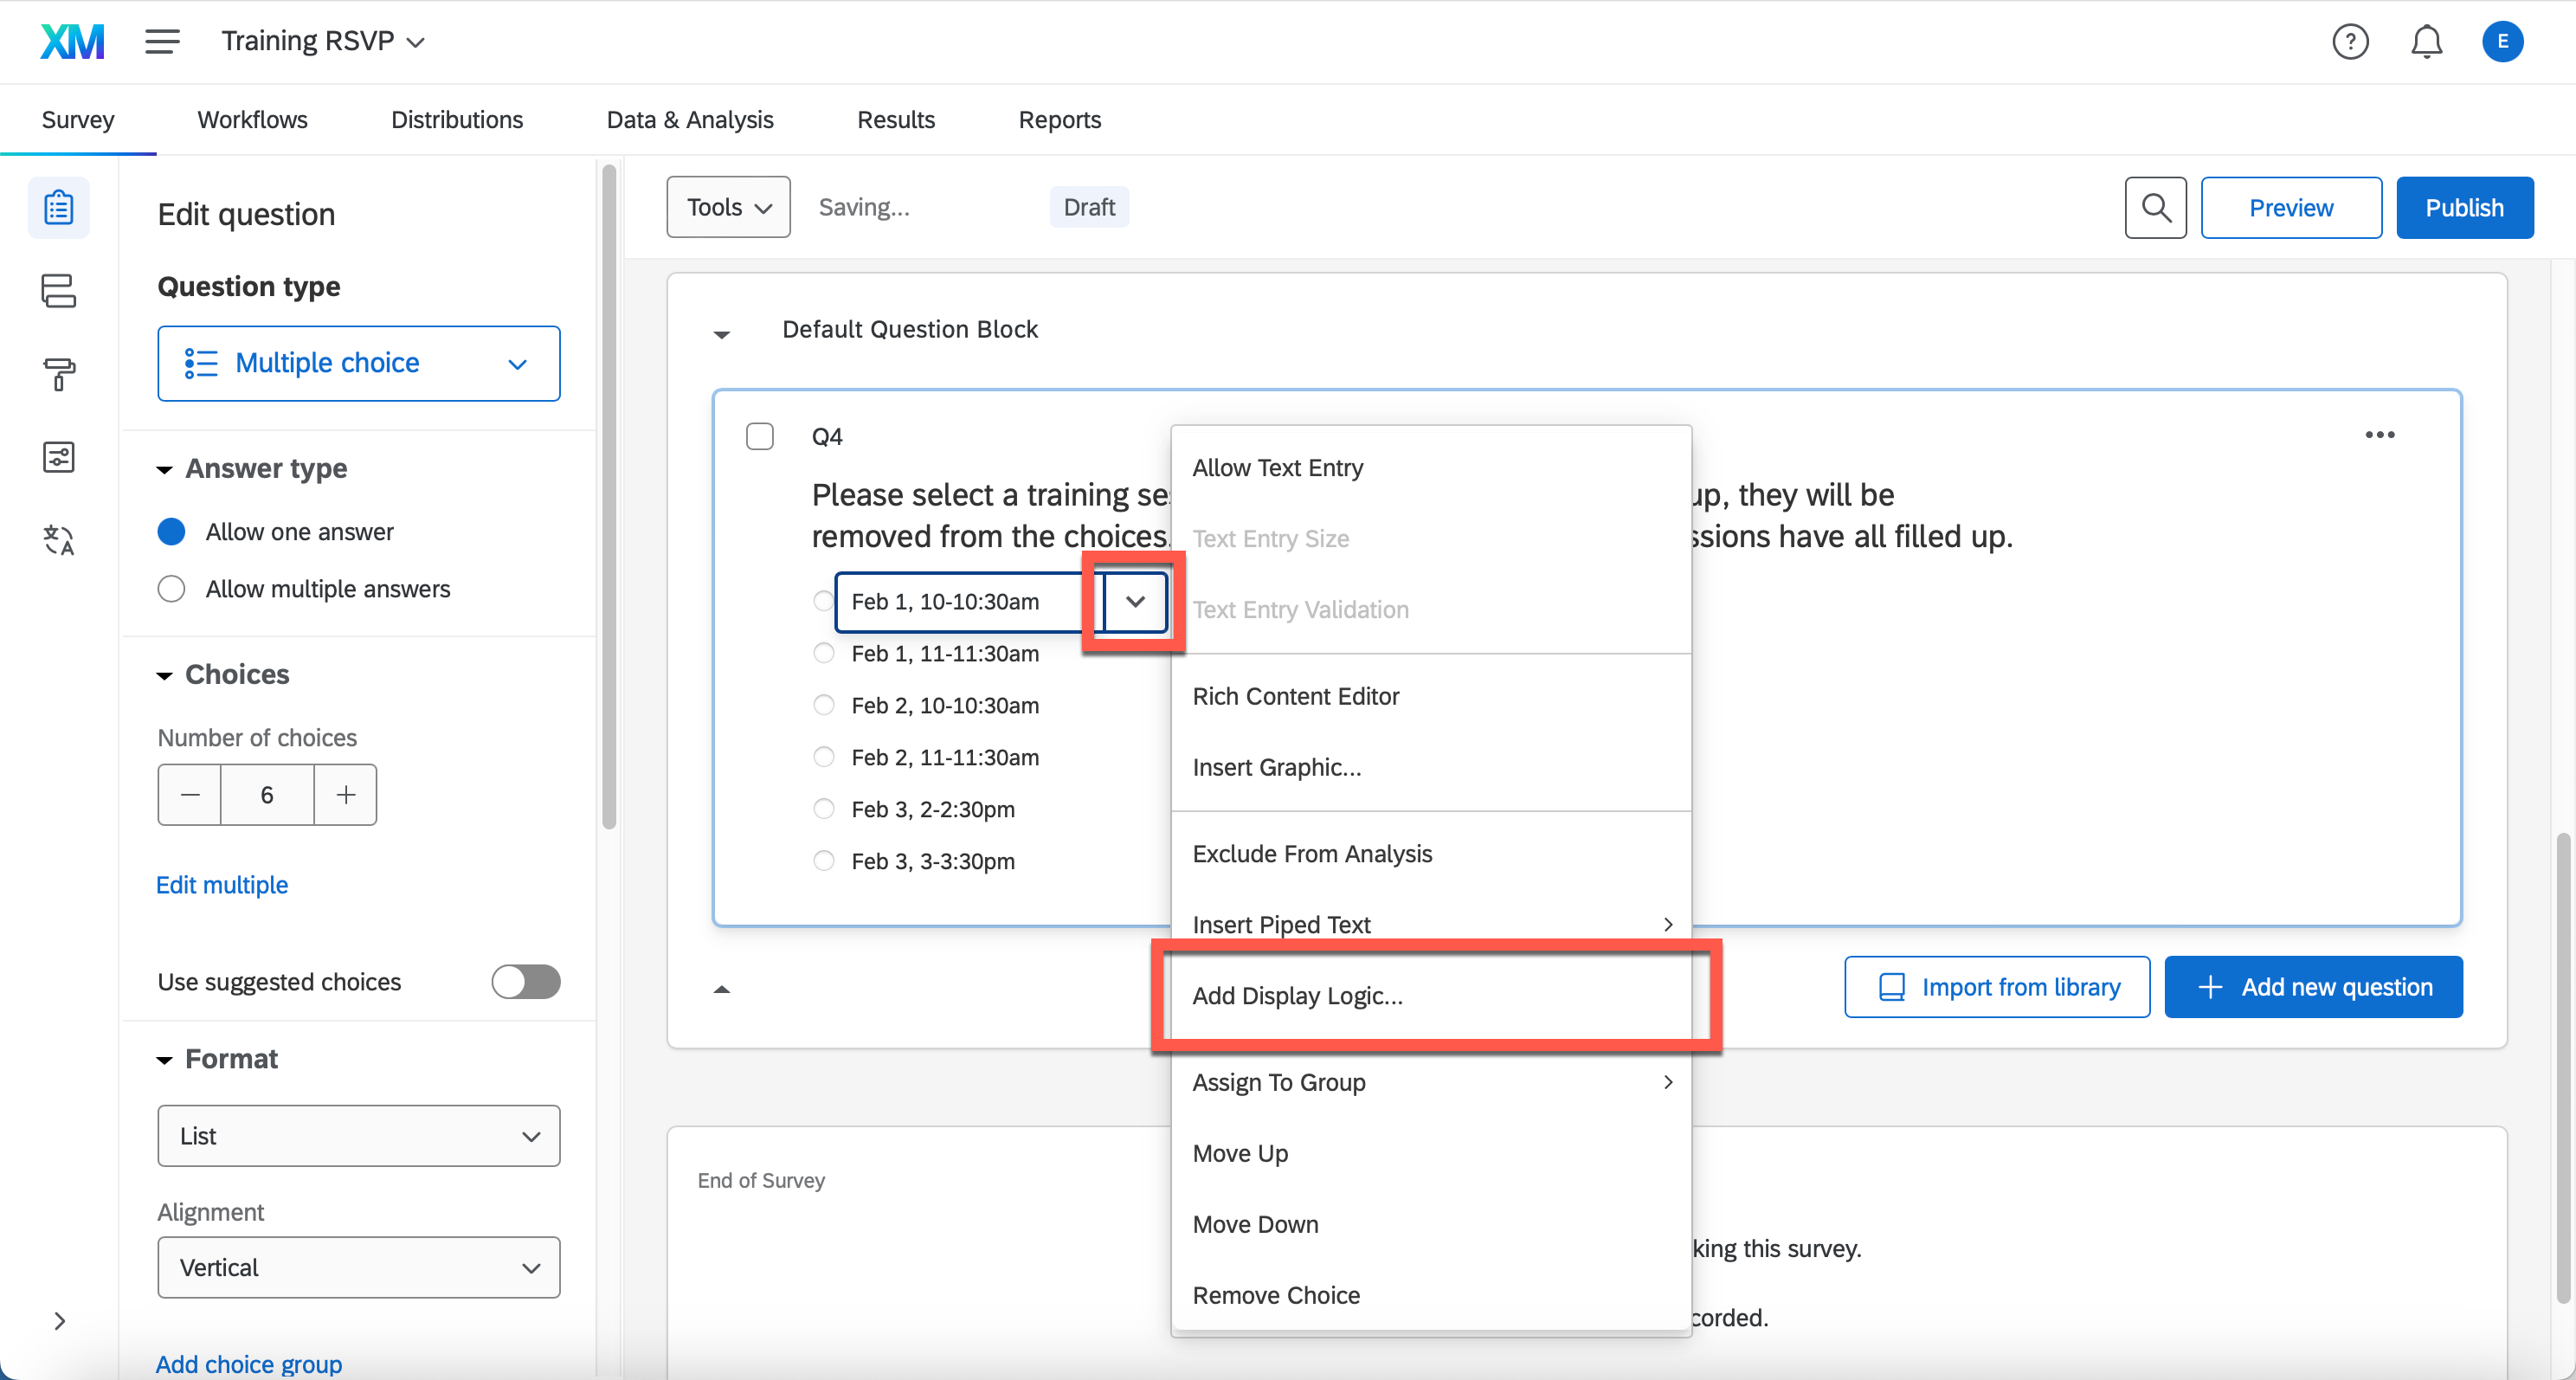
- Click Question and select Quota from the dropdown.

- Use the dropdown to select the quota matching the answer choice.

- Click Has Been Met and select Has Not Been Met from the dropdown. Now, the answer choice will only display if the quota has not been met, and will be hidden once the quota has been met.

- Click Save.

- A blue arrow icon appears next to the answer choice to indicate that display logic has been applied. Repeat these steps for each answer choice that you created a quota for.
