Overview
This guide reviews how to set up a document library (previously known as a shared library) in Microsoft SharePoint for project collaboration and file sharing. The document library is also referred to as the SharePoint site's Documents folder.
SharePoint vs OneDrive
SharePoint is intended for team or project use—for instance, collaborating on a research project or storing departmental documents. By contrast, OneDrive is intended for individual use—for instance, backing up your computer files.
SharePoint vs Google shared Drives
USC recommends SharePoint for the following reasons:
- Higher storage limit: SharePoint sites can store up to 250 GB, with requests for higher storage limits considered on a case by case basis, while Google shared Drives have limited storage
- Approved for storing sensitive data: SharePoint is approved for storing public, internal, and confidential data at USC, including FERPA-protected data, while Google is only approved for the storage of public and internal data at USC
Requesting a new SharePoint site
Document libraries are a feature of Microsoft SharePoint. If your team or group is not yet using SharePoint, you can request a SharePoint site through DTS:
DTS will coordinate with ITS and follow up with you once your new SharePoint site is created. Your SharePoint site will have a unique URL, and you will also be able to access it from the SharePoint start page at https://usc.edu/sharepoint.
Accessing files and folders in a SharePoint site
Access a document library in SharePoint
The SharePoint start page, which lists the USC SharePoint sites you are a member of or have viewed, can be found at the following link:
Once you open a SharePoint site, click Documents in the left menu. This documents folder is the default document library for the SharePoint site. If the SharePoint site has multiple document libraries, you can access the different libraries by clicking Site contents in the left menu.

Access a document library from OneDrive
You can also navigate to a site's document library from OneDrive:
Quick guide
- Go to https://usc.edu/onedrive.
- In the left menu, click the SharePoint site's name under "Quick access." If you do not see the site, click More places.
- The site's Documents folder opens.
- To find this location more quickly in the future: Select Add shortcut to My files (adds a shortcut in your OneDrive folder) or select Pin to Quick access (positions the site at the top of your "Quick access" list).
Detailed guide (with screenshots)
- Go to https://usc.edu/onedrive.
- In the left menu, click the SharePoint site's name under "Quick access." If you do not see the site, click More places.
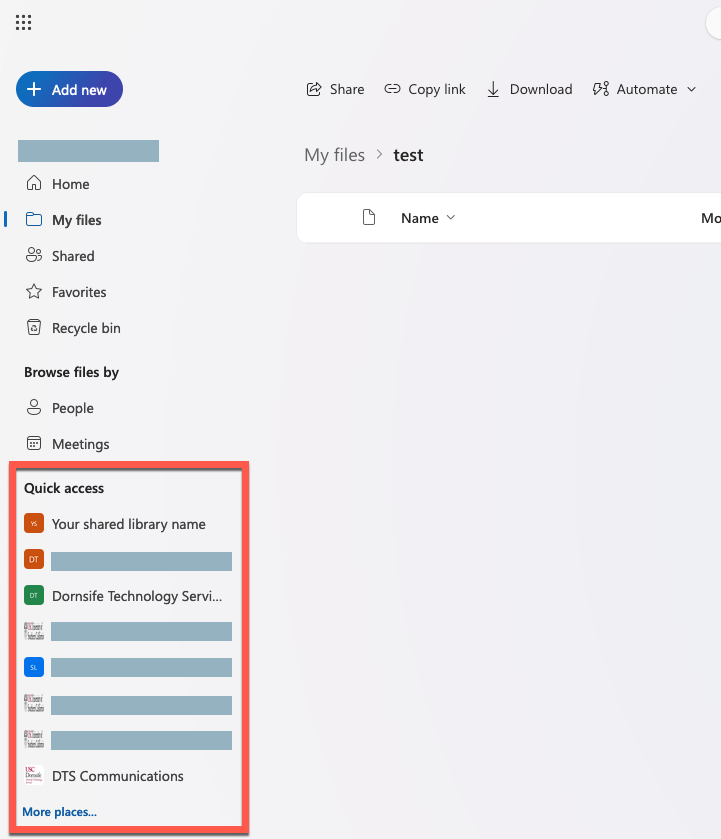
- The site's Documents folder opens.
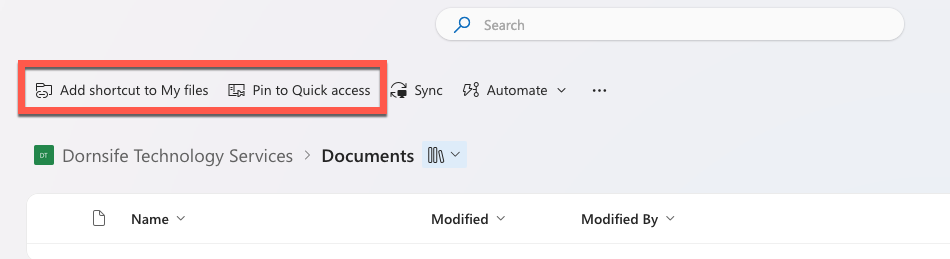
- To find this location more quickly in the future: Select Add shortcut to My files (adds a shortcut in your OneDrive folder) or select Pin to Quick access (positions the site at the top of your "Quick access" list).
Adding members to a SharePoint site
Roles available in SharePoint
Site owners
- Have full control of site content, theme, permission settings, site settings, and hub associations
- Can edit and view site content, including files, pages, lists, and navigation
Site members
- Can edit and view site content, including files, pages, lists, and navigation
- Can be promoted to a site owner
Guests
- Role used for individuals outside USC (that is, they do not have an @usc.edu email address)
- Can edit and view site content, including files, pages, lists, and navigation
Manage members in SharePoint
The process for managing members differs depending on whether you are adding a USC individual or a non-USC individual:
Add or remove a member
Quick guide
- Go to the SharePoint site. If you do not have its link, go to https://usc.edu/sharepoint and then click the site name.
- In the upper right, click
 members.
To add a member:
- Click Add members.
- To add each person, type their name and select them from the dropdown. We recommend making sure that there is at least one other person with the Owner role besides yourself. Then, click Save.
- Any people you add will receive an email invitation to the site.
To remove a member:
- Under the member's name, click their role and select Remove from group.
Detailed guide (with screenshots)
- Go to the SharePoint site. If you do not have its link, go to https://usc.edu/sharepoint and then click the site name.
- In the upper right, click members.
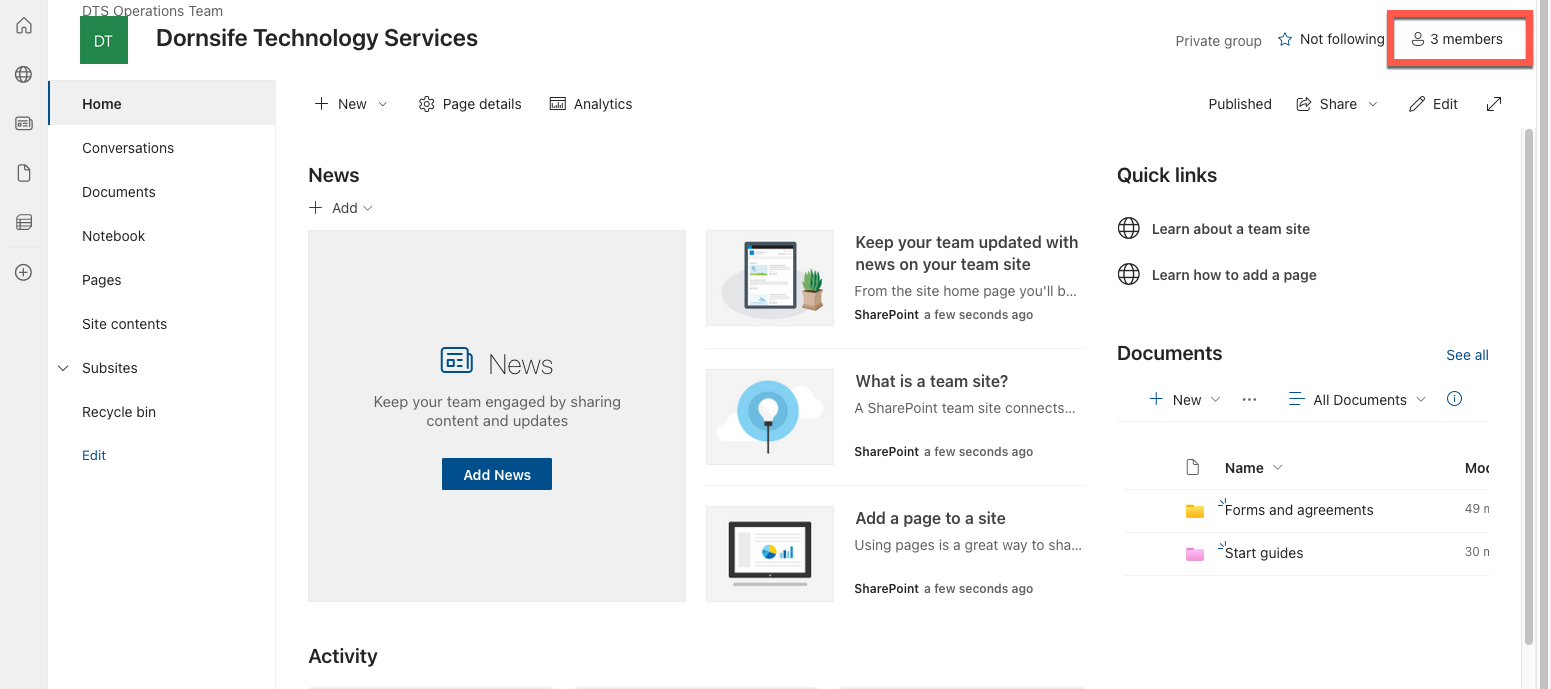
To add a member:
- Click Add members.
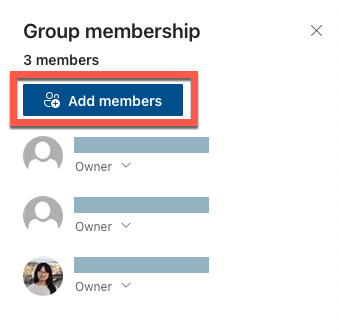
- To add each person, type their name and select them from the dropdown. We recommend making sure that there is at least one other person with the Owner role besides yourself. Then, click Save.
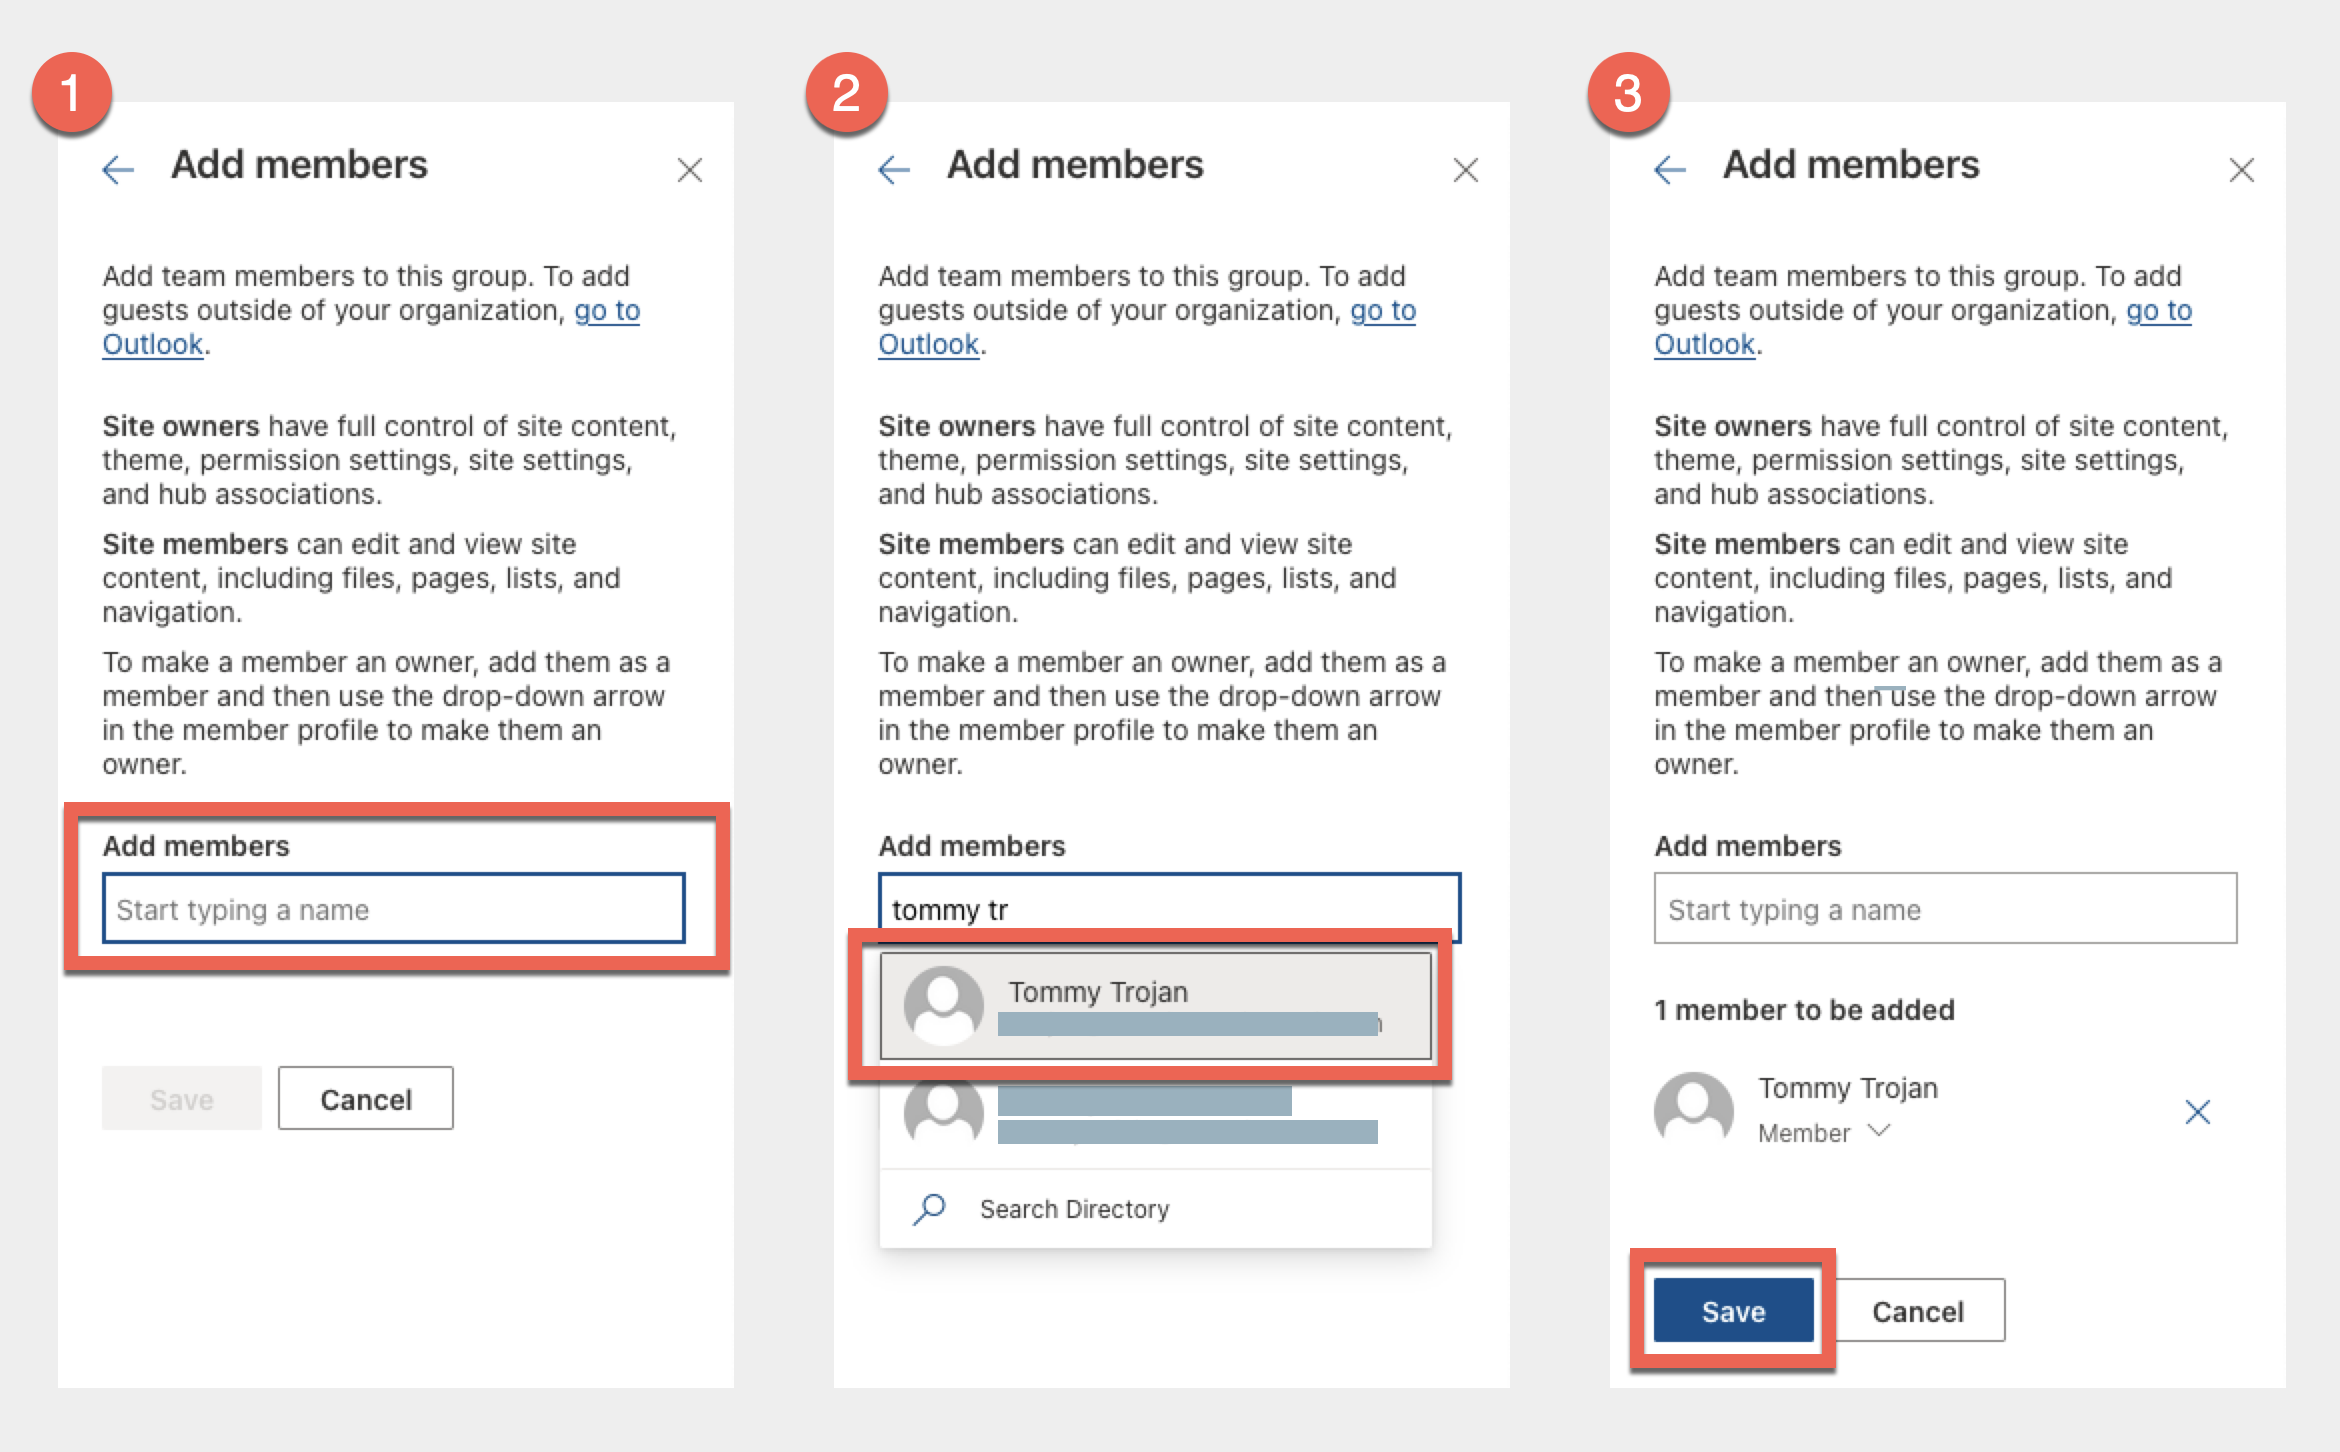
- Any people you add will receive an email invitation to the site.
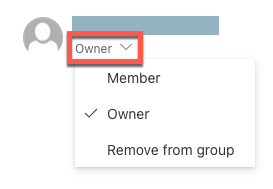
To remove a member:
- Under the member's name, click their role and select Remove from group.
Add or remove a non-USC guest
Using a document library
Any site member can view, add, edit, share, and delete files in the site's document library. If a member uploads a file and later departs USC, the file will still be available to site members.
SharePoint also saves the activity history and version history on files, so members can review each other's changes to files.
For more information about using a document library, see the Additional resources section in this guide.
File sharing from a document library
Files in a document library are automatically available for any site member to access. You can also use the sharing settings on individual files to share files with people who are not site members.
If you need to restrict file sharing so that only some of your site members can see specific files, refer to our guide. Be aware that for this purpose, we would recommend creating a separate document library for the restricted files:
A note about deleted files
If a file is deleted, it is held in the SharePoint site's recycle bin for 93 days. The file can still be recovered during this time. To view deleted files, click Recycle bin in the left menu:

Viewing storage usage
SharePoint sites can store up to 250 GB, with requests for higher storage limits considered on a case by case basis. To inquire about a storage increase, submit a SharePoint Request form.
If you are listed as an owner for a SharePoint site, you can view the site's storage limit and current usage:
Quick guide
- Go to the SharePoint site. If you do not have its link, go to https://usc.edu/sharepoint and then click the site name.
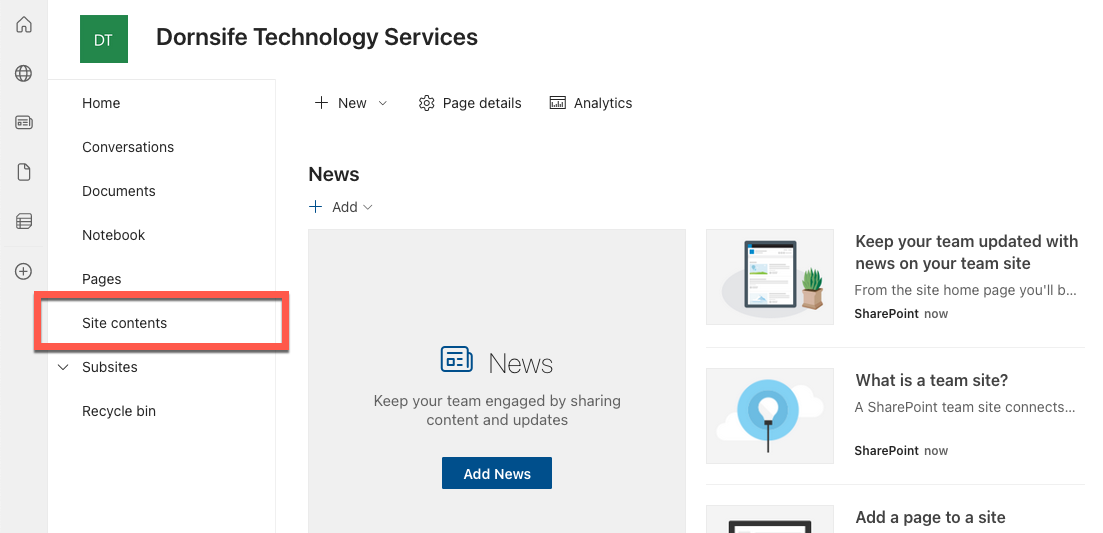
- In the left menu, click Site contents.
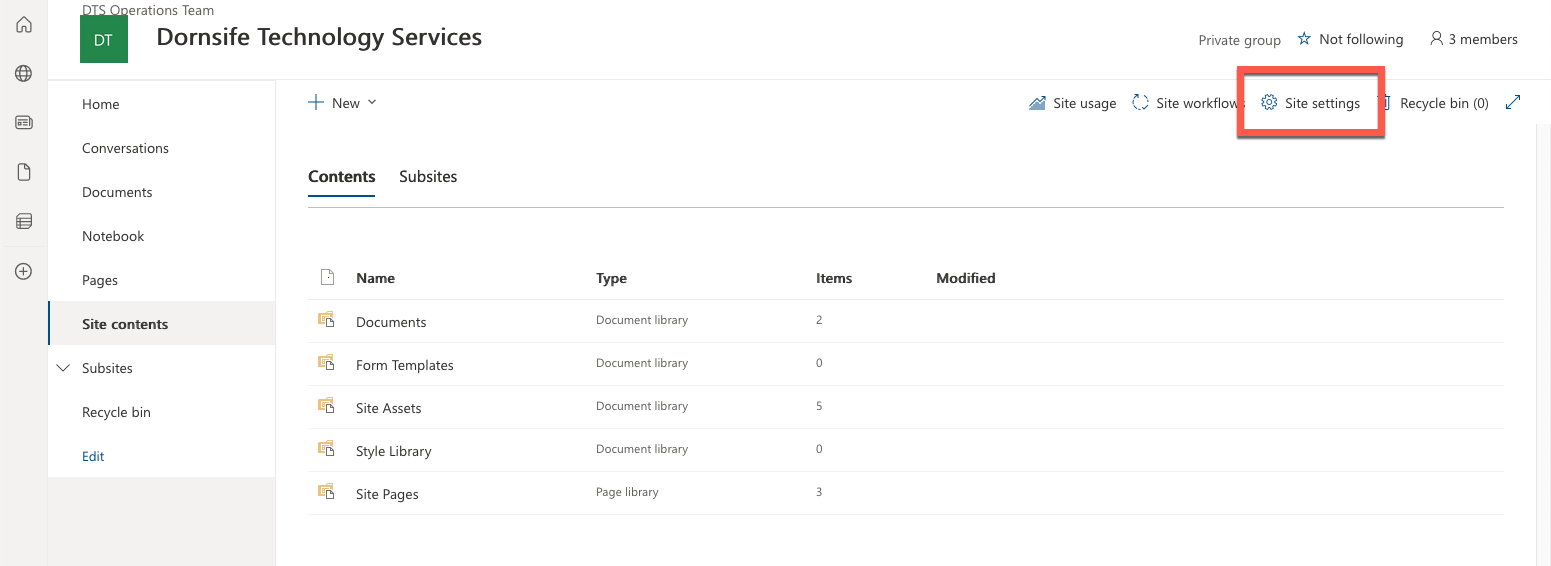
- In the upper right, click Site settings.
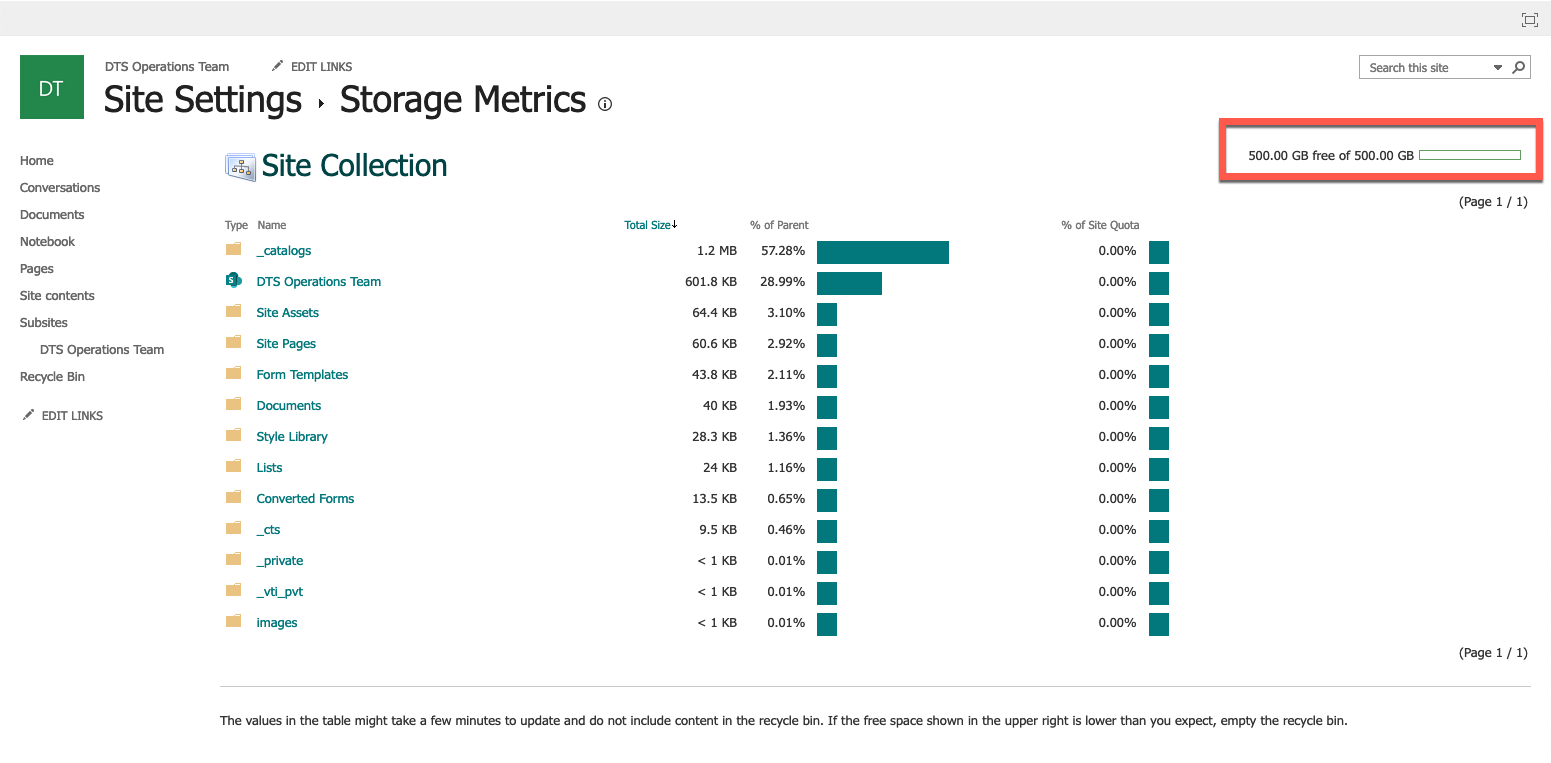
- Click Storage Metrics (under "Site Collection Administration").
- Information about the site's storage usage and limit appears in the upper right.
Detailed guide (with screenshots)
- Go to the SharePoint site. If you do not have its link, go to https://usc.edu/sharepoint and then click the site name.
- In the left menu, click Site contents.
- In the upper right, click Site settings.
- Click Storage Metrics (under "Site Collection Administration").

- Information about the site's storage usage and limit appears in the upper right.
Additional resources
Contributors: Carlos Garibay, Albert Rodriguez.